The post 5 Daily Exercises That Flatten Belly Overhang Faster Than Crunches After 60 appeared first on Eat This Not That.
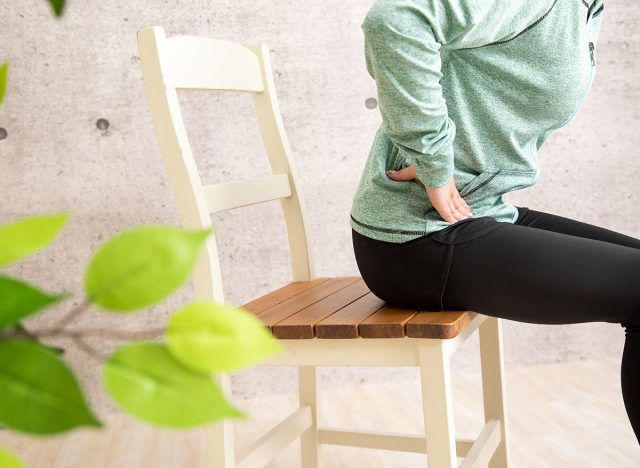
]]>“A ‘belly overhang‘ after 60 is typically the result of several overlapping factors—not just excess fat,” Canham tells us. First, sarcopenia reduces muscle tone in the core and lower body. As deep stabilizing muscles weaken, the abdomen has less structural support and can protrude. Second, hormonal changes—including lower estrogen and testosterone—shift fat storage toward the lower abdomen. Third, skin elasticity declines with age due to reduced collagen, which can contribute to a softer, more pronounced overhang.”
And finally, changes in posture—such as an anterior pelvic tilt—and sedentary habits can worsen the appearance of a protruding belly, even in those who are active.
“Addressing it requires improving muscle support, posture, and overall body composition, not just increasing activity,” Canham says. “Crunches target the rectus abdominis, but they don’t address the deeper core muscles that support the abdomen. They also don’t reduce fat in a specific area—fat loss occurs systemically, not locally.”
Below, Canham breaks down five daily exercises to prioritize in your workouts. They emphasized deep core strengthening, full-body muscle engagement, and pelvic alignment—all of which are crucial for improving the appearance and function of the abdominal region after 60.
Supine Deep Core Breathing
- Lie flat on your back with knees bent and feet flat on the mattress.
- Place one hand on your chest and the other on your belly.
- Take a deep breath in through the nose, allowing your lower hand to naturally rise as your belly expands.
- Slowly exhale through the mouth.
- Perform 2 sets of 8 to 10 gradual breaths.
RELATED: 5 Standing Core Moves That Flatten Your Stomach After 40
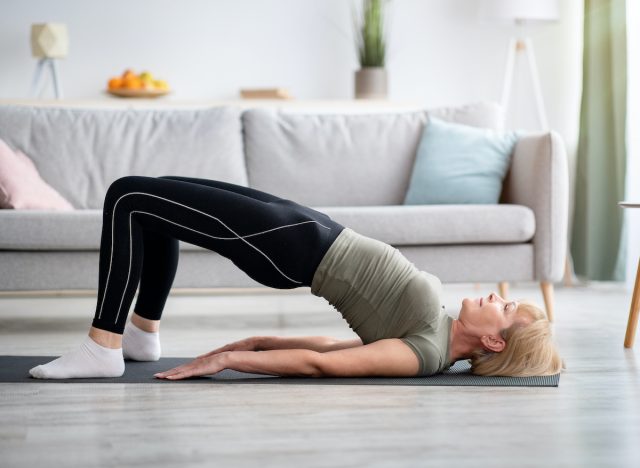
Glute Bridges
- Lie flat on your back with bent knees and feet hip-width apart, arms at your sides with palms pressing into the mattress.
- Press through your heels to lift your hips until your body forms a straight line from head to heels.
- Squeeze your buttocks, holding at the top for 2 seconds.
- Lower your hips back to the start position.
- Perform 2 to 3 sets of 10 to 12 reps.
RELATED: 5 Chair Exercises That Flatten Belly Overhang Faster Than Planks After 50
Dead Bugs
- Lie face-up on the mattress with your arms extended toward the sky and knees lifted and bent to 90 degrees.
- Press your lower back into the mattress as you gradually lower your left arm and extend your right leg.
- Return to the center.
- Then, lower your right arm and left leg.
- Continue to alternate.
- Perform 2 to 3 sets of 8 to 10 reps on each side.
Bird-Dog
- Start on all fours.
- Extend your left arm and right leg, keeping your core braced.
- Hold for 2 to 3 seconds before returning to the start position.
- Switch sides, continuing to alternate.
- Perform 2 sets of 8 reps on each side.
RELATED: These 4 Lower-Body Moves Burn Belly Fat Without Touching Your Core
Standing March
- Start by standing tall with your feet hip-width apart and arms at your sides.
- Lift your left knee up to hip height, pausing for a moment at the top and keeping your core engaged.
- Lower your foot and repeat with your right knee, holding it at the top for a moment before lowering.
- Maintain solid posture and steady breathing throughout.
- Perform 2 to 3 sets of 20 alternating steps.
The post 5 Daily Exercises That Flatten Belly Overhang Faster Than Crunches After 60 appeared first on Eat This Not That.
]]>The post 5 Chair Exercises That Restore Full-Body Balance Faster Than Yoga After 65 appeared first on Eat This Not That.
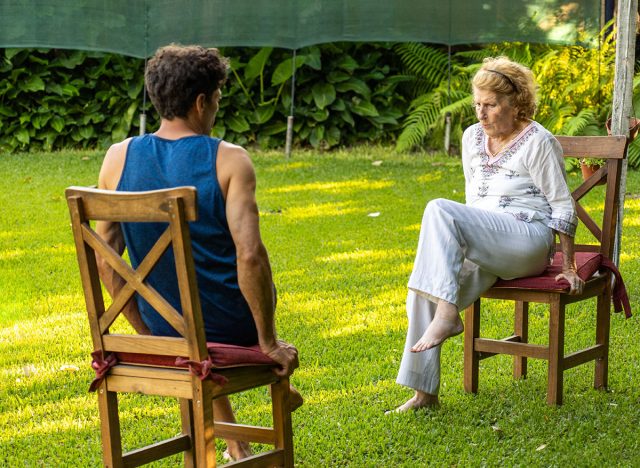
]]>Chair exercises create that environment. They provide support when needed while still forcing the body to stabilize, adjust, and coordinate movement. I’ve worked with many older clients who felt unsteady standing for long periods, yet quickly improved once they practiced controlled movements from a seated position. The chair removes fear while still allowing the nervous system and muscles to rebuild balance together.
Another key factor involves repetition. Balance improves when the body repeatedly practices controlled shifts in weight, posture, and coordination. These exercises do exactly that without overwhelming the joints or requiring complex sequences. When performed daily, they retrain how the body responds to movement and instability.
The following exercises focus on coordination, core engagement, and lower-body control. Move slowly, stay aware of your posture, and focus on smooth, deliberate motion. With consistency, these drills help rebuild the full-body balance needed for confident movement.
Seated March With Hold
This exercise trains coordination between the core and hips while reinforcing balance through controlled movement. I use this frequently because it mimics walking while keeping the body supported. Lifting one leg at a time challenges stability, especially when you add a brief hold at the top.
That hold forces the core to engage and the body to stay upright without shifting side to side. Over time, this builds the stability needed for walking and standing without feeling off balance.
How to Do It
- Sit tall with feet flat on the floor
- Lift one knee toward your chest
- Hold for 2–3 seconds
- Lower slowly
- Alternate legs continuously.
RELATED: If You Can Hold a Wall Sit This Long After 60, Your Leg Strength Is Top-Tier
Seated Reach and Return
This movement challenges balance by shifting your center of gravity forward and backward. I often include this exercise because it teaches the body how to control movement without losing stability.
Reaching forward forces the core and hips to engage while preventing you from tipping too far. Returning upright requires controlled strength. These small adjustments play a big role in real-world balance.
How to Do It
- Sit upright near the edge of a chair
- Extend both arms forward
- Reach slightly forward from the hips
- Return slowly to upright
- Repeat with control.
Seated Heel-to-Toe Taps
This exercise strengthens coordination in the lower legs and improves awareness of foot placement. I’ve seen major balance improvements when clients train the feet and ankles, since they act as the body’s foundation.
Alternating between heel and toe taps challenges control and rhythm. This helps the body respond more quickly to small shifts in balance during walking or standing.
How to Do It
- Sit tall with feet flat
- Lift toes while keeping heels down
- Then press toes down and lift heels
- Alternate smoothly
- Keep movements controlled.
RELATED: The 7-Minute Standing Routine That Restores Core Strength Faster Than Floor Exercises After 60
Seated Cross-Body Reaches
Cross-body movement improves coordination between the upper and lower body. I use this exercise often because it forces the core to stabilize while the arms move across the body.
Reaching across engages the obliques and teaches the body to maintain balance during rotational movement. This becomes especially useful for everyday tasks like turning or reaching.
How to Do It
- Sit tall with arms relaxed
- Reach one arm across your body
- Keep your torso stable
- Return slowly
- Alternate sides.
Seated Single-Leg Hold
This movement isolates balance on one side of the body while keeping the other supported. I rely on this exercise because it builds unilateral control, which is essential for walking and standing.
Holding one leg extended forces the core and hips to stabilize. Even though you’re seated, the body still works to maintain alignment and control.
How to Do It
- Sit tall with both feet on the floor
- Extend one leg forward
- Hold for several seconds
- Keep your core tight
- Switch legs and repeat.
The post 5 Chair Exercises That Restore Full-Body Balance Faster Than Yoga After 65 appeared first on Eat This Not That.
]]>The post If You Can Hold a Wall Sit This Long After 60, Your Leg Strength Is Top-Tier appeared first on Eat This Not That.
]]>These muscles also act as stabilizers for your knees and hips. When the lower body stays strong, it absorbs force more efficiently and keeps joints aligned during movement. That support reduces strain on the knees and lower back while helping your body stay steady during prolonged activity.
A wall sit offers one of the simplest ways to test that strength. The position forces your quads and glutes to maintain steady tension while your body remains stable against the wall. The amount of time you can hold that position reveals a lot about the strength and endurance of your lower body. Ahead, you’ll learn why the wall sit works so well, how to perform it correctly, what your hold time says about your leg strength, and how to build stronger legs.
RELATED: The 7-Minute Standing Routine That Restores Core Strength Faster Than Floor Exercises After 60
Why the Wall Sit Is an Important Movement
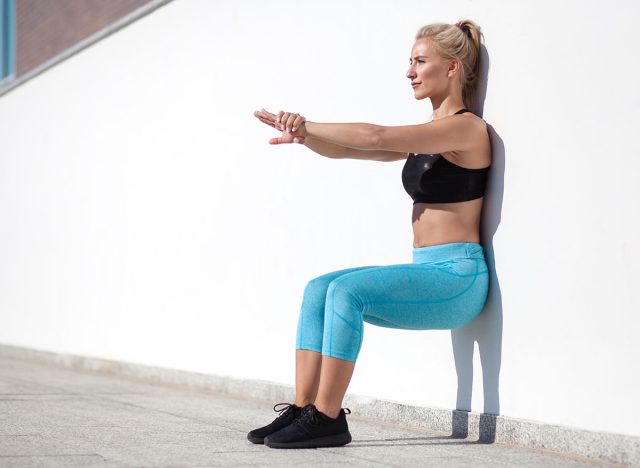
The wall sit challenges your legs to support your body weight while you remain in a fixed position. Many everyday tasks require this same type of muscular endurance. Waiting in line, lowering yourself into a chair, or holding a steady stance during movement all place similar demands on your legs.
Your quads carry most of the load during a wall sit, while your glutes and core help stabilize your posture. Holding the position requires these muscles to stay engaged for an extended period without relying on momentum. That sustained tension helps build fatigue resistance in the muscles responsible for walking, standing, and climbing.
The wall sit also reinforces joint control around the knees and hips. When your legs stay strong in this position, your body learns to maintain alignment even as fatigue builds. That control plays a major role in protecting your joints and supporting long-term mobility.
How to Perform the Best Wall Sit Technique
A proper wall sit requires strong positioning and steady muscular tension. Your goal is to maintain a stable squat position with your back supported by the wall. When your posture stays consistent throughout the hold, the exercise becomes an accurate measure of leg strength and endurance.
How to Do It:
- Stand with your back against a wall and your feet about two feet in front of you.
- Slide your back down the wall while bending your knees.
- Lower until your thighs reach roughly parallel to the floor.
- Place your feet flat on the ground with your knees stacked over your ankles.
- Keep your chest tall and your core braced while maintaining contact with the wall.
- Hold the position until your legs begin to shake or your posture breaks.
Best Variations: Single-Leg Wall Sit, Weighted Wall Sit, Heels-Elevated Wall Sit, Banded Wall Sit, Alternating Leg Lift Wall Sit.
RELATED: 5 Exercises Personal Trainers Recommend for Clients Over 60 Who Haven’t Worked Out in Years
Wall Sit Strength Rankings After 60

This test measures how long you can hold a stable wall sit position without standing up or adjusting your posture.
- Under 20 seconds: Needs Improvement
This range suggests your lower-body strength and endurance could use additional training.
- 20 to 45 seconds: Average
Your legs can support most daily activities, though fatigue may appear during longer efforts.
- 45 to 75 seconds: Above Average
This score reflects strong quads and glutes with good muscular endurance.
- 75+ seconds: Top-Tier
This level demonstrates excellent leg strength and fatigue resistance. Your lower body maintains stability even as the hold becomes demanding.
The Best Tips for Building Stronger Legs After 60

Lower-body strength improves steadily with consistent training and controlled movement. These strategies help increase your wall sit time while supporting joint health and mobility.
- Train your legs two to three times per week: Regular strength work helps build muscular endurance and stability.
- Practice wall sits consistently: Short holds performed several times per week gradually increase your tolerance for the position.
- Add squats and step-ups: These movements target the same muscle groups as wall sits.
- Strengthen your glutes and hips: Bridges and hip thrusts improve hip stability and reduce knee strain.
- Maintain mobility in your hips and ankles: Better joint movement helps you maintain stronger squat positions.
Strong legs support confident movement and long-term independence. If you can hold a wall sit for an extended time with solid posture, your lower body shows the strength and stability needed to stay active for years to come.
References
- Strollo, S E et al. “A review of the relationship between leg power and selected chronic disease in older adults.” The journal of nutrition, health & aging vol. 19,2 (2015): 240-8. doi:10.1007/s12603-014-0528-y
- Cho, Kang Hee et al. “Effect of lower limb strength on falls and balance of the elderly.” Annals of rehabilitation medicine vol. 36,3 (2012): 386-93. doi:10.5535/arm.2012.36.3.386
The post If You Can Hold a Wall Sit This Long After 60, Your Leg Strength Is Top-Tier appeared first on Eat This Not That.
]]>The post The 7-Minute Standing Routine That Restores Core Strength Faster Than Floor Exercises After 60 appeared first on Eat This Not That.
]]>The core doesn’t just function on the floor, it works hardest while you’re upright, stabilizing your body during walking, reaching, and balancing. That’s why standing exercises often restore real-world core strength faster than traditional crunches or planks. When you train the core in a standing position, you teach it to support your body exactly the way it needs to during daily life.
This 7-minute routine focuses on continuous tension, posture control, and deliberate movement. Each exercise lasts just over two minutes, keeping the core engaged without rest. Stay tall, brace your midsection, and move with purpose. When done consistently, this routine rebuilds deep core strength that carries into everything you do.
RELATED: 5 Exercises Personal Trainers Recommend for Clients Over 60 Who Haven’t Worked Out in Years
Minutes 0–2:30 — Standing Knee Drive Hold
This movement locks in lower-core activation while challenging balance and posture. I use this often with clients who need to rebuild coordination and abdominal strength at the same time. Holding the knee at the top forces the core to stabilize the entire body, which creates deep engagement through the lower abs and hip flexors. When done correctly, you’ll feel the midsection working far more than during most floor exercises.
Maintaining an upright posture becomes critical here. As fatigue builds, the body wants to lean back or collapse forward. Resist that urge and keep your torso tall. That’s where the real strength develops.
How to Do It
- Stand tall with feet hip-width apart
- Lift one knee to hip height
- Hold for 2–3 seconds
- Keep core tight and posture upright
- Lower slowly and switch sides.
Minutes 2:30–5:00 — Standing Cross-Body Crunch
This exercise targets the entire abdominal wall while emphasizing rotational strength. I rely on this movement because it builds the kind of core control needed for everyday activities like turning, reaching, and walking. Bringing the elbow and knee together forces the obliques and lower abs to fire together.
Controlled movement makes all the difference. Fast reps reduce effectiveness. Slow, deliberate crunches create constant tension and better muscle activation. As the pace stays steady, the core remains fully engaged throughout the entire interval.
How to Do It
- Stand tall with hands behind your head
- Lift one knee across your body
- Bring opposite elbow toward the knee
- Return to start slowly
- Alternate sides continuously.
RELATED: 5 Standing Exercises That Build Walking Endurance Faster Than Treadmills After 65
Minutes 5:00–7:00 — Standing Anti-Rotation Hold (Hands Press)
This final movement builds deep core stability by resisting movement rather than creating it. I use anti-rotation drills frequently because they strengthen the muscles that keep the spine stable during everyday motion. Instead of bending or twisting, the goal here involves holding tension and preventing rotation.
Press your hands together firmly in front of your chest and maintain that pressure. As you hold, your core fires to keep your torso stable. It may look simple, but when done with intent, this exercise creates deep, lasting core engagement.
How to Do It
- Stand tall with feet shoulder-width apart
- Press palms together in front of chest
- Tighten your core muscles
- Hold steady tension
- Breathe slowly while maintaining posture.
The post The 7-Minute Standing Routine That Restores Core Strength Faster Than Floor Exercises After 60 appeared first on Eat This Not That.
]]>The post 5 Exercises Personal Trainers Recommend for Clients Over 60 Who Haven’t Worked Out in Years appeared first on Eat This Not That.
]]>RELATED: 5 Standing Exercises That Build Walking Endurance Faster Than Treadmills After 65
The Challenges of Coming Back

The two most common physical roadblocks I see are limited joint mobility and reduced balance. Extended periods of inactivity lead to stiffness, particularly in the hips, shoulders, and ankles. The body’s ability to sense its position in space, what’s called proprioception, can also diminish, which raises the risk of falls in early training.
On the mental side, fear of injury holds a lot of people back. Many clients hesitate to push themselves because they’re worried about “breaking” something or causing long-term pain. Another pattern I see regularly is the comparison trap: getting caught up in measuring your current physical abilities against what you could do 20 or 30 years ago. That kind of thinking leads to unnecessary frustration and, more importantly, it misses the point.
Why Functional Movement Comes First
For people over 60, the fitness conversation should start with quality of life and build from there. Functional movements mimic everyday actions: sitting down, standing up, carrying groceries, reaching for something on a shelf. That’s the foundation. Everything else follows.
RELATED: If You Can Hold a Bridge This Long After 55, Your Core Strength Is Top-Tier
Sit-to-Stands
This is the functional squat, and it’s where I start almost every returning client. It builds lower body strength using a built-in safety net (the chair) and directly mimics one of the most common movements in daily life.
Muscles Trained: Quadriceps, glutes, hamstrings
How to Do It:
- Stand in front of a chair with your feet between shoulder and hip width apart
- Slowly lower your hips back and down until your glutes touch the seat
- Drive through your heels and stand back up to the starting position
Avoid These Mistakes:
- Don’t let your knees cave inward at any point during the movement
- Don’t use momentum or rock forward to get yourself up; the drive should come from your legs
Recommended Sets and Reps: 2 sets of 10–12 reps, with 60–90 seconds of rest between sets
Form Tip: Once 12 reps starts to feel less challenging, add a third set before increasing any resistance.
Wall Push-Ups
This movement builds upper body strength in the chest, shoulders, arms, and core without the joint strain of a floor push-up. It’s a smart entry point for anyone who hasn’t been training their upper body, and it’s more demanding than it looks when done with proper control.
Muscles Trained: Chest, shoulders, triceps, core
How to Do It:
- Stand facing a wall with your arms extended and palms flat against the surface at shoulder width
- Slowly bend your elbows and lean in toward the wall
- Push back out to the starting position with control
Avoid These Mistakes:
- Don’t arch your lower back; keep your body in a straight line from head to heels
- Don’t shrug your shoulders toward your ears during the movement
Recommended Sets and Reps: 2 sets of 10–12 reps, with 60–90 seconds of rest between sets.
RELATED: 5 Bed Exercises That Flatten Stubborn Midsection Faster Than Crunches After 60
Bird Dogs
Bird dogs improve core strength, spinal stability, and overall coordination without any of the neck strain that comes with crunches. For clients who haven’t trained in years, this is one of the best ways to rebuild a functional core from the ground up.
Muscles Trained: Core, glutes, lower back, shoulders
How to Do It:
- Start on all fours with your hands under your shoulders and knees under your hips
- Simultaneously extend your right arm forward and your left leg back
- Hold the position for 2–3 seconds, then return to the starting position
- Switch sides with each repetition
Avoid These Mistakes:
- Don’t tilt your hips to one side; keep your pelvis level throughout
- Don’t arch your back unnecessarily; the spine should stay neutral
Recommended Sets and Reps: 2 sets of 10–12 reps per side, with 60–90 seconds of rest between sets
Farmer’s Carry
This one surprises people, but I include it specifically because grip strength and postural stability are two of the strongest indicators of longevity and fall prevention. Carrying weight while walking is also one of the most natural human movements there is.
Muscles Trained: Forearms, grip, traps, core, legs
How to Do It:
- Stand tall with your shoulders back and a weight in each hand (dumbbells work, but jugs of water are a perfectly good substitute)
- Walk in a straight line for 30 seconds using small, controlled steps
- Keep your eyes forward throughout
Avoid These Mistakes:
- Don’t slump your shoulders forward; posture is the whole point of this exercise
- Don’t look down at your feet
- No wrist wraps for this one; the grip work is essential
Recommended Sets and Reps: 2 sets of 30-second walks, with 60–90 seconds of rest between sets
Form Tip: Start with a weight you can carry confidently, but do challenge yourself here. If it feels too easy, go heavier.
RELATED: 5 Chair Exercises That Restore Leg Muscle Faster Than Squats After 65
Step-Ups
Step-ups mimic climbing stairs and build single-leg strength and stability, two things that matter enormously for independent daily function. The first step of a staircase is all you need.
Muscles Trained: Quadriceps, glutes, hamstrings, calves
How to Do It:
- Stand at the bottom of a staircase; use the railing for balance if needed
- Step up with your right foot and bring your left foot up to meet it
- Step back down and repeat for a full set leading with the right leg
- Then complete a second set leading with the left leg
Avoid These Mistakes:
- Don’t stare at the ground; keep your gaze forward
- Don’t lean too far forward as you step up; stay upright
Recommended Sets and Reps: 2 sets of 10–12 reps per leg, with 60–90 seconds of rest between sets.
How To Structure Your Weekly Routine
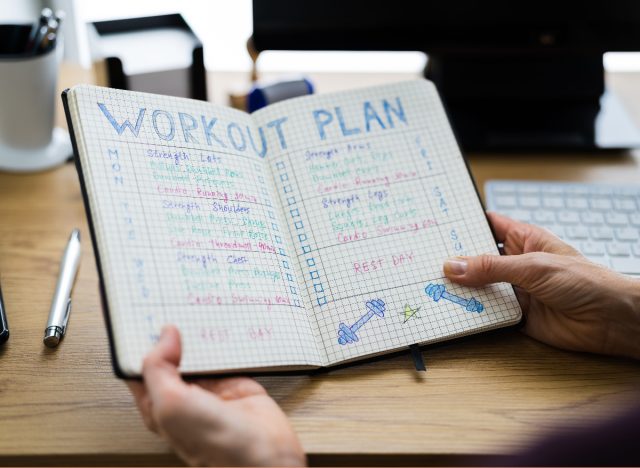
Early on, consistency matters more than intensity. That’s not a cliché; it’s how the body adapts. Here’s the framework I’d recommend:
- Frequency: 3 days per week (Monday, Wednesday, Friday works well) to allow for rest and recovery between sessions
- Sets and reps: 2 sets of 10–12 reps for each exercise; for the farmer’s carry, do 2 sets of 30-second walks
- Rest: 60–90 seconds between sets
- Progression: Once 12 reps starts to feel manageable, add a third set before increasing weight.
RELATED: 5 Dumbbell Exercises That Build Shoulder Strength Faster Than Machines After 60
What To Expect in the First 4–6 Weeks
If you’re consistent and doing these movements with good form, here’s what you can realistically expect:
- Mobility: A significant reduction in morning stiffness and a noticeable improvement in how easily you move through the day
- Strength: The movements themselves will feel easier to execute; neuromuscular control, efficiency, and overall confidence will all improve
- Energy: Better circulation and improved oxygen flow typically lead to better sleep quality and more energy throughout the day
The goal isn’t to get back to where you were. The goal is to build a stronger, more capable version of yourself right now. That’s a goal worth showing up for three times a week.
The post 5 Exercises Personal Trainers Recommend for Clients Over 60 Who Haven’t Worked Out in Years appeared first on Eat This Not That.
]]>The post 5 Standing Exercises That Build Walking Endurance Faster Than Treadmills After 65 appeared first on Eat This Not That.
]]>Treadmills repeat the same motion over and over, but they don’t always correct the weak links that limit endurance. If the hips feel unstable or the calves lack push-off power, the body compensates and tires faster. That’s why targeted standing exercises often deliver faster, more noticeable results. They train the body to move with strength, balance, and control.
Another advantage of standing work involves posture. Walking endurance improves when the body stays upright, stable, and efficient. These exercises reinforce that alignment while strengthening the exact muscles used during walking. Over time, that translates into longer walks, smoother strides, and less fatigue.
The following movements focus on building the strength and coordination behind every step. Move with control, stay tall through your posture, and focus on muscle engagement rather than speed. With consistency, walking endurance starts to rebuild in a way that actually lasts.
RELATED: If You Can Hold a Bridge This Long After 55, Your Core Strength Is Top-Tier
Standing March With Hold
This movement sharpens the exact motion used during walking while forcing the core and hips to stabilize. I rely on this drill often because it rebuilds coordination and endurance at the same time. When clients struggle with shorter stride length or fatigue, this usually becomes one of the first exercises I introduce.
Lifting the knee and holding it briefly forces the body to balance on one leg while the core stays engaged. That single-leg control directly translates into stronger, more efficient walking mechanics. Over time, each step starts to feel lighter and more controlled.
How to Do It
- Stand tall with feet hip-width apart
- Lift one knee to hip height
- Hold for 2–3 seconds
- Lower slowly
- Alternate legs continuously
Step-Through Lunges (Controlled Range)
This variation builds forward-driving strength without the strain of deep lunges. I use this often for clients who need stride power but don’t tolerate traditional lunges well. The movement teaches the body to push forward with control rather than drop into the knees.
Stepping forward lightly and returning to center builds strength in the quads and glutes while reinforcing balance. When done with a shorter range and strict control, the movement feels smooth and joint-friendly.
How to Do It
- Stand tall with feet together
- Step one foot forward lightly
- Bend slightly through the front leg
- Push back to standing
- Alternate legs steadily.
RELATED: 5 Bed Exercises That Flatten Stubborn Midsection Faster Than Crunches After 60
Standing Heel-to-Toe Raises
This movement targets the calves and ankles, which play a critical role in walking endurance. I’ve seen many clients improve their walking distance simply by strengthening their push-off power through the lower legs.
Rolling from heels to toes builds coordination and endurance through the entire foot and ankle. That improved control allows each step to feel smoother and more efficient, reducing fatigue over longer walks.
How to Do It
- Stand tall with feet hip-width apart
- Lift toes slightly off the ground
- Roll forward onto your toes
- Pause briefly
- Return slowly and repeat.
Standing Side Steps
Side steps strengthen the hips, which stabilize the body during walking. Weak hips often lead to side-to-side sway, which wastes energy and reduces endurance. I include this exercise in nearly every walking program because it builds that missing stability.
Stepping side to side while staying low and controlled forces the outer hips to engage continuously. That stability helps keep the body aligned during walking, which makes each step more efficient.
How to Do It
- Stand tall with slight bend in knees
- Step one foot out to the side
- Bring the other foot to meet it
- Stay controlled and steady
- Continue side to side.
RELATED: 5 Chair Exercises That Restore Leg Muscle Faster Than Squats After 65
Standing Hip Extensions With Pause
This movement targets the glutes, which drive the body forward during walking. I always emphasize glute strength when building endurance because weak glutes force other muscles to compensate, leading to early fatigue.
Adding a pause at the top increases muscle engagement and builds endurance in the glutes. When these muscles fire properly, walking feels more powerful and requires less effort.
How to Do It
- Stand tall holding a chair if needed
- Extend one leg behind you
- Pause and squeeze the glutes
- Lower slowly
- Alternate legs steadily.
The post 5 Standing Exercises That Build Walking Endurance Faster Than Treadmills After 65 appeared first on Eat This Not That.
]]>The post If You Can Hold a Bridge This Long After 55, Your Core Strength Is Top-Tier appeared first on Eat This Not That.
]]>Strong glutes and hips play a huge role in how the body performs as it ages. They drive powerful movements like climbing stairs, walking uphill, and rising from chairs. They also help stabilize the pelvis so the lower back doesn’t absorb unnecessary stress. When those muscles stay strong and coordinated, everyday movement feels smoother and more confident.
Hip strength also supports long-term joint health. The glutes help control the position of your knees and spine during movement. That control improves balance, reduces strain on surrounding joints, and keeps your body aligned during walking, lifting, and other daily activities. Many coaches consider the glutes one of the most important muscle groups for maintaining mobility later in life.
The bridge hold offers a clear way to test how well those muscles are doing their job. Holding the position requires your glutes, hamstrings, and deep core muscles to work together without losing tension. Up next, you’ll learn why the bridge is such an effective functional movement, how to perform it correctly, what your hold time says about your core strength, and how to build even stronger hips and glutes.
RELATED: 5 Bed Exercises That Flatten Stubborn Midsection Faster Than Crunches After 60
Why the Bridge Is a Functional Movement
The bridge reinforces one of the body’s most important movement patterns: hip extension. Every step you take, every stair you climb, and every time you stand up from a seated position relies on your hips extending powerfully and under control. Training that pattern helps maintain strength in movements you perform dozens of times every day.
The bridge also teaches your body how to separate hip movement from lower-back movement. Many adults begin to rely too heavily on their lower back when their glutes weaken. The bridge encourages the glutes to take the lead again, improving spinal support and reducing unnecessary strain on the lumbar region.
Another advantage of the bridge is how effectively it challenges muscular endurance. Holding the position forces your glutes and deep core muscles to maintain tension while your pelvis stays level. That sustained effort builds fatigue resistance in the muscles responsible for posture, walking mechanics, and balance.
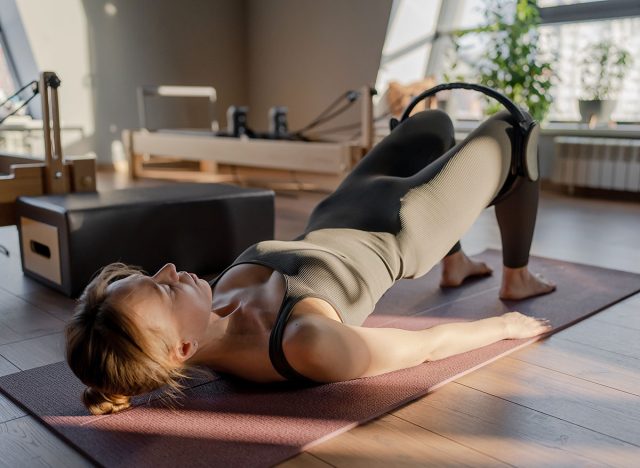
How to Perform the Best Bridge Technique
Proper technique ensures the test measures glute and core strength rather than compensations from the lower back. A strong setup allows the hips to drive the movement while the spine remains stable. When each second of the hold looks the same as the first, the result becomes a meaningful indicator of core strength.
How to Do It:
- Lie on your back with your knees bent and your feet flat on the floor about hip-width apart.
- Place your arms at your sides with your palms facing the floor.
- Brace your core by tightening your midsection before lifting your hips.
- Press through your heels and lift your hips until your shoulders, hips, and knees form a straight line.
- Squeeze your glutes firmly while keeping your ribs down and your pelvis level.
- Hold the position while breathing steadily until your hips begin to drop or your form breaks.
Once your hips sag or your lower back begins to arch excessively, the hold is complete.
RELATED: 5 Chair Exercises That Restore Leg Muscle Faster Than Squats After 65
Bridge Hold Strength Rankings After 55
This test measures how long you can hold a clean bridge position without losing alignment. Start your timer once your hips reach full extension.
- Under 30 seconds: Needs Improvement
This range suggests limited endurance in the glutes and core. Fatigue may appear quickly during prolonged walking or standing.
- 30 to 60 seconds: Average
Your hips and core can handle everyday movement demands, though fatigue may show up during longer efforts.
- 60 to 90 seconds: Above Average
This score reflects strong glute endurance and solid pelvic stability.
- 90+ seconds: Top-Tier
This level demonstrates exceptional hip and core endurance. Your glutes maintain force output while your pelvis and spine stay controlled.
RELATED: 5 Dumbbell Exercises That Build Shoulder Strength Faster Than Machines After 60
The Best Tips for Building Stronger Hips and Glutes After 55
Stronger hips and glutes develop through consistent training that challenges both strength and endurance. These strategies help build a bridge hold that lasts longer while supporting overall movement quality.
- Practice bridges regularly: Perform two to three sets several times per week to build endurance in the glutes and core.
- Add single-leg variations: Single-leg bridges increase hip demand and improve pelvic control.
- Train other hip extension movements: Exercises like step-ups, kettlebell deadlifts, and hip thrusts strengthen the same muscle groups.
- Strengthen your core stabilizers: Planks, dead bugs, and carries improve trunk stability, which supports strong bridge holds.
- Focus on quality tension: Squeezing the glutes and maintaining alignment matter more than simply holding the position longer.
Strong hips and glutes influence nearly every movement you perform throughout the day. If you can hold a bridge for an extended period with clean form, you’re showing that the muscles supporting your spine and pelvis remain powerful, coordinated, and ready for whatever movement the day brings.
References
- Lehecka, B J et al. “BUILDING A BETTER GLUTEAL BRIDGE: ELECTROMYOGRAPHIC ANALYSIS OF HIP MUSCLE ACTIVITY DURING MODIFIED SINGLE-LEG BRIDGES.” International journal of sports physical therapy vol. 12,4 (2017): 543-549.
- Inacio, Mario et al. “Gluteal muscle composition differentiates fallers from non-fallers in community dwelling older adults.” BMC geriatrics vol. 14 37. 25 Mar. 2014, doi:10.1186/1471-2318-14-37
The post If You Can Hold a Bridge This Long After 55, Your Core Strength Is Top-Tier appeared first on Eat This Not That.
]]>The post 5 Chair Exercises That Restore Leg Muscle Faster Than Squats After 65 appeared first on Eat This Not That.
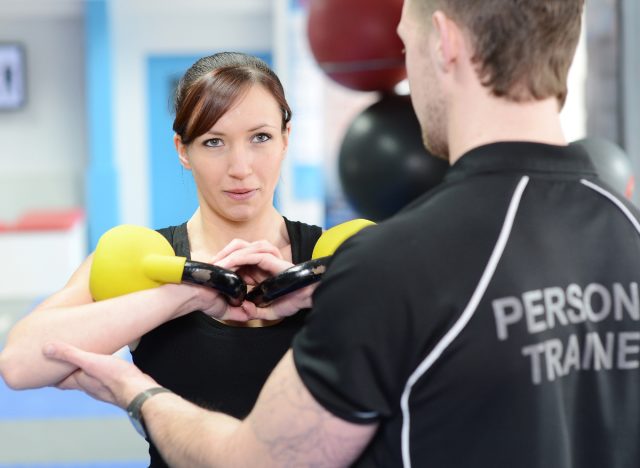
]]>“While squats are king, joint pain or balance issues can limit some people,” explains Steve Stonehouse, Vice President of Programming and Education at Body Fit Training (BFT). “We can often use exercises that provide continuous tension or isolate quads and hamstrings without the systemic fatigue of a full squat.”
Below, Stonehouse breaks down five productive chair exercises to add to your leg day.
Seated Leg Extension
- Begin sitting tall with your back supported against the chair.
- Place your feet flat on the floor.
- Hold the sides of the chair for added stability.
- Straighten your left leg out in front of you until your knee is completely extended. For max quad engagement, keep your toes flexed toward your shin the entire time.
- Hold for 2 seconds at the top before lowering.
- Repeat on the other side, performing 3 sets of 10 to 12 reps.
RELATED: 4 Standing Exercises Men Should Do Daily to Stay Young After 50
Slow Sit-to-Stands
- Begin seated at the front of a sturdy chair with your feet placed on the floor under your knees.
- Lean forward slightly.
- Try to stand up without using your knees, hands, or additional support.
- Use control to slowly sit back down.
- See how many sit-to-stands you’re able to complete in 30 seconds.
- Rest briefly before repeating.
- Perform 3 sets of 10 to 12 reps.
RELATED: These 5 Daily Moves Reverse Muscle Loss Faster Than Gym Workouts After 45
Seated “Hamstring Drags”
- Begin sitting tall on a sturdy chair with one leg extended straight ahead of you and the other foot flat on the ground.
- Position the heel of the extended leg lightly on the ground.
- Engage your core and maintain a tall chest.
- As you press your heel into the floor, gradually “drag” it back toward the chair without moving it very much, creating resistance.
- Hold for a moment before releasing.
- Perform 3 sets of 10 to 12 reps.
RELATED: If You Can Do These 3 Balance Tests at 60, Your Body Age Is 20 Years Younger
Chair-Supported Split Squats
- Start by standing tall with one hand placed on the back of a sturdy chair for support.
- Step your left foot forward about 2 to 3 feet to assume a staggered stance.
- Bend both knees, lowering the bottom toward the ground.
- Press through your front heel to rise back up.
- Repeat on the other side.
- Perform 3 sets of 10 to 12 reps.
RELATED: 5 Easy Bodyweight Tests That Show Your Real Fitness After 45
Isometric Chair Squeezes
- Sit tall on a sturdy chair with your feet planted flat on the floor.
- Place a pillow, rolled towel, or Pilates ball between your knees.
- Engage your core and maintain a tall chest.
- Press your knees inward as you squeeze the object in between your legs.
- Hold for 30 seconds before releasing.
- Perform 3 sets.
The post 5 Chair Exercises That Restore Leg Muscle Faster Than Squats After 65 appeared first on Eat This Not That.
]]>The post 5 Bed Exercises That Flatten Stubborn Midsection Faster Than Crunches After 60 appeared first on Eat This Not That.
]]>There are several ways to strengthen this area, including crunches. This exercise isolates the abdominal muscles and can be a solid addition to a well-rounded ab workout. But we spoke with Karen Ann Canham, CEO and founder of Karen Ann Wellness, Board-Certified Wellness Coach, and Nervous System Specialist who has almost two decades of experience in wellness and corporate leadership, to learn a much better approach. Canham shares five bed exercises that can help flatten the stubborn midsection faster than crunches after 60.
Why Crunches Aren’t an Effective Go-to Solution for Burning Belly Fat
If you’re looking to melt pesky belly fat, crunches aren’t the most effective choice.
“Crunches don’t directly burn belly fat—and this becomes even more relevant after 60,” Canham stresses. “First, spot reduction isn’t physiologically effective. Fat loss happens systemically, not from the specific area being exercised. Crunches primarily strengthen the rectus abdominis, but they don’t significantly impact abdominal fat stores.”
In addition, after you hit 60, sarcopenia causes a reduction in lean muscle mass and slower metabolic rate. This makes it much easier to store fat and more difficult to get rid of it—especially in the abdominal region.
“Hormonal changes—including lower estrogen or testosterone and higher cortisol—shift fat storage toward the abdomen,” Canham adds. “Finally, crunches can increase intra-abdominal pressure without strengthening the deeper stabilizing muscles (like the transverse abdominis), which can actually make the abdomen appear more protruded if those muscles are weak.”
Flattening your belly calls for improved muscle tone, metabolism, and posture—not performing countless crunches. Below, Canham shares five bed exercises to add to your routine.
“These exercises focus on deep core activation, pelvic stability, and full-body muscle engagement, which are more effective for improving how the midsection looks and functions than high-rep crunches alone,” Canham says.
Supine Deep Core Breathing
- Lie flat on your back with knees bent and feet flat on the mattress.
- Place one hand on your chest and the other on your belly.
- Take a deep breath in through the nose, allowing your lower hand to naturally rise as your belly expands.
- Slowly exhale through the mouth.
- Perform 2 sets of 8 to 10 slow breaths.
RELATED: This 20-Minute Bodyweight Workout Melts Hanging Belly Fat Better Than Crunches After 40
Dead Bugs
- Lie face-up on the mattress with your arms extended toward the sky and knees lifted and bent to 90 degrees.
- Press your lower back into the mattress as you gradually lower your left arm and extend your right leg.
- Return to the center.
- Then, lower your right arm and left leg.
- Continue to alternate.
- Perform 2 to 3 sets of 8 to 10 reps on each side.
RELATED: 5 Standing Moves That Shrink Belly Fat Without Getting on the Floor
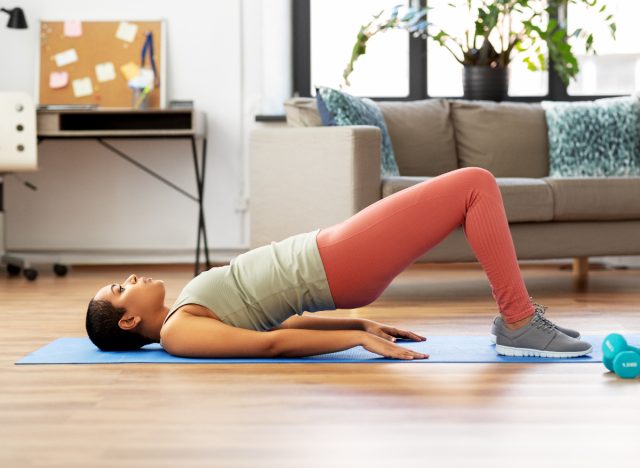
Glute Bridges
- Lie flat on your back with bent knees and feet hip-width apart, arms at your sides with palms pressing into the mattress.
- Press through your heels to lift your hips until your body forms a straight line from head to heels.
- Squeeze your buttocks, holding at the top for 2 seconds.
- Lower your hips back to the start position.
- Perform 2 to 3 sets of 10 to 12 reps.
RELATED: 5 Daily Moves That Flatten Belly Fat Better Than Dieting After 40
Lying Alternating Toe Taps
- Lie flat on your back with knees bent to 90 degrees and hips stacked over your heels.
- Keep your arms at your sides for support.
- Activate your core and press your lower back into the mattress.
- Gently lower your left foot toward the mattress, tapping your toes to the surface.
- Return to the tabletop position.
- Repeat on the other side.
- Perform 2 to 3 sets of 10 to 12 reps on each side.
RELATED: Denise Austin’s 5 Habits to Tackle Stubborn Belly Fat
Side-Lying Leg Lifts
- Begin by lying on one side with your legs stacked, your head resting on your bottom arm, and your top hand placed on your hip.
- Lift your top leg upward.
- Hold it for a moment.
- Slowly lower.
- Repeat on the other side.
- Perform 2 sets of 10 to 12 reps on each side.
The post 5 Bed Exercises That Flatten Stubborn Midsection Faster Than Crunches After 60 appeared first on Eat This Not That.
]]>The post 4 Chair Exercises That Build Leg Strength Faster Than Weight Lifting After 60 appeared first on Eat This Not That.
]]>What Makes Chair-Based Workouts Safe and Effective
“Chair exercises provide stability and a stopping point in the population over 60 years of age so that they can still exercise with less risk of falling,” explains Guevara. “If someone that’s 60+ years old tries to do a squat and can’t balance themselves at the bottom or they don’t have the strength to come back up, they can fall and get injured.”
Working with a chair provides a “safety net” and a cue so you know exactly how far down you are.
Below, Guevara shares four chair exercises that help build leg strength after 60.
Chair Squats
“Squats are a good all around quads, hamstrings, and glute builder that carry over to everyday activities like getting in and out of a chair, getting in and out of a car, when using the toilet, etc.,” Guevara explains.
- Begin by standing tall in front of a sturdy chair with your feet hip-width apart on the ground.
- Activate your core and keep your chest lifted.
- Bend at the knees and hips and lower slowly into a squat—as if you’re about to sit down. Make sure your weight stays in your heels.
- Lightly touch the surface of the chair with your glutes.
- Press through your heels to rise back up.
RELATED: If You Can Do This Many Squats After 50, You Are in Great Shape
Calf Raises
“Standing calf raises can be done by hanging on to the backrest of a chair and going up and down on your toes,” Guevara says.
- Begin by standing tall with your feet hip-width apart, facing a sturdy chair with your hands lightly resting on the backrest.
- Engage your core.
- Rise onto your toes slowly.
- Hold for 2 to 3 seconds at the top.
- Lower back down with control.
RELATED: This 9-Minute Bodyweight Strength Flow Builds More Muscle Than 45 Minutes of Gym Machines After 40
Lunges
- Stand tall, perpendicular to the back of a sturdy chair with your feet parallel and hip-width apart.
- Step one foot forward, using the chair for support.
- Engage your core as you bend your knees, lowering to form 90-degree bends in both legs.
- Keep your upper body straight.
- Press through your front heel and the ball of your back foot to rise back up.
RELATED: 4 Standing Exercises That Build Muscle the Old-School Way After 60
Squat Holds
- Begin standing tall in front of a sturdy chair with your feet hip-width apart and arms extended ahead of you.
- Squat down to the point where your glutes are just above the seat.
- Hold for 5 to 10 seconds.
- Sit down to relax before repeating.
The post 4 Chair Exercises That Build Leg Strength Faster Than Weight Lifting After 60 appeared first on Eat This Not That.
]]>