The post If You Can Hold a Bridge This Long After 55, Your Core Strength Is Top-Tier appeared first on Eat This Not That.
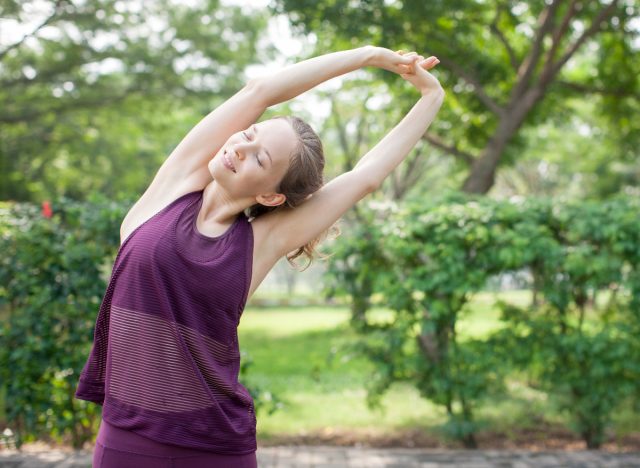
]]>Strong glutes and hips play a huge role in how the body performs as it ages. They drive powerful movements like climbing stairs, walking uphill, and rising from chairs. They also help stabilize the pelvis so the lower back doesn’t absorb unnecessary stress. When those muscles stay strong and coordinated, everyday movement feels smoother and more confident.
Hip strength also supports long-term joint health. The glutes help control the position of your knees and spine during movement. That control improves balance, reduces strain on surrounding joints, and keeps your body aligned during walking, lifting, and other daily activities. Many coaches consider the glutes one of the most important muscle groups for maintaining mobility later in life.
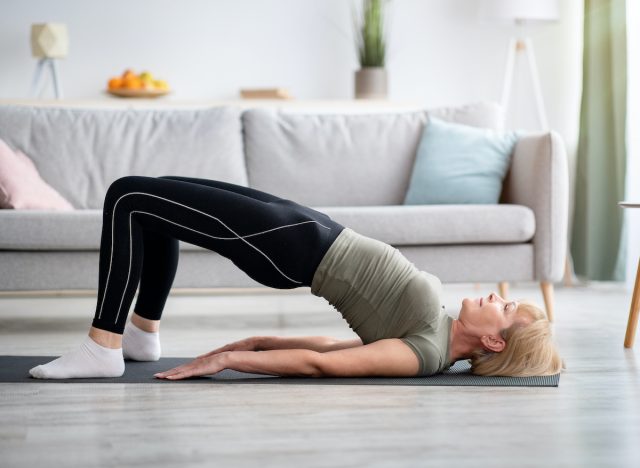
The bridge hold offers a clear way to test how well those muscles are doing their job. Holding the position requires your glutes, hamstrings, and deep core muscles to work together without losing tension. Up next, you’ll learn why the bridge is such an effective functional movement, how to perform it correctly, what your hold time says about your core strength, and how to build even stronger hips and glutes.
RELATED: 5 Bed Exercises That Flatten Stubborn Midsection Faster Than Crunches After 60
Why the Bridge Is a Functional Movement
The bridge reinforces one of the body’s most important movement patterns: hip extension. Every step you take, every stair you climb, and every time you stand up from a seated position relies on your hips extending powerfully and under control. Training that pattern helps maintain strength in movements you perform dozens of times every day.
The bridge also teaches your body how to separate hip movement from lower-back movement. Many adults begin to rely too heavily on their lower back when their glutes weaken. The bridge encourages the glutes to take the lead again, improving spinal support and reducing unnecessary strain on the lumbar region.
Another advantage of the bridge is how effectively it challenges muscular endurance. Holding the position forces your glutes and deep core muscles to maintain tension while your pelvis stays level. That sustained effort builds fatigue resistance in the muscles responsible for posture, walking mechanics, and balance.
How to Perform the Best Bridge Technique
Proper technique ensures the test measures glute and core strength rather than compensations from the lower back. A strong setup allows the hips to drive the movement while the spine remains stable. When each second of the hold looks the same as the first, the result becomes a meaningful indicator of core strength.
How to Do It:
- Lie on your back with your knees bent and your feet flat on the floor about hip-width apart.
- Place your arms at your sides with your palms facing the floor.
- Brace your core by tightening your midsection before lifting your hips.
- Press through your heels and lift your hips until your shoulders, hips, and knees form a straight line.
- Squeeze your glutes firmly while keeping your ribs down and your pelvis level.
- Hold the position while breathing steadily until your hips begin to drop or your form breaks.
Once your hips sag or your lower back begins to arch excessively, the hold is complete.
RELATED: 5 Chair Exercises That Restore Leg Muscle Faster Than Squats After 65
Bridge Hold Strength Rankings After 55
This test measures how long you can hold a clean bridge position without losing alignment. Start your timer once your hips reach full extension.
- Under 30 seconds: Needs Improvement
This range suggests limited endurance in the glutes and core. Fatigue may appear quickly during prolonged walking or standing.
- 30 to 60 seconds: Average
Your hips and core can handle everyday movement demands, though fatigue may show up during longer efforts.
- 60 to 90 seconds: Above Average
This score reflects strong glute endurance and solid pelvic stability.
- 90+ seconds: Top-Tier
This level demonstrates exceptional hip and core endurance. Your glutes maintain force output while your pelvis and spine stay controlled.
RELATED: 5 Dumbbell Exercises That Build Shoulder Strength Faster Than Machines After 60
The Best Tips for Building Stronger Hips and Glutes After 55
Stronger hips and glutes develop through consistent training that challenges both strength and endurance. These strategies help build a bridge hold that lasts longer while supporting overall movement quality.
- Practice bridges regularly: Perform two to three sets several times per week to build endurance in the glutes and core.
- Add single-leg variations: Single-leg bridges increase hip demand and improve pelvic control.
- Train other hip extension movements: Exercises like step-ups, kettlebell deadlifts, and hip thrusts strengthen the same muscle groups.
- Strengthen your core stabilizers: Planks, dead bugs, and carries improve trunk stability, which supports strong bridge holds.
- Focus on quality tension: Squeezing the glutes and maintaining alignment matter more than simply holding the position longer.
Strong hips and glutes influence nearly every movement you perform throughout the day. If you can hold a bridge for an extended period with clean form, you’re showing that the muscles supporting your spine and pelvis remain powerful, coordinated, and ready for whatever movement the day brings.
References
- Lehecka, B J et al. “BUILDING A BETTER GLUTEAL BRIDGE: ELECTROMYOGRAPHIC ANALYSIS OF HIP MUSCLE ACTIVITY DURING MODIFIED SINGLE-LEG BRIDGES.” International journal of sports physical therapy vol. 12,4 (2017): 543-549.
- Inacio, Mario et al. “Gluteal muscle composition differentiates fallers from non-fallers in community dwelling older adults.” BMC geriatrics vol. 14 37. 25 Mar. 2014, doi:10.1186/1471-2318-14-37
The post If You Can Hold a Bridge This Long After 55, Your Core Strength Is Top-Tier appeared first on Eat This Not That.
]]>The post 5 Dumbbell Exercises That Restore Shoulder Strength Faster Than Lifting Weights After 55 appeared first on Eat This Not That.
]]>Large gym lifts sometimes emphasize momentum or surrounding muscle groups rather than the shoulder muscles themselves. That’s why controlled dumbbell exercises frequently produce better results. With dumbbells, each shoulder works independently, forcing the stabilizing muscles to engage while strengthening the deltoids, rotator cuff, and upper back.
Another advantage of dumbbell training involves joint control. When movements stay slow and deliberate, the shoulders strengthen without unnecessary strain. Many of my clients regain confidence in their upper-body strength once they begin focusing on controlled repetitions instead of simply lifting heavier weights.
The following exercises strengthen the shoulders from multiple angles, helping rebuild stability, mobility, and muscular endurance. Move slowly, maintain good posture, and focus on squeezing the working muscles during each repetition. With consistent practice, these movements help restore the strength needed for everyday upper-body tasks.
Dumbbell Shoulder Press
The shoulder press remains one of the most effective exercises for rebuilding overhead strength. I often introduce this movement early because it strengthens the front and middle portions of the shoulders while also activating the upper back and core for stability.
Many clients notice that everyday tasks like reaching into cabinets or placing objects on shelves feel easier once the overhead pressing muscles regain strength. Performing the movement slowly ensures the shoulders carry the workload rather than the lower back.
How to Do It
- Stand or sit with a dumbbell in each hand
- Hold weights at shoulder height
- Press the dumbbells overhead slowly
- Lower them back with control
- Repeat steadily.
RELATED: 5 Daily Exercises That Restore Full-Body Strength Faster Than Gym Sessions After 60
Dumbbell Lateral Raises
Lateral raises strengthen the middle portion of the shoulder muscles, which help lift the arms outward and stabilize the shoulder joint. I frequently add this exercise to shoulder routines because it improves both strength and joint control.
Many adults over 55 develop weakness in this area, which can lead to shoulder fatigue during everyday activities. Strengthening the side deltoids restores balance across the shoulder joint and improves overall arm movement.
How to Do It
- Stand tall holding dumbbells at your sides
- Lift both arms outward to shoulder height
- Keep elbows slightly bent
- Lower the weights slowly
- Repeat with control.
Dumbbell Front Raises
Front raises strengthen the front portion of the shoulders, which plays a major role in lifting and carrying objects. I often recommend this movement for clients who feel weakness when raising their arms in front of the body.
Performing the exercise with slow, controlled movement keeps the shoulders engaged throughout the lift. Over time, this helps rebuild strength in the muscles responsible for forward arm movement.
How to Do It
- Stand tall with dumbbells in front of your thighs
- Lift both arms forward to shoulder height
- Keep your core tight
- Lower the weights slowly
- Repeat steadily.
RELATED: 5 Park Bench Exercises That Restore Leg Muscle Faster Than Squats After 60
Dumbbell Reverse Fly
The reverse fly targets the rear portion of the shoulders and upper back, areas that often weaken due to prolonged sitting and poor posture. I regularly include this exercise in shoulder programs because it restores balance across the shoulder joint.
Strengthening the rear deltoids helps pull the shoulders back into better alignment. Many clients notice improved posture and reduced shoulder discomfort once these muscles regain strength.
How to Do It
- Hold dumbbells while bending slightly at the hips
- Let arms hang toward the floor
- Lift the weights outward to the sides
- Squeeze shoulder blades together
- Lower slowly.
RELATED: The 6-Minute Bed Routine That Restores Full-Body Balance After 65
Dumbbell Upright Rows
Upright rows strengthen the shoulders while also engaging the upper trapezius muscles of the upper back. This movement helps improve shoulder stability and upper-body pulling strength.
I often finish shoulder workouts with upright rows because they reinforce coordination between the shoulders and upper back. When performed with controlled motion, the exercise strengthens the muscles that support lifting and carrying tasks.
How to Do It
- Stand tall holding dumbbells in front of your thighs
- Pull the weights upward toward your chest
- Keep elbows higher than the wrists
- Lower the weights slowly
- Repeat steadily.
The post 5 Dumbbell Exercises That Restore Shoulder Strength Faster Than Lifting Weights After 55 appeared first on Eat This Not That.
]]>The post 5 Daily Exercises That Restore Back Strength Faster Than Floor Workouts After 55 appeared first on Eat This Not That.
]]>“After 55, muscle mass in the posterior chain decreases, fascia loses hydration and becomes restrictive, spinal discs compress, and deep stabilizing muscles go quiet from underuse,” explains Chancy Gill, LMT, co-owner of Syringa Bodwork in Hayden, Idaho. “Decades of desk posture weaken the glutes and shorten the hip flexors, leaving the lower back to carry a load it was never meant to handle. The result: stiffness, reduced mobility, chronic fatigue, and a higher risk of injury. Floor stretches and crunches rarely fix this, especially when restricted fascia is preventing the muscles from firing correctly.”
For those 55+, the most challenging barrier to exercise isn’t about motivation, but rather comfortability and accessibility. Traditional gym sessions can sometimes feel intimidating or inconvenient, which can cause inconsistency.
“At-home exercises eliminate these barriers, allowing people to train at their own pace in an environment that is comfortable,” explains Josh York, Founder & CEO, GYMGUYZ. “These workouts can also be tailored to ability and mobility levels, making them impactful for functional movements.”
Below, experts break down their top daily exercises that help restore back strength quicker than floor workouts.
Standing Hip Hinges
The standing hip hinge engages the hamstrings, lumbar extensors, and glutes.
“Hinge from the hips—not the waist—sending them back while keeping a long, neutral
spine. Drive through the heels to return,” explains Gill. “Repatterns the body to load the posterior chain instead of the lower back. Add light dumbbells as it becomes comfortable.”
- Stand tall, feet hip-width apart.
- Place your hands behind your head.
- Press your hips back while maintaining a tall chest.
- As you hinge forward, feel a solid stretch in your hamstrings.
- Activate your hamstrings and glutes to drive your hips forward.
- Perform 3 sets of 10 to 12 reps.
RELATED: 5 Daily Standing Exercises That Strengthen Your Back Better Than Gym Machines After 45
Resistance Band Rows
This exercise engages the lats, lower trapezius, and rhomboids.
“Anchor a band at chest height and pull both hands toward the ribcage, squeezing the
shoulder blades together at the end of each rep,” explains Gill. “The primary antidote to rounded-shoulder posture. Easily done seated if needed.”
- Begin by anchoring a resistance band to a sturdy pole at chest level.
- Stand tall, facing the anchor point.
- Hold the handles with both hands.
- Bend your elbows and pull the band toward your body.
- Squeeze your shoulder blades together.
- Extend your arms back to the start position.
- Perform 3 sets of 12 to 15 reps.
RELATED: 5 Back Exercises Women Over 50 Should Never Skip
Standing Glute Kickbacks
This move fires up the hamstrings, glutes, and lumbar stabilizers.
- Begin standing tall with your hands placed on a sturdy chair back for balance.
- Maintain an upright spine as you extend one leg straight back—squeezing the glute at the top of the movement.
- Hold for one count before lowering with control.
- Perform 3 sets of 12 to 15 reps on each side.
RELATED: 5 Daily Hip Exercises That Protect Your Back After 50, According to a Trainer
Wall Pushups
“Wall pushups are modified pushups targeting the chest, shoulders, and arms,” York says.
- Begin standing tall, arms-length away from a wall.
- Place your hands shoulder-width apart on the surface.
- Engage your core and bend your elbows to lower your chest toward the wall.
- Press back up to the starting position, keeping the movement slow and controlled.
- Perform 3 sets of 10 to 12 reps.
RELATED: 5 Daily Exercises That Rebuild Lost Muscle Faster Than the Gym After 50
Chair Squats
“Chair squats are modified standard squats to aid in legs, glutes, and core strength,” York points out.
- Begin by standing tall in front of a sturdy chair with your feet hip-width apart on the ground.
- Activate your core and keep your chest lifted.
- Bend at the knees and hips and lower slowly into a squat—as if you’re about to sit down. Make sure your weight stays in your heels.
- Lightly touch the surface of the chair with your glutes.
- Press through your heels to rise back up.
- Perform 3 sets of 10 to 12 reps.
The post 5 Daily Exercises That Restore Back Strength Faster Than Floor Workouts After 55 appeared first on Eat This Not That.
]]>The post 4 Bed Exercises That Restore Muscle Tone Faster Than Gym Machines After 55 appeared first on Eat This Not That.
]]>I’ve worked with plenty of clients who benefit from exercises that meet them where they are. Sometimes that means beginning the day with a few movements before their feet even touch the floor. A short routine performed on the bed can wake up your muscles and help the body feel more capable right from the start. It also provides a practical way to build strength and restore muscle tone without relying on machines.
The four exercises below target key muscle groups while keeping the routine approachable and effective. They train the legs, hips, and core while encouraging smooth, controlled movement. Perform them regularly, and you will build strength, improve stability, and start the day with a body that feels energized and ready to move.
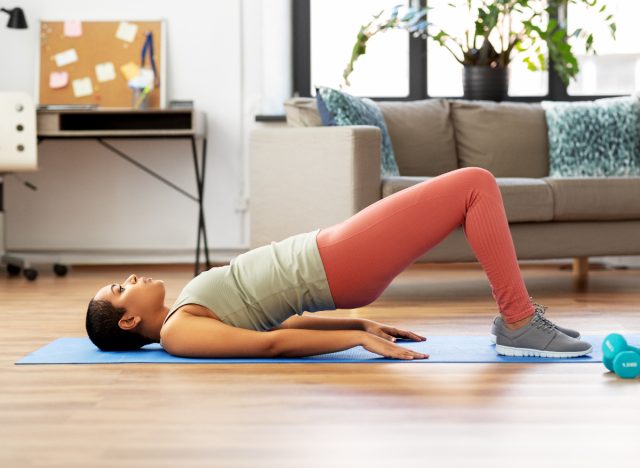
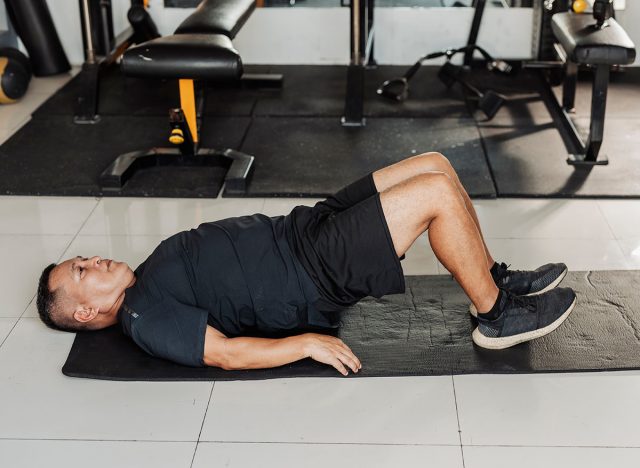
Glute Bridge
The glute bridge activates the glutes and hamstrings while encouraging the hips to move through a strong extension pattern. Many people spend long hours sitting during the day, which can make the glutes less active. This exercise helps wake those muscles up quickly. The movement also supports the lower back by strengthening the muscles that stabilize the pelvis. With consistent practice, glute bridges help rebuild lower-body muscle tone and improve hip strength.
Muscles Trained: Glutes, hamstrings, and core stabilizers.
How to Do It:
- Lie on your back with your knees bent and your feet flat on the bed.
- Place your arms at your sides for support.
- Press through your heels and lift your hips upward.
- Squeeze your glutes at the top of the movement.
- Slowly lower your hips back to the starting position.
Recommended Sets and Reps: Perform 3 sets of 12 to 15 reps. Rest for 45 seconds between each set.
Best Variations: Single-leg glute bridge, pause glute bridge, banded glute bridge.
Form Tip: Drive through your heels and focus on squeezing your glutes at the top.
RELATED: 5 Chair Exercises That Build Core Strength Faster Than Planks After 60
Dead Bugs
Dead bugs strengthen the deep core muscles that stabilize the spine. The alternating arm and leg motion keeps the core engaged as the limbs move. This pattern improves coordination and strengthens the abdominal wall. Performing the exercise on a bed allows you to focus on slow, controlled movement. Over time, stronger core muscles help support better posture and overall muscle tone.
Muscles Trained: Transverse abdominis, rectus abdominis, and hip flexors.
How to Do It:
- Lie on your back with your arms extended toward the ceiling.
- Bend your knees so your legs form a tabletop position.
- Brace your core and gently press your lower back into the mattress.
- Extend one arm and the opposite leg toward the bed.
- Return to the starting position and repeat on the other side.
Recommended Sets and Reps: Perform 3 sets of 10 to 12 reps per side. Rest for 45 seconds between each set.
Best Variations: Heel tap dead bug, slow tempo dead bug, alternating dead bug.
Form Tip: Keep your lower back lightly pressed into the mattress during each repetition.
Side-Lying Leg Raises
Side-lying leg raises strengthen the outer hips and glutes, which play an important role in balance and stability. These muscles help control hip alignment during walking and standing. Strengthening them can improve overall lower-body muscle tone. The controlled lift also encourages the hips to move through a comfortable range of motion. With regular practice, this movement helps build stronger hips and more stable legs.
Muscles Trained: Glutes, outer hips, and hip stabilizers.
How to Do It:
- Lie on your side with your legs stacked on top of each other.
- Support your head with your lower arm.
- Keep your top leg straight and lift it upward slowly.
- Pause briefly at the top of the movement.
- Lower your leg back down with control.
Recommended Sets and Reps: Perform 3 sets of 12 to 15 reps per leg. Rest for 30 seconds between each set.
Best Variations: Banded leg raise, slow tempo leg raise, small pulse raises.
Form Tip: Keep your hips stacked and avoid leaning backward as you lift your leg.
RELATED: 4 Bed Exercises That Shrink Stubborn Midsection Faster Than Ab Workouts After 60
Supine Knee Tucks
Supine knee tucks strengthen the abdominal muscles while encouraging smooth hip movement. Pulling the knees toward the chest activates the core and hip flexors simultaneously. This movement helps strengthen the muscles that support the midsection. The controlled motion also improves coordination between the hips and core. Over time, this exercise helps restore muscle tone throughout the abdominal region.
Muscles Trained: Rectus abdominis, hip flexors, and core stabilizers.
How to Do It:
- Lie on your back with your legs extended.
- Brace your core and lift your feet slightly off the bed.
- Pull your knees toward your chest.
- Pause briefly while keeping your core engaged.
- Extend your legs back out with control.
Recommended Sets and Reps: Perform 3 sets of 10 to 12 reps. Rest for 45 seconds between each set.
Best Variations: Alternating knee tucks, slow tempo knee tucks, and single-leg knee tucks.
Form Tip: Move slowly and keep your core engaged throughout the entire motion.
RELATED: The 5-Minute Standing Routine That Restores Posture After 60, According to a Trainer
Best Daily Tips for Restoring Muscle Tone After 55
Restoring muscle tone after 55 becomes much easier when movement is consistent and accessible. Small daily routines often create the biggest long-term changes. When exercises are simple to start and easy to repeat, the body receives regular signals to maintain strength and coordination. Over time, those signals encourage the muscles to stay active and responsive.
- Start with small routines: Even five to ten minutes of daily movement can make a noticeable difference.
- Focus on controlled movement: Smooth repetitions encourage better muscle activation and joint stability.
- Strengthen multiple muscle groups: Exercises that involve the hips, legs, and core promote full-body muscle tone.
- Stay consistent: Daily habits often produce better results than occasional longer workouts.
- Listen to your body: Move comfortably and gradually increase effort as strength improves.
A short routine like this can help restore muscle tone, improve stability, and make daily movement feel easier and more enjoyable.
References
- Maccarone, Maria Chiara et al. “Effects of the Full-Body in-Bed Gym program on quality of life, pain, and risk of sarcopenia in elderly sedentary individuals: preliminary positive results of a Padua prospective observational study.” European journal of translational myology vol. 33,3 11780. 26 Sep. 2023, doi:10.4081/ejtm.2023.11780
- Schumacher, Leah M et al. “Consistent Morning Exercise May Be Beneficial for Individuals With Obesity.” Exercise and sport sciences reviews vol. 48,4 (2020): 201-208. doi:10.1249/JES.0000000000000226
The post 4 Bed Exercises That Restore Muscle Tone Faster Than Gym Machines After 55 appeared first on Eat This Not That.
]]>The post 5 Daily Exercises That Restore Hip Mobility Faster Than Floor Stretches After 55 appeared first on Eat This Not That.
]]>After years of coaching athletes and everyday clients, I’ve seen how quickly the hips respond when you give them proper movement prescriptions. Many people assume the answer is to lie on the floor and do long stretches. Stretching has its place, yet the hips often improve faster when they move through strength-based positions that encourage the joints to work through their full range of motion. Plus, many people would rather move than spend ten minutes staring at the ceiling while holding a stretch.
These five daily movements help the hips open up while strengthening the muscles that support them. They combine mobility, stability, and coordination so your hips learn to move freely while staying strong. Perform them consistently, and you’ll build smoother movement, stronger legs, and hips that feel a whole lot better throughout the day.
Bodyweight Deep Squat
The deep squat encourages the hips to move through a full range of motion while strengthening the surrounding muscles. Sitting in the bottom position allows the hips, knees, and ankles to work together naturally. This movement gently stretches the hips while building strength in the quads and glutes. Over time, practicing deep squats helps the joints feel more comfortable in deeper positions. Many people notice their hips start to feel looser and more stable within just a few weeks.
Muscles Trained: Quads, glutes, hamstrings, and core.
How to Do It:
- Stand with your feet slightly wider than shoulder width.
- Brace your core and push your hips back.
- Lower your body into a deep squat position.
- Keep your chest tall and your heels grounded.
- Stand back up by driving through your heels.
Recommended Sets and Reps: Perform 3 sets of 10 to 12 reps. Rest for 45 seconds between each set.
Best Variations: Goblet deep squat, pause squat, assisted squat hold.
Form Tip: Sit your hips down between your heels rather than leaning forward.
RELATED: If You Can Hold These 3 Bed Positions After 60, Your Core Is Stronger Than 90% of Peers
Standing Hip Circles
Standing hip circles encourage the hips to move smoothly in multiple directions. Many daily movements only challenge the hips forward and backward. Circular motion allows the joint to explore a wider range of movement. This helps improve joint awareness and coordination. Over time, the hips become more comfortable moving through these larger patterns.
Muscles Trained: Hip flexors, glutes, and stabilizing muscles around the hip joint.
How to Do It:
- Stand tall while holding onto a wall or sturdy surface.
- Lift one knee to hip height.
- Slowly draw a large circle with your knee.
- Continue rotating the hip through a full circular motion.
- Reverse the direction after completing several circles.
Recommended Sets and Reps: Perform 3 sets of 6 to 8 circles per direction per leg. Rest for 30 seconds between each set.
Best Variations: Controlled hip rotations, banded hip circles, slow tempo circles.
Form Tip: Move slowly and keep your torso steady as the hip moves.
Alternating Lateral Lunges
Alternating lateral lunges strengthen the hips while improving side-to-side mobility. This movement challenges the inner thighs and glutes while encouraging the hips to move in a wider pattern. Many people feel immediate benefits in the groin and hip region after performing a few sets. The controlled shift in body weight also improves balance and coordination. Consistent practice builds stronger hips that move more comfortably in multiple directions.
Muscles Trained: Glutes, quads, inner thighs, and hips.
How to Do It:
- Stand with your feet hip-width apart.
- Step your right foot out to the side.
- Bend your knee while pushing your hips back.
- Keep your opposite leg straight and your chest tall.
- Push through your foot to return to the starting position and switch sides.
Recommended Sets and Reps: Perform 3 sets of 10 reps per side. Rest for 45 seconds between each set.
Best Variations: Weighted lateral lunge, slider lateral lunge, pause lateral lunge.
Form Tip: Sit your hips back to engage the glutes as you step sideways.
RELATED: 5 Bed Exercises That Restore Leg Strength Faster Than Squats After 60
Reverse Lunge with Reach
Reverse lunges encourage the hips to extend and flex through a controlled movement. Adding an overhead reach increases the mobility challenge while engaging the entire body. The movement stretches the hip flexors of the back leg while strengthening the front leg. This combination encourages smoother hip motion during walking and climbing. Over time, the exercise helps restore both strength and flexibility in the hips.
Muscles Trained: Glutes, quads, hip flexors, and core.
How to Do It:
- Stand tall with your feet hip-width apart.
- Step one leg backward into a reverse lunge.
- Raise both arms overhead as you lower your back knee.
- Keep your chest tall and your core engaged.
- Push through your front foot to return to standing.
Recommended Sets and Reps: Perform 3 sets of 8 to 10 reps per leg. Rest for 45 seconds between each set.
Best Variations: Dumbbell reverse lunge with reach, bodyweight overhead lunge, alternating reverse lunge.
Form Tip: Reach upward through your fingertips to open the hips and torso.
Curtsy Lunge
Curtsy lunges strengthen the hips while challenging them in a diagonal movement pattern. The crossing step activates the glutes and outer hips while encouraging stability. This movement helps train the muscles that support the pelvis during walking and single-leg activities. Many people find that it quickly improves balance and hip control. Over time, the exercise builds stronger hips that feel more stable and coordinated.
Muscles Trained: Glutes, quads, hips, and inner thighs.
How to Do It:
- Stand with your feet hip-width apart.
- Step one leg diagonally behind your body.
- Bend both knees to lower into a lunge.
- Keep your chest tall and your hips facing forward.
- Push through your front foot to return to standing.
Recommended Sets and Reps: Perform 3 sets of 8 to 10 reps per leg. Rest for 45 seconds between each set.
Best Variations: Dumbbell curtsy lunge, alternating curtsy lunge, pause curtsy lunge.
Form Tip: Keep your hips square as you step behind your body.
RELATED: 5 Standing Exercises That Flatten Stubborn Belly Pooch Faster Than Crunches After 55
Best Daily Tips for Improving Hip Mobility After 55
Healthy hips make everyday movement easier and more comfortable. When the hips move well, the knees and lower back often feel better, too. Rather than stretching your life away, improving hip mobility with well-chosen movements performed regularly can make a noticeable difference in how the body feels and moves.
- Move your hips in multiple directions: Exercises that include forward, sideways, and rotational movements help your hips stay adaptable.
- Prioritize controlled movement: Slow and steady repetitions allow the joints to move through their full range safely.
- Strengthen the surrounding muscles: Strong glutes and thighs support healthy hip mechanics.
- Stay consistent with daily movement: Short daily sessions help maintain hip mobility and strength.
- Listen to your body: Move within comfortable ranges and gradually increase depth as mobility improves.
Stick with these exercises and your hips will begin to feel stronger, looser, and more capable with every week of training.
References:
- Leem, Inhwan et al. “Impact of Hip Exercises on Postural Stability and Function in Patients with Chronic Lower Back Pain.” Diagnostics (Basel, Switzerland) vol. 15,10 1229. 13 May. 2025, doi:10.3390/diagnostics15101229
- Ehresman, Brent A et al. “Improved Hip Flexibility and Gluteal Function Following a Daily Lunge-and-Reach Stretching Intervention.” International journal of sports physical therapy vol. 20,6 814-823. 2 Jun. 2025, doi:10.26603/001c.137692
The post 5 Daily Exercises That Restore Hip Mobility Faster Than Floor Stretches After 55 appeared first on Eat This Not That.
]]>The post 5 Standing Exercises That Flatten Stubborn Belly Pooch Faster Than Crunches After 55 appeared first on Eat This Not That.
]]>That’s where standing exercises shine. Movements that involve the hips, legs, and upper body simultaneously elevate heart rate, stimulate more muscle groups, and increase calorie output. I’ve seen this approach work well with many clients over 55 who want workouts that feel productive without demanding hours in the gym. Big compound movements help the body work harder while also strengthening the core muscles that support the midsection.
The exercises below combine strength and movement to create a potent training effect. Each one recruits large muscle groups while keeping the core active and stable. Perform them regularly, and you’ll build strength, increase calorie burn, and support training that helps flatten stubborn belly pooch.
RELATED: 4 Standing Exercises That Restore Stair-Climbing Strength Faster Than Lunges After 60
Side Slams
Side slams combine rotation, power, and full-body engagement in a single movement. The explosive downward slam activates the obliques while the legs and hips generate force. That combination challenges the core while elevating heart rate and increasing calorie burn. Rotational exercises also strengthen the muscles that wrap around the waistline. Over time, stronger obliques help support a tighter midsection.
Muscles Trained: Obliques, shoulders, core, and hips.
How to Do It:
- Stand with your feet shoulder-width apart while holding a medicine ball.
- Raise the ball above one shoulder.
- Rotate your torso as you slam the ball down toward the opposite side.
- Catch or retrieve the ball and reset your position.
- Repeat the movement on the opposite side, switching each rep.
Recommended Sets and Reps: Perform 3 sets of 10 to 12 reps per side. Rest for 45 seconds between each set.
Best Variations: Rotational slam, overhead slam, alternating slam.
Form Tip: Rotate through your torso while keeping your feet planted and your core braced.
Kettlebell High Pulls
Kettlebell high pulls train explosive hip extension while challenging the upper body and core. The powerful hip drive recruits large muscle groups in the glutes and legs. As the kettlebell travels upward, the core stabilizes the torso to control the movement. This type of full-body effort increases energy output and strengthens multiple muscle groups at once. Consistent practice builds strength and supports fat loss efforts.
Muscles Trained: Glutes, hamstrings, shoulders, and core.
How to Do It:
- Stand with your feet shoulder-width apart, holding a kettlebell in both hands.
- Hinge your hips back and allow the kettlebell to swing between your legs.
- Drive your hips forward powerfully.
- Pull the kettlebell upward toward chest height.
- Lower the kettlebell with control and repeat.
Recommended Sets and Reps: Perform 3 sets of 10 to 12 reps. Rest for 60 seconds between each set.
Best Variations: Single-arm high pull, kettlebell swing-to-high pull, alternating high pull.
Form Tip: Generate the movement from your hips rather than pulling with your arms.
RELATED: 5 Exercises You Can Do in Your Bedroom That Restore Full-Body Strength After 60
Dumbbell Squat to Press
The dumbbell squat-to-press combines two compound movements into a powerful exercise. The squat activates the legs and glutes while the press challenges the shoulders and core. This full-body effort increases muscle recruitment and calorie expenditure. The core remains active throughout the entire movement to stabilize the spine. Over time, this exercise strengthens the entire body while supporting fat-burning workouts.
Muscles Trained: Quads, glutes, shoulders, and core.
How to Do It:
- Hold a dumbbell in each hand at shoulder height.
- Stand with your feet shoulder-width apart.
- Lower into a squat while keeping your chest upright.
- Drive upward through your heels.
- Press the dumbbells overhead as you stand.
Recommended Sets and Reps: Perform 3 sets of 8 to 10 reps. Rest for 60 seconds between each set.
Best Variations: Single-dumbbell thruster, kettlebell thruster, alternating press thruster.
Form Tip: Brace your core before pressing the weights overhead.
Step-Ups
Step-ups strengthen the lower body while increasing heart rate and overall workload. Each step challenges the glutes and quads while the core stabilizes the body during the movement. This combination improves lower-body strength and contributes to higher calorie expenditure. The movement also mimics everyday activities such as climbing stairs. Over time, step-ups build strength and endurance while supporting fat-burning workouts.
Muscles Trained: Quads, glutes, hamstrings, and core.
How to Do It:
- Stand in front of a sturdy bench or step.
- Place one foot firmly on top of the platform.
- Drive through that foot to lift your body upward.
- Briefly bring the opposite foot onto the platform.
- Step back down with control and repeat.
Recommended Sets and Reps: Perform 3 sets of 10 reps per leg. Rest for 60 seconds between each set.
Best Variations: Weighted step-ups, alternating step-ups, knee-drive step-ups.
Form Tip: Push through your front heel to activate the glutes.
RELATED: 5 Daily Exercises Men Over 55 Should Do to Restore Lost Muscle
Kettlebell Swing
Kettlebell swings train explosive hip movement while engaging the entire posterior chain. The glutes and hamstrings drive the motion while the core stabilizes the spine. This repeated full-body effort elevates heart rate and increases calorie burn. Swings also strengthen the muscles that support posture and athletic movement. With consistent training, they become one of the most efficient exercises for building strength and energy output.
Muscles Trained: Glutes, hamstrings, core, and lower back stabilizers.
How to Do It:
- Stand with your feet slightly wider than shoulder width.
- Hold a kettlebell with both hands in front of your hips.
- Hinge your hips back and swing the kettlebell between your legs.
- Drive your hips forward to propel the kettlebell to chest height.
- Allow the kettlebell to swing back down and repeat.
Recommended Sets and Reps: Perform 3 sets of 12 to 15 reps. Rest for 60 seconds between each set.
Best Variations: Single-arm swing, alternating swing, heavy power swing.
Form Tip: Snap your hips forward and keep your core braced during each swing.
RELATED: 5 Standing Exercises That Reduce Waist Thickening Faster Than Cardio After 55
Daily Habits That Help Flatten Belly Pooch After 55

Shrinking a belly pooch becomes much easier when exercise is paired with supportive daily habits. Training stimulates muscles and increases energy output, yet long-term fat loss also depends on lifestyle factors. When strength training, nutrition, and recovery align, the body becomes far more efficient at maintaining a healthy body composition.
- Create a small calorie deficit: Fat loss occurs when the body consistently burns more calories than it consumes.
- Prioritize protein intake: Protein supports muscle maintenance and helps keep you satisfied between meals.
- Train large muscle groups regularly: Exercises that involve the legs, hips, and upper body increase calorie expenditure.
- Stay consistent with movement: Daily walks and regular workouts help maintain energy output throughout the week.
- Prioritize sleep and recovery: Adequate sleep supports hormonal balance and overall metabolic health.
Combine these habits with the exercises above, and you’ll create a routine that supports a stronger body and a tighter midsection.
References
- Brobakken, Mathias Forsberg et al. “Abdominal aerobic endurance exercise reveals spot reduction exists: A randomized controlled trial.” Physiological reports vol. 11,22 (2023): e15853. doi:10.14814/phy2.15853
- Saeidifard, Farzane et al. “Differences of energy expenditure while sitting versus standing: A systematic review and meta-analysis.” European journal of preventive cardiology vol. 25,5 (2018): 522-538. doi:10.1177/2047487317752186
The post 5 Standing Exercises That Flatten Stubborn Belly Pooch Faster Than Crunches After 55 appeared first on Eat This Not That.
]]>The post 5 Standing Exercises That Reduce Waist Thickening Faster Than Cardio After 55 appeared first on Eat This Not That.
]]>Why standing exercises? They’re extremely effective in trimming down your waist by activating the entire core. By standing upright, you’re moving against gravity and boosting the calorie burn. You’ll notice your waist trimming down in no time!
“After 55, several physiological changes make abdominal fat easier to gain and harder to lose,” explains Karen Ann Canham, CEO and founder of Karen Ann Wellness, Board-Certified Wellness Coach, and Nervous System Specialist who has almost two decades of experience in wellness and corporate leadership. “First, sarcopenia—the natural loss of muscle mass with age—reduces resting metabolic rate. With less muscle tissue, the body burns fewer calories at rest, making fat accumulation more likely, particularly around the midsection. Second, hormonal changes, including declines in estrogen and testosterone, tend to shift fat storage toward the abdomen. Many adults notice increased central fat even if their overall weight hasn’t changed dramatically.”
In addition, sleep disturbances and chronic stress can heighten cortisol levels, which are connected to increased fat storage in the abdominal region.
While performing cardio promotes a healthy heart, it typically falls short when it comes to providing stimulus to maintain or build muscle mass.
“Standing strength exercises recruit multiple muscle groups at once, increasing overall metabolic demand and helping maintain lean muscle mass,” Canham says. “When adults preserve or build muscle—especially in the legs, hips, and core—they increase resting metabolic rate, meaning the body burns more energy throughout the day.”
Below, Canham shares five standing exercises that reduce waist thickening quicker than cardio alone after 55.
Standing Knee Lifts
“Standing knee lifts with core engagement activate the lower abdominals and hip flexors while maintaining upright posture,” Canham says.
- Start by standing tall with your feet hip-width apart and arms at your sides.
- Lift your left knee up to hip height while keeping your core engaged.
- Lower your foot and repeat on your right side, lifting your right knee up to hip level.
- Continue to alternate knee lifts.
- Perform 2 to 3 sets of 12 to 15 reps on each leg.
RELATED: 5 Easy Standing Exercises That Will Melt Your Love Handles Right Off After 40
Standing Torso Rotations
“Standing torso rotations strengthen the obliques and improve rotational mobility,” Canham says.
- Start standing tall with your feet hip-width apart.
- Cross your arms in front of your chest. Alternatively, hold a medicine ball with arms extended ahead of you.
- Rotate from your core as you twist from side to side, keeping your hips square and feet planted on the ground.
- Perform 2 to 3 sets of 12 to 15 reps on each side.
RELATED: 4 Simple Changes That Burn Belly Fat Without Exercise After 40
Standing Side Bends
“Standing side bends strengthen lateral core muscles and support waist stability,” Canham explains.
- Stand tall, holding a dumbbell in your left hand by your side.
- Slowly bend at your waist toward the left, stretching your obliques as you do so.
- Return to standing.
- Repeat on the right side, holding a dumbbell in your right hand and bending to the right.
- Perform 2 to 3 sets of 10 to 12 reps on each side.
RELATED: 5 Walking Exercises That Flatten Your Stomach Better Than Gym Machines After 50
Standing Cross-Body Punches
“Standing cross-body punches engage the obliques and elevate heart rate slightly while maintaining core control,” Canham says.
- Stand tall with your feet hip-width apart and knees slightly bent.
- Bring your fists up to your chest or chin.
- Punch your left arm forward while maintaining relaxed shoulders and keeping your other hand at your chest.
- Return to the start.
- Repeat by punching your right arm forward.
- Continue to perform 2 sets of 20 alternating punches.
Standing Marches
“Standing marches with abdominal bracing train the deep core while reinforcing balance and posture,” Canham points out.
- Start by standing tall with your feet hip-width apart and arms at your sides.
- Lift your left knee up to hip height while swinging your right arm forward and left arm back. Keep your core engaged.
- Lower your foot and repeat with your right knee, swinging your left arm forward and right arm back.
- Maintain solid posture and steady breathing throughout.
- Perform 2 to 3 sets of 20 marching steps.
The post 5 Standing Exercises That Reduce Waist Thickening Faster Than Cardio After 55 appeared first on Eat This Not That.
]]>The post 5 Morning Exercises That Restore Thigh Strength Faster Than Squats After 55 appeared first on Eat This Not That.
]]>Many of the men and women I work with notice that a few well-chosen morning exercises make a huge difference in how their legs feel. The right movements activate the quads, glutes, and hips while also improving balance and coordination. These exercises also sneak in a little mobility work, which helps the joints move more comfortably throughout the day.
The five movements below combine strength, stability, and mobility to wake up the entire lower body. They target the muscles that support the thighs while encouraging smooth, controlled movement. Perform them regularly, and you’ll build stronger legs, better stability, and a morning routine that leaves you feeling ready to go.
Reverse Lunge with Rotation
The reverse lunge with rotation combines lower-body strength with gentle spinal movement. Stepping backward allows the front leg to drive the effort, which activates the quads and glutes while reducing stress on the knees. Adding torso rotation encourages the hips and spine to move together, improving mobility and coordination. This combination wakes up the legs while engaging the core. Over time, the movement helps restore strength and stability throughout the lower body.
Muscles Trained: Quads, glutes, hamstrings, obliques, and core.
How to Do It:
- Stand tall with your feet hip-width apart.
- Step one leg backward into a reverse lunge.
- Lower your back knee toward the floor with control.
- Rotate your torso toward your front leg.
- Return to standing and repeat on the opposite side.
Recommended Sets and Reps: Perform 3 sets of 8 to 10 reps per leg. Rest for 45 seconds between each set.
Best Variations: Dumbbell reverse lunge with rotation, bodyweight rotational lunge, walking rotational lunge.
Form Tip: Keep your front heel planted firmly on the floor as you rotate your torso.
RELATED: The 8-Minute Standing Routine That Firms Midsection After 55, According to a Coach
Lateral Lunges
Lateral lunges strengthen the thighs while encouraging the hips to move through a wider range of motion. Many daily movements occur in the forward and backward direction, yet the body also benefits from side-to-side strength. This exercise challenges the inner and outer thigh muscles while improving hip mobility. The controlled shift in weight wakes up stabilizing muscles that support balance. Over time, stronger lateral movement improves overall leg strength and coordination.
Muscles Trained: Quads, glutes, inner thighs, and hips.
How to Do It:
- Stand tall with your feet hip-width apart.
- Step one foot out to the side.
- Bend the stepping leg as you push your hips back.
- Keep the opposite leg straight and your chest tall.
- Push through your foot to return to the starting position.
Recommended Sets and Reps: Perform 3 sets of 8 to 10 reps per leg. Rest for 45 seconds between each set.
Best Variations: Bodyweight lateral lunge, dumbbell lateral lunge, alternating side lunge.
Form Tip: Sit your hips back as you step to the side to engage the glutes and inner thighs.
Bodyweight Squats
Bodyweight squats activate the quads, glutes, and hips while reinforcing natural movement patterns. Performing them in the morning helps wake up the major lower-body muscles. The controlled motion also improves mobility through the hips, knees, and ankles. Squats encourage better coordination between the core and legs. With consistent practice, this exercise helps restore strength and confidence in everyday movement.
Muscles Trained: Quads, glutes, hamstrings, and core.
How to Do It:
- Stand with your feet about shoulder-width apart.
- Brace your core and push your hips back.
- Lower into a squat while keeping your chest tall.
- Allow your knees to track over your toes.
- Drive through your heels to return to standing.
Recommended Sets and Reps: Perform 3 sets of 12 to 15 reps. Rest for 45 seconds between each set.
Best Variations: Tempo squats, pause squats, goblet squats.
Form Tip: Keep your weight balanced through your heels and midfoot.
RELATED: If You’re Over 55 and New to the Gym, These 4 Machines Are the Safest Place to Start
Plank with Leg Lift
Plank with leg lifts strengthens the glutes while reinforcing core stability. Lifting one leg forces the hips and core to stabilize the body during the movement. This encourages strong activation in the glutes and thighs. The exercise also promotes balance and coordination between both sides of the body. When practiced regularly, it helps strengthen the muscles that support hip and thigh stability.
Muscles Trained: Glutes, hamstrings, core, and shoulders.
How to Do It:
- Begin in a plank position with your hands beneath your shoulders.
- Brace your core and keep your body in a straight line.
- Lift one leg several inches off the floor.
- Hold briefly while maintaining a stable torso.
- Lower the leg and repeat on the opposite side.
Recommended Sets and Reps: Perform 3 sets of 10 lifts per leg. Rest for 45 seconds between each set.
Best Variations: Forearm plank leg lift, slow tempo plank lift, alternating plank hold.
Form Tip: Keep your hips level as you lift each leg.
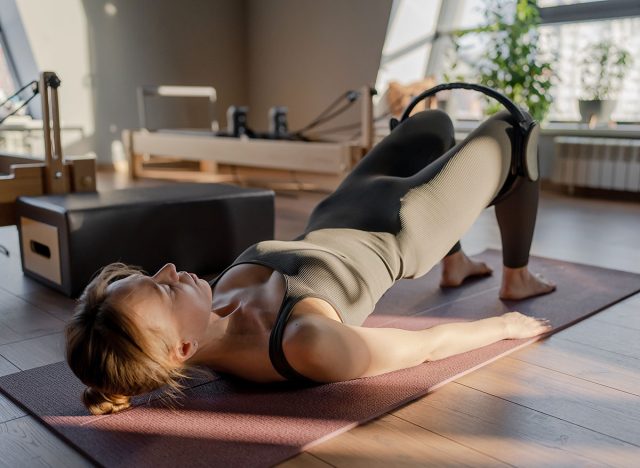
Single-Leg Glute Bridge
The single-leg glute bridge activates the glutes and hamstrings while improving hip stability. Training one leg at a time helps restore balance between both sides of the body. The movement also strengthens the muscles that support the thighs and hips. Strong glutes play a major role in protecting the knees and lower back during daily movement. With consistent practice, this exercise helps rebuild lower-body strength and stability.
Muscles Trained: Glutes, hamstrings, and core stabilizers.
How to Do It:
- Lie on your back with one knee bent and one leg extended.
- Place your foot flat on the floor near your hips.
- Press through your heel and lift your hips upward.
- Squeeze your glutes at the top of the movement.
- Lower your hips slowly and repeat.
Recommended Sets and Reps: Perform 3 sets of 10 to 12 reps per leg. Rest for 45 seconds between each set.
Best Variations: Elevated single-leg glute bridge, pause glute bridge, banded glute bridge.
Form Tip: Drive through your heel and squeeze your glutes at the top.
RELATED: 5 Bed Exercises That Restore Hip Strength Faster Than Stretching After 60
Simple Morning Habits That Help Restore Leg Strength After 55

Starting the day with movement creates momentum that carries into the rest of the day. Morning exercise encourages circulation, wakes up muscles, and prepares the joints for activity. When performed consistently, these small habits help rebuild strength and keep the body feeling capable and energized.
- Move shortly after waking: Gentle exercise early in the day encourages circulation and prepares the body for activity.
- Focus on controlled movement: Smooth repetitions help activate muscles while improving coordination.
- Prioritize hip and thigh engagement: Exercises that involve lunging, squatting, and bridging help strengthen the legs.
- Add light mobility work: Movements that stretch and strengthen simultaneously keep joints comfortable and responsive.
- Stay consistent: A short morning routine performed regularly helps the body maintain strength and stability.
A few minutes of intentional movement each morning can leave your legs feeling stronger, more stable, and ready for the day ahead.
References
- Schumacher, Leah M et al. “Consistent Morning Exercise May Be Beneficial for Individuals With Obesity.” Exercise and sport sciences reviews vol. 48,4 (2020): 201-208. doi:10.1249/JES.0000000000000226
- Wei, Wei et al. “Effects of progressive body-weight versus barbell back squat training on strength, hypertrophy and body fat among sedentary young women.” Scientific reports vol. 13,1 13505. 19 Aug. 2023, doi:10.1038/s41598-023-40319-x
The post 5 Morning Exercises That Restore Thigh Strength Faster Than Squats After 55 appeared first on Eat This Not That.
]]>The post The 8-Minute Standing Routine That Firms Midsection After 55, According to a Coach appeared first on Eat This Not That.
]]>“After 55, several physiological changes contribute to a softer midsection. First, sarcopenia, the age-related loss of muscle mass, reduces overall muscle tone. Core muscles that support the abdomen become less active if they aren’t trained regularly,” explains Canham. “Second, hormonal shifts, particularly declining estrogen and testosterone, tend to redistribute fat toward the abdominal area. Many adults notice more central fat storage even if their weight hasn’t changed significantly.”
In addition, changes to posture and prolonged sitting can weaken the deep core stabilizers. When muscles like the glutes and transverse abdominis lose strength, your abs can look more protruded—even when fat-gain isn’t part of the equation.
“Restoring firmness requires strengthening the core in upright, functional positions, not just doing floor-based ab exercises,” Canham points out. “The most important muscles to target are the ones responsible for stability and posture, not just visible ‘six-pack’ muscles.”
Below, she breaks down a speedy standing workout that can help firm the midsection as you age.
Standing Torso Rotations
- Start standing tall with your feet hip-width apart.
- Cross your arms in front of your chest. Alternatively, hold a medicine ball with arms extended ahead of you.
- Rotate from your core as you twist from side to side, keeping your hips square and feet planted on the ground.
- Perform 2 sets of 12 to 15 reps on each side.
Standing Knee Lifts
- Start by standing tall with your feet hip-width apart and arms at your sides.
- Lift your left knee up to hip height while keeping your core engaged.
- Lower your foot and repeat on your right side, lifting your right knee up to hip level.
- Continue to alternate knee lifts.
- Perform 2 sets of 10 to 12 reps on each leg.
RELATED: 5 Walking Exercises That Flatten Your Stomach Better Than Gym Machines After 50
Standing Side Bends
- Stand tall, holding a dumbbell in your left hand by your side.
- Slowly bend at your waist toward the left, stretching your obliques as you do so.
- Return to standing.
- Repeat on the right side, holding a dumbbell in your right hand and bending to the right.
- Perform 2 sets of 10 to 12 reps on each side.
RELATED: This 20-Minute Bodyweight Workout Melts Hanging Belly Fat Better Than Crunches After 40
Standing Cross-Body Punches
- Stand tall with your feet hip-width apart and knees slightly bent.
- Bring your fists up to your chest or chin.
- Punch your left arm forward while maintaining relaxed shoulders and keeping your other hand at your chest.
- Return to the start.
- Repeat by punching your right arm forward.
- Perform 2 sets of 20 alternating punches.
RELATED: 5 Standing Moves That Shrink Belly Fat Without Getting on the Floor
Standing Marches
- Start by standing tall with your feet hip-width apart and arms at your sides.
- Lift your left knee up to hip height while swinging your right arm forward and left arm back. Keep your core engaged.
- Lower your foot and repeat with your right knee, swinging your left arm forward and right arm back.
- Maintain solid posture and steady breathing throughout.
- Perform 2 sets of 20 marching steps.
The post The 8-Minute Standing Routine That Firms Midsection After 55, According to a Coach appeared first on Eat This Not That.
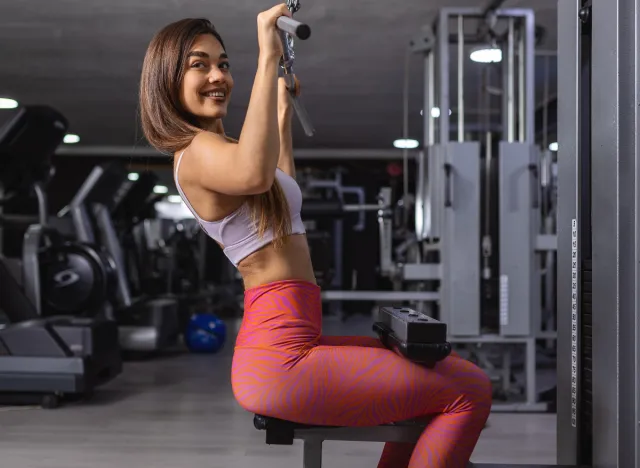
]]>The post If You’re Over 55 and New to the Gym, These 4 Machines Are the Safest Place to Start appeared first on Eat This Not That.
]]>The truth is, most of the barriers people over 55 face aren’t physical. They’re mental. I’ve watched people walk into a gym, look around, and walk right back out without touching a single machine. The fear of looking silly, getting hurt, or simply not knowing where to start is enough to keep people away for years — sometimes forever.
But here’s what I know after 35 years in this field: the gym can absolutely be a safe, welcoming place for older adults. You just need to know where to begin. These four machines are the safest, most effective starting point — and they can meaningfully improve your strength, posture, and daily life within weeks.
Why Machines Beat Free Weights for Beginners
Machines are not inherently better than free weights for strength training. In fact, free weights are generally superior for long-term training. But if you’re over 55 and just starting out, machines are the smarter choice.
Here’s why. Machines guide your movement. The track dictates your range of motion, so you can’t accidentally move the weight in a way that puts pressure on your joints or spine. With free weights, you have to coordinate movement through three dimensions of space, maintain balance, and master technique — a lot to handle when you haven’t worked out in decades.
Machines are also safer if you fail a rep. The weight simply stops moving. There’s no risk of dropping something on yourself. And most machines use a simple stack-and-pin system, so changing the load takes seconds rather than fussing with plates and bars.
Perhaps most importantly for this age group: machines don’t demand core strength. With free weights, your stabilizers have to work to keep you balanced. If your core is weak, that becomes the limiting factor — not your actual strength. A machine supports your body and removes that issue entirely.
There are limitations, of course. Free weights teach functional movement patterns more effectively, and a barbell squat more closely mirrors the motion of standing up from a chair than a leg press does. But if you’re currently doing zero strength training, that’s a moot point. Machines are a safe, effective way to get started — and you can always transition to free weights later.
RELATED: 5 Bed Exercises That Restore Hip Strength Faster Than Stretching After 60
Leg Press
The leg press builds strength in your quads, glutes, and hamstrings — the exact muscles you need for standing up, climbing stairs, and walking. It’s safer than squats because your back is supported against a pad, which eliminates spinal compression and removes any balance requirement. For older adults, this is the single most important machine for maintaining independence.
Muscles Trained: Quadriceps, glutes, hamstrings
How to Do It:
- Sit in the seat with your back flat against the pad
- Place your feet on the platform roughly hip-width apart, in the middle of the footplate
- Keep your feet flat — full contact from heel to toe
- Release the safety handles on either side
- Bend your knees and lower the platform toward you over 3 seconds
- Stop when your knees reach roughly 90 degrees — thighs parallel to the footplate or slightly above
- Push through your heels and extend your legs over 2 seconds back to the starting position
- Don’t lock your knees at the top — keep a very slight bend
Avoid These Mistakes:
- Don’t go deeper than 90 degrees — past that point, stress on the knee joint increases dramatically and your lower back will curl off the pad
- Don’t push through your toes; drive through your heels to keep the load on your glutes and quads, not your knees
- Don’t lock your knees completely at the top — keep them slightly bent throughout
- Don’t let your knees collapse inward; they should track in line with your toes — press them slightly outward if they cave in
Recommended Sets and Reps: 2 sets of 10–12 reps (weeks 1–2); 3 sets of 10–12 reps (weeks 3–8)
Form Tip: Keep your heels fully planted on the footplate throughout the entire movement.
Chest Press
The chest press builds upper body pushing strength — the kind you need for getting up from the floor, pushing open heavy doors, and lifting objects away from your body. It works your chest, shoulders, and triceps without requiring the balance and shoulder stability that free weight pressing demands. This makes it far safer for older adults, especially those with shoulder issues.
Muscles Trained: Chest (pectorals), shoulders (anterior deltoids), triceps
How to Do It:
- Adjust the seat height so the handles align with the middle of your chest when seated
- Sit with your back completely flat against the pad and feet flat on the floor
- Grip the handles with palms facing down or slightly inward, depending on the machine
- Take a breath, then push the handles away from your chest over 2 seconds
- Stop just before your elbows lock — keep a slight bend at full extension
- Hold for 1 second
- Take 3 seconds to bring the handles back toward your chest with control
- Stop when your hands are roughly in line with your chest — don’t let the weight stack touch down between reps
Avoid These Mistakes:
- Don’t set the seat too high or too low — handles above shoulder height shifts stress onto your shoulder joints; too low reduces chest activation; they should align with your mid-chest
- Don’t bounce the weight off the stack between reps; keep tension on the muscles throughout
- Don’t flare your elbows out wide — keep them at roughly 45 degrees from your body to protect the shoulder joint
- Don’t arch your lower back off the pad when pushing; keep your back flat against it for the entire movement
Recommended Sets and Reps: 2 sets of 10–12 reps (weeks 1–2); 3 sets of 10–12 reps (weeks 3–8)
Form Tip: If you feel more stress in your shoulders than your chest, lower the seat one notch.
RELATED: 4 Daily Exercises That Rebuild Knee Strength Faster Than Resistance Bands After 55
Lat Pulldown
The lat pulldown strengthens your back — specifically your lats, rhomboids, and rear deltoids. These muscles are critical for posture. They’re what keeps your shoulders from rounding forward and your upper back from hunching. Strong back muscles also help with pulling movements like opening doors, lifting shopping bags, and maintaining good posture during long periods of sitting.
Muscles Trained: Latissimus dorsi, rhomboids, rear deltoids
How to Do It:
- Adjust the thigh pad so it sits snugly against your thighs when seated — this keeps you anchored during the pull
- Reach up and grip the bar with an overhand grip (palms facing away), hands slightly wider than shoulder-width
- Pull the bar down toward your upper chest over 2–3 seconds, focusing on driving your elbows down and back — not just pulling with your arms
- Bring the bar to roughly chin or upper chest level
- Squeeze your shoulder blades together at the bottom for 1 second
- Take 3 seconds to let the bar rise back up with control until your arms are fully extended
- Don’t let the weight stack crash down
Avoid These Mistakes:
- Don’t pull the bar behind your head — this is hard on your shoulders and neck; always bring it to the front of your body, to your upper chest or chin
- Don’t lean back excessively, which turns this into a rowing motion; keep your torso upright with just a very slight backward lean (5–10 degrees maximum)
- Don’t use momentum or swing to move the weight; if you’re rocking back and forth, reduce the load and control the movement
- Don’t pull with your arms — think about pulling your elbows down toward your hips, not pulling your hands down; this cue is what actually activates your back
Recommended Sets and Reps: 2 sets of 10–12 reps (weeks 1–2); 3 sets of 10–12 reps (weeks 3–8)
Form Tip: Imagine tucking your elbows into your back pockets — that mental cue gets the lats firing properly.
Seated Row
The seated row works the middle back muscles — your rhomboids, middle traps, and rear delts. Together with the lat pulldown, this machine creates balanced back development and directly combats the rounded-shoulder posture that’s so common in older adults. It’s also one of the safest upper body exercises because your chest is supported against a pad, which protects your lower back throughout the movement.
Muscles Trained: Rhomboids, middle trapezius, rear deltoids
How to Do It:
- Adjust the seat so the handles are at chest height when seated
- Sit with your chest against the pad and feet flat on the floor or footrests
- Grip the handles — start with a neutral grip (palms facing each other)
- Pull the handles toward your torso over 2–3 seconds, focusing on squeezing your shoulder blades together rather than just bending your elbows
- Bring the handles back until your hands are alongside your ribcage
- Hold and squeeze for 1 second
- Take 3 seconds to extend your arms back to the starting position with control — arms fully extended, but don’t let your shoulder blades roll forward excessively
Avoid These Mistakes:
- Don’t pull with your arms — your arms are just hooks; the movement should come from retracting your shoulder blades; think about pinching a pencil between them as you pull
- Don’t round your upper back forward at the start of each rep; keep your chest against the pad and maintain a slight arch in your upper back throughout
- Don’t pull the handles too high toward your neck or too low toward your hips; they should move straight back toward the middle of your ribcage
- Don’t let the weight stack slam down between reps; control the weight all the way back to the starting position — that lowering phase is just as important as the pull
Recommended Sets and Reps: 2 sets of 10–12 reps (weeks 1–2); 3 sets of 10–12 reps (weeks 3–8)
Form Tip: If you feel this more in your biceps than your back, reduce the weight and slow the movement down.
RELATED: 5 Daily Exercises That Restore Leg Muscle Faster Than Weight Training After 50
How to Structure Your Weekly Routine
For someone new to the gym or returning after years away, simplicity and consistency matter more than complexity. Here’s a structure that works.
Train three days per week on non-consecutive days. Monday, Wednesday, Friday is the standard. This gives you one full day of recovery between sessions, which is critical for older adults whose recovery capacity is lower than younger people. Your muscles don’t grow during the workout — they grow during recovery. Without adequate rest, you’ll accumulate fatigue without building strength.
Each session should include all four machines in this order: leg press, chest press, lat pulldown, seated row. This sequence is deliberate. You start with the largest muscle groups when you’re fresh, then move to upper body pushing, then upper body pulling. It prevents fatigue in one muscle group from limiting your performance in the next.
Your session looks like this:
- 5-minute warm-up on the treadmill or stationary bike at an easy pace
- Leg press — 2 or 3 sets of 10–12 reps, 60–90 seconds rest between sets
- Chest press — 2 or 3 sets of 10–12 reps, 60–90 seconds rest
- Lat pulldown — 2 or 3 sets of 10–12 reps, 60–90 seconds rest
- Seated row — 2 or 3 sets of 10–12 reps, 60–90 seconds rest
- 5-minute cool-down stretching (quads, hamstrings, chest, and back)
The whole session should take 30–40 minutes including warm-up. Rest for 60–90 seconds between sets — for older adults, adequate rest matters more than it does for younger people. Don’t rush.
On non-training days, stay active but avoid intense exercise. Walking is perfect. Light stretching or yoga is fine. The goal is movement without stress — you’re promoting recovery, not adding training stimulus.
What to Expect in the First 8 Weeks
The first changes happen within the first week, but they’re not physical — they’re neurological. Movements that felt awkward on day one will feel smoother by day three or four. Your nervous system is learning to activate the right muscles in the right sequence. Adaptation without muscle growth yet.
By week two, you’ll notice functional improvements in daily life. Getting up from low chairs will be easier. Carrying shopping bags won’t feel as taxing. Posture will improve slightly because your back muscles are starting to fire properly.
At four weeks, you’ll see measurable strength increases. The weights you struggled with in week one will feel manageable, and you’ll need to increase the load to maintain the same level of challenge. Research shows beginners can gain 20–30% strength in the first month of training, primarily from neural adaptations.
At eight weeks, you’ll see visible changes. Your legs will look more toned. Your shoulders will appear broader and your upper back will sit flatter. Clothes will fit differently — often looser around the waist and tighter around the thighs and shoulders. Other people will start commenting that you look healthier or that your posture has improved.
By that point, you should be lifting 30–50% more than you started with across all four machines. If you started the leg press at 30kg, you should be pressing 40–45kg. If you began the chest press at 15kg, you should be at 20–25kg. Those increases are normal and expected.
RELATED: 5 Bed Exercises That Flatten Belly Pooch Faster Than Gym Machines After 55
Here are four signs it’s time to progress:
- You can complete 12 reps for all 3 sets with proper form and feel like you could do more — add 1 plate (2–5kg depending on the machine) and stay within the 10–12 rep range
- The workout feels easy and you’re not tired afterward — you’re over-adapted; step up to 4 sets per exercise or add a fifth machine
- You’re consistently finishing in under 25 minutes (not counting warm-up and cool-down) — you’re either resting too briefly or not pushing hard enough; add more weight or more volume
- You’ve been on the same routine for 8–10 weeks with no changes — add a hamstring curl machine, shoulder press, or a cable exercise to keep challenging yourself
What you shouldn’t expect after 4–8 weeks is a body transformation. You won’t lose 10kg of body fat or go from couch to fitness model. Strength training does exactly what it says: it makes you stronger and builds muscle. Fat loss comes from nutrition. These workouts will boost your resting metabolism and help preserve muscle mass, but you’ll still need to change your diet if fat loss is the goal.
What you can expect after 8 weeks of solid training: you’ll be stronger, more confident, and feeling better in daily life. You’ll have built a routine you can carry forward — one that will keep improving your life for decades to come. It’s not glamorous, but it will genuinely change things.
The post If You’re Over 55 and New to the Gym, These 4 Machines Are the Safest Place to Start appeared first on Eat This Not That.
]]>