The post If You Can Hold a Wall Sit This Long After 60, Your Leg Strength Is Top-Tier appeared first on Eat This Not That.
]]>These muscles also act as stabilizers for your knees and hips. When the lower body stays strong, it absorbs force more efficiently and keeps joints aligned during movement. That support reduces strain on the knees and lower back while helping your body stay steady during prolonged activity.
A wall sit offers one of the simplest ways to test that strength. The position forces your quads and glutes to maintain steady tension while your body remains stable against the wall. The amount of time you can hold that position reveals a lot about the strength and endurance of your lower body. Ahead, you’ll learn why the wall sit works so well, how to perform it correctly, what your hold time says about your leg strength, and how to build stronger legs.
RELATED: The 7-Minute Standing Routine That Restores Core Strength Faster Than Floor Exercises After 60
Why the Wall Sit Is an Important Movement
The wall sit challenges your legs to support your body weight while you remain in a fixed position. Many everyday tasks require this same type of muscular endurance. Waiting in line, lowering yourself into a chair, or holding a steady stance during movement all place similar demands on your legs.
Your quads carry most of the load during a wall sit, while your glutes and core help stabilize your posture. Holding the position requires these muscles to stay engaged for an extended period without relying on momentum. That sustained tension helps build fatigue resistance in the muscles responsible for walking, standing, and climbing.
The wall sit also reinforces joint control around the knees and hips. When your legs stay strong in this position, your body learns to maintain alignment even as fatigue builds. That control plays a major role in protecting your joints and supporting long-term mobility.
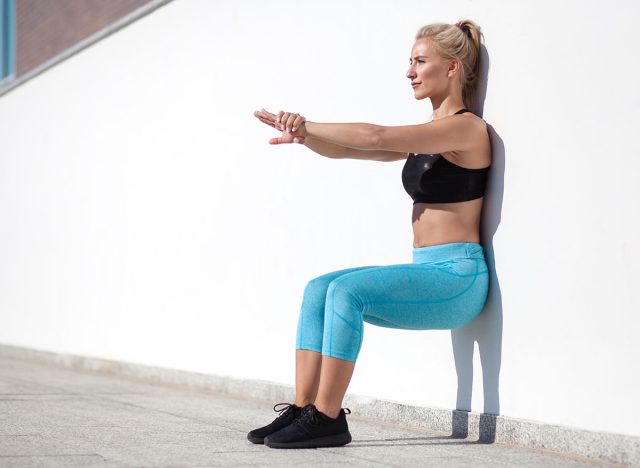
How to Perform the Best Wall Sit Technique
A proper wall sit requires strong positioning and steady muscular tension. Your goal is to maintain a stable squat position with your back supported by the wall. When your posture stays consistent throughout the hold, the exercise becomes an accurate measure of leg strength and endurance.
How to Do It:
- Stand with your back against a wall and your feet about two feet in front of you.
- Slide your back down the wall while bending your knees.
- Lower until your thighs reach roughly parallel to the floor.
- Place your feet flat on the ground with your knees stacked over your ankles.
- Keep your chest tall and your core braced while maintaining contact with the wall.
- Hold the position until your legs begin to shake or your posture breaks.
Best Variations: Single-Leg Wall Sit, Weighted Wall Sit, Heels-Elevated Wall Sit, Banded Wall Sit, Alternating Leg Lift Wall Sit.
RELATED: 5 Exercises Personal Trainers Recommend for Clients Over 60 Who Haven’t Worked Out in Years
Wall Sit Strength Rankings After 60

This test measures how long you can hold a stable wall sit position without standing up or adjusting your posture.
- Under 20 seconds: Needs Improvement
This range suggests your lower-body strength and endurance could use additional training.
- 20 to 45 seconds: Average
Your legs can support most daily activities, though fatigue may appear during longer efforts.
- 45 to 75 seconds: Above Average
This score reflects strong quads and glutes with good muscular endurance.
- 75+ seconds: Top-Tier
This level demonstrates excellent leg strength and fatigue resistance. Your lower body maintains stability even as the hold becomes demanding.
The Best Tips for Building Stronger Legs After 60

Lower-body strength improves steadily with consistent training and controlled movement. These strategies help increase your wall sit time while supporting joint health and mobility.
- Train your legs two to three times per week: Regular strength work helps build muscular endurance and stability.
- Practice wall sits consistently: Short holds performed several times per week gradually increase your tolerance for the position.
- Add squats and step-ups: These movements target the same muscle groups as wall sits.
- Strengthen your glutes and hips: Bridges and hip thrusts improve hip stability and reduce knee strain.
- Maintain mobility in your hips and ankles: Better joint movement helps you maintain stronger squat positions.
Strong legs support confident movement and long-term independence. If you can hold a wall sit for an extended time with solid posture, your lower body shows the strength and stability needed to stay active for years to come.
References
- Strollo, S E et al. “A review of the relationship between leg power and selected chronic disease in older adults.” The journal of nutrition, health & aging vol. 19,2 (2015): 240-8. doi:10.1007/s12603-014-0528-y
- Cho, Kang Hee et al. “Effect of lower limb strength on falls and balance of the elderly.” Annals of rehabilitation medicine vol. 36,3 (2012): 386-93. doi:10.5535/arm.2012.36.3.386
The post If You Can Hold a Wall Sit This Long After 60, Your Leg Strength Is Top-Tier appeared first on Eat This Not That.
]]>The post If You Can Hold a Plank This Long After 60, Your Core Strength Is Stronger Than 90% of Peers appeared first on Eat This Not That.
]]>One thing I’ve noticed coaching clients over the years is that core strength often shows up in subtle ways before people even realize it. Your balance feels steadier. Posture improves. Every day movements feel smoother and less effortful. The core acts like the body’s central support system, quietly doing its job behind the scenes every time you move.
That’s where the plank comes into the picture. This simple position challenges the entire core while also recruiting the shoulders, hips, and legs to work together. Unlike exercises that involve bending or twisting, the plank trains the muscles to stabilize the spine. That ability to maintain control under tension makes it one of the most reliable measures of core strength.
The best part is that the plank works as both a test and a training tool. The longer someone can hold a strong plank position, the greater the endurance of their core muscles. That’s why coaches frequently use plank hold times as a quick benchmark for overall core strength.
RELATED: The 7-Minute Standing Routine That Shrinks Hip Dip Fat After 45, According to a Trainer
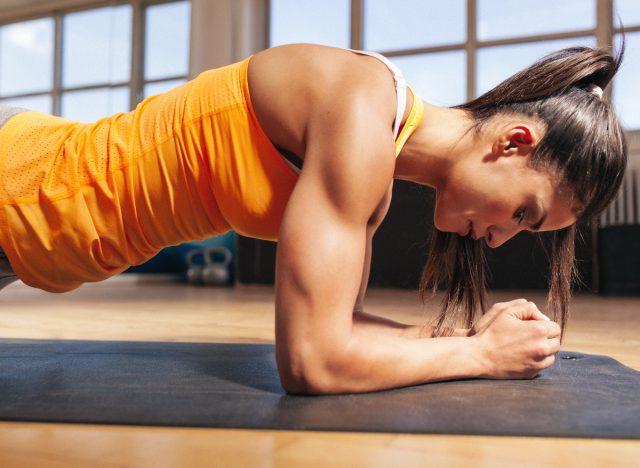
How to Execute a Perfect Plank
Before worrying about how long you can hold a plank, it’s important to focus on quality. A strong plank position keeps the body aligned from head to heels while the core muscles stay engaged throughout the hold.
Follow these steps to perform a proper plank:
- Start face down on the floor with your forearms under your shoulders.
- Straighten your legs behind you and plant your toes on the ground.
- Lift your body so it forms a straight line from head to heels.
- Brace your core and squeeze your glutes.
- Hold the position while breathing steadily.
Form Tip: Avoid letting your hips sag or rise too high. Your body should remain in one straight line throughout the hold.
RELATED: 4 Bed Exercises That Restore Thigh Strength Faster Than Leg Press After 65
Plank Strength Rankings After 60
Plank hold times provide a useful way to measure core endurance. The longer someone maintains proper alignment, the stronger and more resilient the stabilizing muscles around the spine become. This matters because those muscles help protect the lower back, support posture, and improve balance during everyday activities.
While everyone’s starting point looks a little different, plank times can give a helpful snapshot of where your core strength stands. Use the rankings below as a general guideline for assessing your performance.
How Do You Rank
- Below Average: Less than 20 seconds
- Average: 20 to 40 seconds
- Good: 40 to 60 seconds
- Very Good: 60 to 90 seconds
- Top 10%: 90 seconds or longer
If you can maintain a strong plank for 90 seconds or more, your core strength likely exceeds 90% of most people in your age group.
How to Improve Your Plank Score
Building a longer plank hold often comes down to consistency and proper progression. The goal is to strengthen the core’s stabilizing muscles while gradually increasing the time they can remain under tension.
Here are several effective strategies for improving your plank score:
- Practice shorter holds more frequently: Multiple sets of 20 to 30 seconds often build endurance faster than a single long hold.
- Focus on perfect alignment: Keeping your body in a straight line activates the correct muscles and prevents energy leaks.
- Strengthen supporting muscles: Exercises like glute bridges, bird dogs, and dead bugs help reinforce core stability.
- Add plank variations: Side planks, plank shoulder taps, and plank marches challenge the core in different ways.
- Progress gradually: Add five to ten seconds to your hold time as your strength improves.
Consistent practice usually produces noticeable improvements within a few weeks.
RELATED: 5 Dumbbell Exercises That Restore Shoulder Strength Faster Than Lifting Weights After 55
Best Daily Tips for Building Core Strength
A strong core develops through regular movement and smart training habits. The muscles that stabilize the spine respond well to consistent exercise and controlled repetitions. Small daily habits can make a meaningful difference in how the body feels and moves.
- Train the core regularly: Short sessions performed several times per week help build endurance.
- Strengthen the hips and glutes: These muscles work together with the core to stabilize the body.
- Maintain upright posture throughout the day: Sitting and standing tall encourages the core to stay engaged.
- Prioritize controlled movement: Smooth, deliberate repetitions activate deeper stabilizing muscles.
- Stay consistent with your routine: Regular practice helps the core grow stronger and more resilient.
Stick with these habits and your core will continue supporting stronger movement, better balance, and greater confidence in everyday activity.
Reference
- Kang, Kwon-Young. “Effects of core muscle stability training on the weight distribution and stability of the elderly.” Journal of physical therapy science vol. 27,10 (2015): 3163-5. doi:10.1589/jpts.27.3163
- Park, Sihwa et al. “Effects of plank exercise on respiratory capacity, physical fitness, and immunocytes in older adults.” Journal of exercise rehabilitation vol. 19,6 332-338. 26 Dec. 2023, doi:10.12965/jer.2346536.268
The post If You Can Hold a Plank This Long After 60, Your Core Strength Is Stronger Than 90% of Peers appeared first on Eat This Not That.
]]>The post If You Can Hold a Side Plank This Long After 60, Your Core Stability Is Top-Tier appeared first on Eat This Not That.
]]>We spoke with Karen Ann Canham, CEO and founder of Karen Ann Wellness, a board-certified wellness coach and nervous system specialist with nearly two decades of experience in wellness and corporate leadership, to learn how long you should be able to hold a side plank after 60 for your core stability to rank as top-tier.
Why Core Stability Matters

A strong, stable core is one of the most critical foundations of safe movement as you grow older.
“A strong core helps: maintain upright posture, reducing strain on the spine; stabilize the pelvis during walking, which improves gait efficiency; improve balance reactions when the body is pushed or shifts unexpectedly; [and] reduce fall risk, especially during movements like stepping, turning, or reaching,” Canham notes. “Research consistently shows that older adults with stronger core and hip stabilizers have better balance control and greater confidence in daily movement.”
RELATED: If You Can Hold a Plank This Long After 50, Your Core Is Stronger Than Most
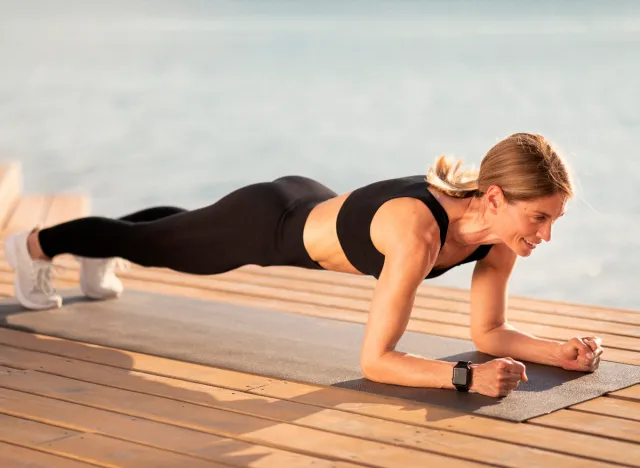
If You Can Hold a Side Plank This Long After 60, Your Core Stability Is Top-Tier
For those 60+, core endurance benchmarks shift naturally due to joint tolerance, muscle mass, and recovery capacity.
“A solid baseline for most healthy adults over 60 is holding a side plank for 15 to 25 seconds per side with good form,” says Canham. “An above-average hold would be 30 to 45 seconds per side, while 60 seconds or more with stable alignment would be considered exceptional for this age group.”
What’s most important is maintaining solid alignment. This means keeping your shoulders stacked, spine neutral, and hips lifted rather than aiming for a longer time while using poor form.
RELATED: If You Can Do This Many Squats After 50, You Are in Great Shape
Muscles Side Planks Activate

Side planks engage several important stabilizing muscles that work in unison to support the pelvis and spine. The main muscles fired up in side planks include the obliques, glute medius, glute maximus, transverse abdominis (also known as the deep “corset” muscle), and quadratus lumborum.
“Together, these muscles create a strong lateral support system for the spine, allowing the body to resist side-to-side movement,” Canham tells us.
RELATED: Over 50? If You Can Do This Many Knee Pushups, Your Upper Body Is Stronger Than Most
Side Planks Train Anti-Lateral Flexion
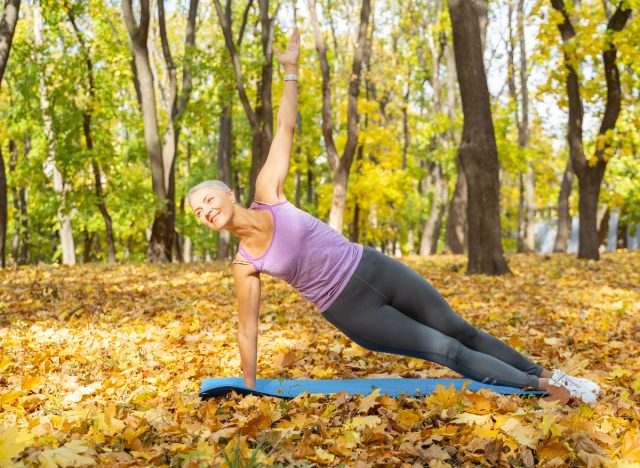
While classic front planks mainly challenge anti-extension strength—which helps your lower back resist arching—side planks train anti-lateral flexion. This means your body must resist the urge to bend sideways.
“This is particularly important because many balance challenges in everyday life occur side-to-side, such as stepping off a curb, carrying a bag, or recovering from a stumble,” Canham explains. “Side planks also activate the obliques and hip stabilizers more directly than front planks, making them especially valuable for improving lateral stability and fall resistance in older adults.”
The post If You Can Hold a Side Plank This Long After 60, Your Core Stability Is Top-Tier appeared first on Eat This Not That.
]]>The post The 7-Minute Dumbbell Routine That Builds More Muscle Than Most Gym Workouts After 60 appeared first on Eat This Not That.
]]>Why Traditional Gym Workouts Fail After 60
Once we’re over 60, we can’t train like we did when we were 30 or 40. The most significant reason is anabolic resistance — our muscles just don’t respond as well to growth signals as they used to. Testosterone and growth hormone levels are lower. Muscle protein synthesis rates are lower. We take longer to recover. Our joints aren’t as resilient. Doing the typical gym workout designed for a 25-year-old is going to leave you exhausted, sore, and without the results you want.
Most traditional gym programmes are volume-based: 3 sets of this, 4 sets of that, multiple exercises per muscle group. This creates way too much inflammation in someone over 60, and your body can’t recover quickly enough. You’re just spinning your wheels while you’re constantly sore.
The other big problem is intensity. So many older people are told to “not push it” and to “just use lighter weights and do more reps.” This isn’t how it works. You need to challenge your muscles. 20 reps with a light weight will leave you winded, but it’s not going to be enough to stimulate a strength response. What does work is putting real effort into shorter sessions, then recovering properly. That’s how you get results.
RELATED: 5 Standing Exercises That Restore Posture Faster Than Floor Exercises After 60
Why Dumbbells Are the Best Tool After 60
Machines lock you into fixed movement patterns. When you’re 60 or older, your joints don’t all move the same way they did when you were younger. Your right shoulder might have a slightly different range of motion than your left. Your hips might be tighter on one side. Machines don’t account for this, and that’s how you end up with pain or injury.
Dumbbells let you move naturally. Your body finds the path that works for your joints — and this matters more as we age, because our bodies have decades of compensation patterns built in. Dumbbells work with those patterns instead of fighting against them.
Bodyweight training has its place, but there’s a limit to how much resistance you can create. For muscle growth, you need progressive overload — gradually increasing the challenge. With bodyweight alone, progression gets complicated. You need to learn more difficult movement variations, which often require better mobility or balance than most people over 60 have.
Dumbbells make progression simple. Start with 2kg. Move to 3kg. Then 4kg. No complex movement patterns to learn, no mobility requirements you might not meet. They also force stability work — when you press a dumbbell overhead, your core has to stabilise and the smaller muscles around your shoulder have to work. Machines do this for you, which means those muscles don’t develop. Over 60, those stabilising muscles are exactly what keep you functional and injury-free.
Why 7 Minutes Beats a Longer Session
![]()
Recovery is the limiting factor after 60, not your ability to do work. A 45-minute gym session might feel productive, but if it takes you three days to recover, you can’t train frequently enough to build muscle. You end up training twice a week at best, and that’s not enough stimulus.
A 7-minute routine done with genuine effort creates the muscle-building stimulus you need without overwhelming your recovery capacity. You can do this four or five times per week because you’re not destroying yourself each session. More frequent training means more growth signals sent to your muscles across the week.
Longer sessions also mean more exercises, and more exercises mean more room for poor form when you’re tired. Form breakdown is how people get injured. A short routine keeps you fresh — every rep is quality, every set is done with control.
The psychological aspect matters too. Seven minutes is doable. You don’t need to psyche yourself up for it or block out half your morning. You just do it. That consistency compounds. Most people fail not because they can’t do a hard workout — they fail because they can’t sustain the habit.
RELATED: 5 Morning Exercises That Restore Thigh Strength Faster Than Squats After 55
Goblet Squat
This targets your quads, glutes, and core — the muscles that keep you mobile and independent. After 60, leg strength determines whether you can get up from a chair without using your hands, whether stairs feel manageable, whether you feel stable when you walk.
Muscles Trained: Quads, glutes, core
How to Do It:
- Hold one dumbbell vertically at chest height with both hands underneath the top weight plate
- Stand with feet shoulder-width apart
- Keep your chest up and core tight
- Sit back and down as if sitting into a chair, going as low as your mobility allows without your lower back rounding
- Push through your whole foot to stand back up
- Breathe in as you lower, breathe out as you stand
Modifications:
- For knee pain: don’t go as deep — a quarter or half squat still works the muscles
- For hip tightness: widen your stance and turn your toes out slightly
- For balance issues: hold a sturdy surface with one hand and hold the dumbbell in the other
Avoid These Mistakes:
- Don’t let your knees cave inward — push them out in line with your toes throughout the movement
- Don’t round your lower back at the bottom — only go as deep as you can while keeping your back flat
Recommended Sets and Reps: 3 sets of 8–10 reps (2 minutes)
Form Tip: Start with 4–6kg. If you can easily do 15 reps, go heavier. If you can’t complete 8 reps with good form, go lighter. Progress by adding 1–2kg once you can do 3 sets of 10 comfortably.
Dumbbell Romanian Deadlift
This builds your hamstrings, glutes, and lower back — the posterior chain. These muscles are underworked in most people over 60 because we spend too much time sitting. Strengthening them improves posture, reduces back pain, and makes bending down to pick things up safer.
Muscles Trained: Hamstrings, glutes, lower back
How to Do It:
- Hold a dumbbell in each hand in front of your thighs
- Stand with feet hip-width apart, knees slightly bent
- Hinge at your hips by pushing them back, lowering the dumbbells down the front of your legs
- Keep your back flat and core tight throughout
- Go down until you feel a stretch in your hamstrings
- Drive your hips forward to stand back up, keeping the dumbbells close to your legs the entire time
Modifications:
- For lower back sensitivity: reduce the range of motion — you don’t need to go below knee height
- For tight hamstrings: don’t worry about how low you go — the stretch you feel is the point
- For grip strength issues: use wrist straps, or hold one heavier dumbbell with both hands instead of two lighter ones
Avoid These Mistakes:
- Don’t round your back — keep your chest up and shoulder blades pulled back
- Don’t bend the knees too much — this becomes a squat rather than a hip hinge, so keep your knees in roughly the same position throughout
Recommended Sets and Reps: 3 sets of 8–10 reps (2 minutes)
Form Tip: Start with 3–5kg in each hand. Progress when you can complete all sets with control and still feel challenged by the last few reps.
RELATED: The 8-Minute Standing Routine That Firms Midsection After 55, According to a Coach
Dumbbell Shoulder Press
This targets your shoulders and triceps. Strong shoulders mean you can lift things overhead, put items on high shelves, and maintain good posture. After 60, shoulder weakness leads to that forward-rounded posture that makes you look and feel older.
Muscles Trained: Shoulders, triceps
How to Do It:
- Hold a dumbbell in each hand at shoulder height, palms facing forward
- Stand with feet hip-width apart, core engaged
- Press both dumbbells straight up until your arms are fully extended overhead
- Lower them back down under control to shoulder height
- Don’t let your lower back arch as you press up
Modifications:
- For shoulder pain: reduce the range of motion — press only halfway up if that’s pain-free
- For limited mobility: use a seated position with back support
- If pressing overhead hurts: substitute with a front raise to shoulder height instead
Avoid These Mistakes:
- Don’t arch your lower back to help press the weight up — keep your core tight and ribs down
- Don’t shrug your shoulders up toward your ears — keep your shoulder blades down and back throughout the movement
Recommended Sets and Reps: 3 sets of 8–10 reps (2 minutes)
Form Tip: Start with 2–4kg in each hand. Shoulders are more prone to injury than legs, so be conservative with weight at first and progress slowly.
Dumbbell Bent-Over Row
This builds your upper back and biceps. A strong back pulls your shoulders back and down, counteracting the forward slump from sitting. It also improves grip strength, which predicts longevity better than almost any other fitness marker.
Muscles Trained: Upper back, biceps
How to Do It:
- Hold a dumbbell in each hand and hinge forward at the hips with a flat back, knees slightly bent
- Let the dumbbells hang straight down
- Pull both dumbbells up to your ribs by driving your elbows back
- Squeeze your shoulder blades together at the top
- Lower under control — your torso stays still, only your arms move
Modifications:
- For lower back issues: support yourself with one hand on a bench or chair and row one arm at a time
- For grip problems: use straps
- For shoulder discomfort: don’t pull as high — rowing to your hips instead of your ribs is fine
Avoid These Mistakes:
- Don’t use momentum or swing the weights up — the movement should be controlled throughout
- Don’t round your lower back — keep your back flat for the entire set
Recommended Sets and Reps: 2 sets of 10–12 reps (1 minute)
Form Tip: Start with 3–5kg in each hand. Progress when the last few reps of each set feel challenging but you can still maintain form.
RELATED: If You’re Over 55 and New to the Gym, These 4 Machines Are the Safest Place to Start
How To Structure Your Week

Four days per week is the target. Monday, Tuesday, Thursday, Friday works well — this gives you frequent stimulus without overdoing it. Three days is the minimum for muscle growth after 60. Five days is fine if you’re recovering well, but four is the sweet spot for most people.
Time of day matters less than consistency. Morning works well because it’s done before life gets in the way — your body warms up during the routine, so you don’t need to be fully awake. Evening works if you prefer it, but don’t train within two hours of bed, as it can interfere with sleep.
What matters more is training at the same time each day. Your body adapts to perform at whatever time you consistently train. Pick a time that fits your schedule and stick to it.
What To Eat Before and After

Before training, you don’t need anything special. If you train first thing in the morning, training fasted is fine. If you prefer to eat something, a piece of fruit or a slice of toast 30 minutes before is enough. The goal is to not feel hungry or sluggish — nothing more complicated than that.
After training is where nutrition matters. Within an hour of finishing, eat 25–30 grams of protein. This could be two eggs and some Greek yoghurt, a protein shake, or a small piece of chicken or fish. After 60, your muscles are less responsive to protein, so you need more of it to trigger muscle growth.
Across the whole day, aim for 1.6 grams of protein per kilogram of body weight. For a 70kg person, that’s roughly 110 grams of protein per day. Spread it across three or four meals — breakfast, lunch, dinner, and maybe a snack. Don’t worry about complicated timing strategies or specific foods. Just get enough protein consistently, and your muscles will have what they need to grow.
RELATED: 5 Bed Exercises That Restore Hip Strength Faster Than Stretching After 60
What To Expect in 4 to 6 Weeks
During the first two weeks, you’ll notice nothing in the mirror. You will notice things feeling easier — standing up from a chair, climbing stairs, better posture without consciously trying. This is neural adaptation: you’re getting better at using the muscle mass you already have.
By week four, small changes start to appear. Your legs look slightly more defined. Your shoulders look slightly wider. Clothes fit slightly differently — looser around the abdomen, tighter in the legs and shoulders. Other people notice you look a bit healthier. Other people ask if you’ve lost weight, despite the number on the scale not changing at all.
By week six, the strength gains are undeniable. You’re using heavier dumbbells than when you started. Movements that were difficult at first now feel normal. You feel more confident because you can feel yourself getting stronger.
On an everyday level, you’ll notice things like:
- Carrying shopping bags seems easier
- You can lift a suitcase into an overhead plane compartment without asking for help
- You can stand up from a low chair without pushing off with your hands
These are subtle differences, but they make a huge difference in how capable you feel. The most important thing you’ll notice after six weeks is that training is now a habit. You don’t need to motivate yourself to do it. It’s just something you do. That’s when the real long-term changes begin.
The post The 7-Minute Dumbbell Routine That Builds More Muscle Than Most Gym Workouts After 60 appeared first on Eat This Not That.
]]>The post If You Can Do This Many Squats After 55, Your Leg Strength Is Top 10% appeared first on Eat This Not That.
]]>So now that you know the importance of incorporating squats in your life, let’s see if your leg strength is in the top 10% after 55. Challenge yourself by trying to perform this many squats—and if you can, kudos to you! If not, consider adding more squats to your routine.
How Many Bodyweight Squats Signal Peak Lower-Body Strength
“While normative data varies slightly by study, for an individual over the age of 55, completing 45 or more consecutive bodyweight squats with proper form places them in the top tier (top 10%) of muscular endurance for their age group,” explains Matt Bandelier, director of business development at Eden Health Club. “For the general population in this demographic, the average is closer to 19 to 25 reps.”
Hitting more than 45 bodyweight squats indicates exceptional balance, joint health, muscular stamina, and aerobic capacity.
RELATED: If You Can Do These 8 Lower-Body Moves, Your Leg Strength Is Elite
What To Know About Muscular Endurance vs. Max Strength
Performing consecutive bodyweight squats mainly reflects muscular endurance rather than maximal strength. True strength is defined as the ability to exert maximal force against resistance, such as lifting a heavy box, while endurance means being able to repeat a sub-maximal effort over time.
“However, for the 55+ demographic, high-rep bodyweight proficiency is a strong proxy for functional strength,” Bandelier points out. “If you can move your own bodyweight 45 times, you possess enough base strength for essentially all activities of daily living. If your goal is to build bone density or maximal power, you would eventually need to add external load (weights) rather than just adding more reps.”
RELATED: If You Can Pass These 3 Drills, You’re Moving Better Than Most People at Any Age
What Muscles Are Mainly Responsible for Squat Performance?

The main drivers behind squat performance include the quads and glutes. For adults 55+, the lower back and core play a major role in helping you maintain a tall torso, preventing the collapse that typically stops the set before your legs fatigue.
“Additionally, mobility in the ankles and strength in the calves are critical for balance and achieving full depth,” Bandelier says.
The post If You Can Do This Many Squats After 55, Your Leg Strength Is Top 10% appeared first on Eat This Not That.
]]>The post If You Can Hold These 4 Positions After 55, Your Hip Mobility Is Elite appeared first on Eat This Not That.
]]>In my coaching work, hip mobility is one of the first things I look at when someone wants to feel better moving around. Over time, I’ve seen how quickly tight hips can limit stride length, posture, and even lower back comfort. The flip side is just as powerful. When people consistently train these positions, their movement often improves faster than they expect. It does not require extreme stretching sessions, just smart, focused holds done with intent.
The four positions below give you a clear snapshot of your hip mobility. If you can hold these with control and good alignment, your hips are in excellent shape for your age. Let’s break down what to aim for and how to do each one correctly.
RELATED: The 8-Minute Morning Routine That Tightens Arm Flab Faster Than Weight Training After 55
Half-Kneeling Hip Flexor Stretch Hold
This position opens the front of the hips, an area that often tightens with prolonged sitting and reduced activity. Improving hip flexor length can help restore stride mechanics and reduce stress on the lower back. I like this hold because it teaches you to control pelvic position while the hip extends. When performed correctly, it creates a deep but comfortable stretch through the front of the trailing leg. It also reinforces posture awareness.
Muscles Trained: Hip flexors, glutes, deep core stabilizers, and quadriceps
How to Do It:
- Kneel on your right knee with your left foot planted in front of you.
- Brace your core and gently tuck your hips under.
- Shift your body forward until you feel a stretch in the front of your right hip.
- Keep your chest tall and your ribs stacked over your hips.
- Hold the position while breathing slowly.
- Switch sides after the hold time.
Recommended Sets and Reps: Perform 2 to 3 sets of 20 to 40 second holds per side. Rest for 30 to 45 seconds between each set.
Best Variations: Supported hip flexor stretch, overhead reach stretch, couch stretch
Form Tip: Keep your hips tucked slightly to avoid arching your lower back.
Deep Squat Hold
The deep squat hold challenges hip flexion, ankle mobility, and core control simultaneously. This position reflects real-world mobility that carries over to daily movement patterns. I often use it as a quick check because it exposes restrictions quickly. When someone can sit comfortably in a deep squat, their hips usually move very well. It also builds strength at the bottom range while you hold.
Muscles Trained: Glutes, hip adductors, quadriceps, and core stabilizers
How to Do It:
- Stand with your feet slightly wider than shoulder width.
- Brace your core and sit your hips down and back.
- Lower into the deepest squat position you can control.
- Keep your heels grounded on the floor.
- Hold your chest tall and your knees tracking over your toes.
- Breathe steadily during the hold.
Recommended Sets and Reps: Perform 2 to 3 sets of 20 to 45 second holds. Rest for 45 to 60 seconds between each set.
Best Variations: Supported squat hold, goblet squat hold, heels elevated squat hold
Form Tip: Think about spreading the floor apart with your feet to stay stable.
RELATED: 4 Daily Exercises That Rebuild Joint Strength After 60
Figure Four Stretch Hold
The figure four targets the outer hips and glutes, which often tighten with age and reduced rotational movement. Improving this area supports smoother hip rotation and can ease tension through the lower back. I like this position because it gives clear feedback on side-to-side differences. Many clients feel one hip opens faster than the other. Consistent practice helps even things out and improves overall hip comfort.
Muscles Trained: Glutes, deep hip rotators, hip stabilizers, and lower back support muscles
How to Do It:
- Lie on your back with your knees bent and feet flat on the floor.
- Cross your right ankle over your left knee.
- Reach through and gently pull your left thigh toward your chest.
- Keep your shoulders relaxed against the floor.
- Hold the stretch while breathing steadily.
- Switch sides after the hold time.
Recommended Sets and Reps: Perform 2 to 3 sets of 20 to 40 second holds per side. Rest for 30 to 45 seconds between each set.
Best Variations: Seated figure four, supported figure four, band-assisted figure four
Form Tip: Slightly flex the crossed ankle to protect your knee.
Split Squat Hold
The split squat hold builds hip mobility while reinforcing single-leg strength and control. This position challenges both hip flexion and extension simultaneously, making it highly functional for walking and climbing stairs. I like using this hold because it exposes side-to-side differences quickly and helps restore balance between the hips. When clients stay consistent with it, they often notice smoother strides and better lower-body stability. It also builds confidence in deeper single-leg positions.
Muscles Trained: Glutes, quadriceps, hip flexors, and core stabilizers
How to Do It:
- Step your right foot forward and your left foot back into a split stance.
- Brace your core and lower straight down into a controlled split squat.
- Stop when your back knee hovers just above the floor.
- Keep your torso tall and your front heel grounded.
- Hold the bottom position while breathing steadily.
- Switch sides after the hold time.
Recommended Sets and Reps: Perform 2 to 3 sets of 20 to 30 second holds per side. Rest for 45 to 60 seconds between each set.
Best Variations: Supported split squat hold, front foot elevated hold, rear foot elevated hold
Form Tip: Lower straight down rather than drifting forward into your front knee.
RELATED: If You Can Complete This 5-Minute Chair Test at 55, You’re in Peak Shape
The Best Tips for Improving Hip Mobility After 55

Improving hip mobility after 55 comes down to consistency, patience, and quality positioning. The hips respond very well to regular movement when the exercises stay controlled and repeatable. I’ve seen many adults regain noticeable freedom of motion within a few weeks once they commit to short daily sessions. You do not need marathon stretching routines to see progress. Focus on frequent, well-executed holds and let the improvements build over time.
- Practice mobility work most days of the week: Frequent exposure helps the hips stay loose and responsive.
- Breathe slowly during each hold: Calm breathing helps the muscles relax into deeper positions.
- Stay just below discomfort: Gentle tension works better than forcing extreme ranges.
- Balance both sides evenly: Spend extra time on the tighter hip when needed.
- Pair mobility with strength work: Strong hips help maintain the range you build.
- Be patient and consistent: Small daily improvements add up quickly.
Stick with these positions, and your hip mobility can stay sharp and capable for many years to come.
References
- Ferrucci, Luigi et al. “Age-Related Change in Mobility: Perspectives From Life Course Epidemiology and Geroscience.” The journals of gerontology. Series A, Biological sciences and medical sciences vol. 71,9 (2016): 1184-94. doi:10.1093/gerona/glw043
- Stathokostas, Liza et al. “Flexibility of older adults aged 55-86 years and the influence of physical activity.” Journal of aging research vol. 2013 (2013): 743843. doi:10.1155/2013/743843
The post If You Can Hold These 4 Positions After 55, Your Hip Mobility Is Elite appeared first on Eat This Not That.
]]>The post 4 Daily Exercises That Rebuild Joint Strength After 60 appeared first on Eat This Not That.
]]>A joint isn’t just bone on bone. It’s a space filled with sensors, fluid, and supporting tissue all constantly talking to your nervous system. When that conversation gets misheard, the body still moves — but forces stop spreading out the way they should. That’s when joints begin to feel tight, weak, or unstable, even when nothing is seriously damaged.
RELATED: If You Can Complete This 5-Minute Chair Test at 55, You’re in Peak Shape
Your Brain Runs the Show

I explain it to clients this way: a joint is less like a hinge and more like a tension detector. Your brain needs feedback from it every millisecond to decide how much force is safe. That real-time feedback is what helps create and maintain what’s known as an OAIR — the optimal axis of instantaneous rotation. It’s your ability to keep a joint centered regardless of position and speed of movement. When I reach my arm up, for example, I’m creating an axis through the glenohumeral joint so that regardless of where I rotate, bend, or twist, the humerus stays stacked on top of the scapula.
That feedback system is called proprioception — basically, your body’s self-awareness. When the signal is clear, movement feels smooth and easy. When it gets fuzzy, the body protects the area by tightening around it and forcing other joints to compensate. What most people feel as stiffness, and even pain, is often the nervous system adjusting tension because it doesn’t trust the joint anymore.
Strength Isn’t Enough
This is why strengthening alone often doesn’t fix the problem. If your brain doesn’t trust a joint, your body won’t be able to fully utilize that joint through its designed range of motion. Other muscles jump in, things compensate, and you end up feeling tight and uncomfortable. Over time, people call that aging. But a lot of the time, it’s just a loss of communication.
My approach addresses this directly. Instead of starting by pushing strength, I start by restoring the signal. One of the main tools I use for that is ELDOA. It’s not just stretching — it’s a very specific way of positioning the body so tension is emphasized one joint at a time within fascial chains. When the tissues around a joint are put under tension, they send a signal to the brain about their current position. The brain starts to search for an ideal position, registers it, and adapts accordingly. Once guarding decreases, strength finally starts to help instead of irritate.
Physically, this improves space in the joint, helps fluid move through the cartilage and discs, and organizes how the surrounding muscles work together. But the big change is neurological — the brain regains confidence in the area. And once a joint has that clarity, the body naturally spreads the load better. That’s why working on one joint often helps decrease pain somewhere else entirely. The body works as a system, not as isolated parts.
So, before we get into the exercises, understand the goal. We’re not just trying to make joints stronger. We’re helping the brain understand them again. Because a joint that the brain trusts becomes stable, and a stable joint can finally become strong. Here are the four joints I prioritize first, and how to rebuild their function.
RELATED: The 7-Minute Morning Routine That Shrinks Stubborn Belly Overhang Faster Than Ab Workouts After 55
T8-T9 ELDOA (Mid-Thoracic Spine)
The T8-T9 junction sits just below the shoulder blades, in the middle of the thoracic spine. The goal of this ELDOA is to create a two-way tension: everything below T8 pulls down, and everything at T8 and above pulls up. That opposing tension is what decompresses the joint and restores the brain’s signal to that area.
Muscles Trained: Paraspinal muscles, deep thoracic extensors, postural stabilizers
How to Do It:
Factor of Progression 1:
- Sit on the floor and grab onto your shins
- Walk your feet in closer to increase difficulty, or farther out to make it easier — find a position where you can maintain a straight gravity line (ear, shoulder, and hip all in line)
- Sit up as tall as possible and maintain that alignment
- Look one to two feet in front of you on the floor
- Keep your belly relaxed and breathe
- Hold for one minute
Factor of Progression 2 (when you can complete Factor 1 easily):
- Release your arms out in front of you
- Spread your fingers, bend your wrists back, lock your elbows, and spiral your arms open
- Push your arms forward and tuck your chin slightly — without losing the gravity line
- Hold for one minute
Factor of Progression 3 (when you can complete Factor 2 easily):
- Bring your arms up until they’re in line with your ears, shoulders, and hips
- Spread your fingers, bend your wrists back, and reach as high as possible
- Hold for one minute
- At the end of the minute, gently relax one arm, then the other, then your entire spine
Form Tip: Your gravity line — ear, shoulder, hip in alignment — should never break, regardless of which progression you’re on.
L4-L5 ELDOA (Lower Lumbar Spine)
The L4-L5 junction sits just below the belly button. At L4, there’s a ligament called the iliolumbar ligament that connects the fourth lumbar vertebra to the back of the pelvis — meaning this area has a lot to do with how the pelvis is positioned. Restoring signal here can have a significant effect on low back comfort and pelvic stability.
Muscles Trained: Paraspinal muscles, iliolumbar ligament, deep lumbar stabilizers
How to Do It:
Factor of Progression 1:
- Place your heels a minimum of glute-width apart (wider creates more tension)
- Bend your ankles back and press your pinky toes toward the floor
- Press your knees toward the floor
- Bring your legs in closer to your body to increase tension, or farther out to reduce it — the goal is to feel your paraspinal muscles working to stay vertical
- Hold your legs, line up your ear, shoulder, and hip (gravity line), and breathe from your belly
- Hold for one minute
Factor of Progression 2 (when Factor 1 is easy):
- Bring your arms up, spread your fingers, bend your wrists back, lock your elbows, and spiral open
- Push your arms forward — without rounding your spine; your spinal position does not change
- Hold for one minute
Factor of Progression 3 (when Factor 2 is easy):
- Raise your arms parallel to your gravity line — ears, shoulders, hips
- Spread your fingers, bend your wrists back, lock your elbows, and rotate your arms open
- Maintain ankle and knee pressure toward the floor while reaching as high as possible
- Hold for one minute
- At the end of the minute, gently relax one arm, then the other, then everything releases
Form Tip: The amount of tension you build is controlled by how far you bring your legs in — more bend equals more challenge to your paraspinals. Start conservatively.
RELATED: 5 Morning Exercises That Restore Full-Body Mobility Faster Than 30 Minutes of Stretching After 55
S2-S3 ELDOA (Upper Sacrum)
This ELDOA targets the upper part of the sacrum — the triangular bone at the base of the spine. The approach here is a two-directional tension: the sacrum through L3 anchors into the floor while everything above lifts upward. This helps decompress the sacroiliac area and restore communication between the pelvis and lumbar spine.
Muscles Trained: Deep sacral stabilizers, lumbar extensors, cervical flexors
How to Do It:
- Come down to the floor on your forearms
- Walk your elbows back as far as possible, with your middle finger in line with your shoulder — don’t place them too far forward or you’ll risk slipping
- Walk your feet back to a comfortable position
- Press everything from the middle of your sacrum down to your belly button (roughly L3) firmly into the floor — this section stays fixed
- Lift your chest toward the ceiling, keeping the sacrum-to-L3 section grounded
- Push your head back and tuck your chin
- Swallow and place your tongue at the roof of your mouth
- Hold for one minute, maintaining the chin tuck, the sacrum anchor, and the upward lift of the chest
- Focus on lengthening the neck as much as possible — imagine that length pulling all the way down into the sacrum
- At the end of the minute, gently relax out of the posture
Form Tip: The sacrum-to-L3 section should not lift off the floor at any point. If you feel that section popping up, walk your feet in slightly and reduce the chest lift.
RELATED: 5 Bed Exercises That Restore Back Strength Better Than Physical Therapy After 60
C4-C5 ELDOA (Mid-Cervical Spine)
The C4-C5 junction sits in the very middle of the neck. This is one of the most commonly compressed areas in people who spend time at a desk or looking at screens, and restoring signal here can affect shoulder mobility, upper back tension, and even jaw discomfort. This ELDOA uses progressive loading to create decompression at that cervical junction.
Muscles Trained: Deep cervical flexors, shoulder stabilizers, upper thoracic extensors
How to Do It:
Factor of Progression 1:
- Lie on your back with your eyes looking down and your chin tucked in
- Feel the back of your neck lengthen — that lengthening is the first signal
- Hold here and breathe with a relaxed jaw and relaxed belly
Factor of Progression 2 (when Factor 1 is comfortable):
- Without changing your head or neck position, bring one leg up and then the other
- Your knees should come past 90 degrees
- Continue breathing with a relaxed jaw and belly
- Hold for one minute
Factor of Progression 3 (when Factor 2 is easy):
- Raise both arms, spread your fingers, bend your wrists back, lock your elbows, and spiral your arms open
- Imagine balancing a hot cup of coffee directly over the head of the humerus — that balance stays no matter what
- Lift your shoulders off the ground and away from your ears without changing the arm position
- Keep your eyes down, chin tucked, fingers spread, wrists back
- If you have the neck strength, tuck your chin so deeply that your head lifts about a quarter inch off the ground
- Hold for 60 seconds
- To release: use one hand to lower your head gently, then the other; relax one leg, then the other; let your entire body decompress
Form Tip: The coffee cup image is worth keeping in mind throughout — the moment your shoulders shrug toward your ears, the position collapses. Keep them down and away.
The Complete Routine
The post 4 Daily Exercises That Rebuild Joint Strength After 60 appeared first on Eat This Not That.
]]>The post The 7-Minute Morning Routine That Shrinks Stubborn Belly Overhang Faster Than Ab Workouts After 55 appeared first on Eat This Not That.
]]>In my years coaching adults who want a stronger, tighter midsection, I’ve learned that the most effective routines share one thing in common. They are simple enough to repeat daily and targeted enough to actually challenge the deep core. Many of my clients start seeing better engagement within the first couple of weeks once they lock into a short morning habit like this. When the setup is easy and the movements make sense, people stick with it.
This morning core routine uses three highly effective exercises to strengthen your entire core from multiple angles. Each move builds control, endurance, and deep abdominal tension, supporting a firmer waistline. Here is exactly how to perform the routine for the best results.
RELATED: 5 Morning Exercises That Restore Full-Body Mobility Faster Than 30 Minutes of Stretching After 55
The 7 Minute Morning Routine to Shrink Stubborn Belly Overhang
What you need: A sturdy bed or floor space and seven focused minutes. This routine uses three core exercises performed with controlled reps and short rests to maximize midsection activation.
The Routine:
- Side Plank Holds
- Flutter Kicks
- Supine Leg Drops
Directions
Perform the exercises in the order listed. Move with control and focus on keeping your core braced throughout each set. Rest only as prescribed. The full sequence takes about seven minutes to complete. Read on for the detailed instructions.
Side Plank Holds
Side planks target the obliques, which play a major role in tightening the waistline and improving trunk stability. This exercise teaches your core to resist side-to-side collapse, which carries over strongly into daily movement. I often program side planks because they create deep core tension without requiring much movement. Over time, stronger obliques help your midsection feel more supported and connected.
Muscles Trained: Obliques, transverse abdominis, shoulders, and glutes.
How to Do It:
- Lie on your side with your elbow stacked under your shoulder.
- Extend your legs and stack your feet.
- Brace your core and lift your hips off the bed or floor.
- Keep your body in a straight line from head to heels.
- Hold while breathing steadily.
- Lower with control and switch sides.
Recommended Sets and Reps: Perform 2 sets of 20 to 30 second holds per side. Rest for 30 seconds between each set.
Best Variations: Bent knee side plank, staggered stance side plank, and longer hold plank.
Form Tip: Keep your hips lifted and your rib cage pulled down.
RELATED: 5 Bed Exercises That Restore Back Strength Better Than Physical Therapy After 60
Flutter Kicks
Flutter kicks light up the lower portion of your core, an area that often loses strength over time. This movement builds endurance through the hip flexors and deep abdominals while reinforcing steady core bracing. I like using flutter kicks in morning routines because they quickly create a strong abdominal burn without a complicated setup. Consistent practice helps improve lower core tone and control.
Muscles Trained: Lower abdominals, hip flexors, and core stabilizers.
How to Do It:
- Lie on your back with legs extended.
- Place your hands lightly under your hips for support.
- Lift both legs a few inches off the surface.
- Begin alternating small controlled kicks.
- Keep your lower back gently pressed down.
- Continue for the full set.
Recommended Sets and Reps: Perform 2 sets of 30 seconds. Rest for 30 seconds between each set.
Best Variations: Bent knee flutter kicks, slower tempo kicks, hands-free kicks.
Form Tip: Keep the kicks small and controlled.
Supine Leg Drops
Supine leg drops challenge your core to stabilize while your legs move through a longer range of motion. This builds deep abdominal strength and improves pelvic control, both of which support a tighter midsection. I often include leg drops once clients are ready for more control-based work because they create excellent tension through the lower abs. With consistent practice, this exercise helps reinforce strong core positioning.
Muscles Trained: Lower abdominals, transverse abdominis, and hip flexors.
How to Do It:
- Lie on your back with legs extended toward the ceiling.
- Place your arms at your sides for support.
- Brace your core and slowly lower both legs toward the bed or floor.
- Stop before your lower back lifts.
- Raise your legs back to the starting position with control.
- Repeat for the target reps.
Recommended Sets and Reps: Perform 2 sets of 8 to 12 reps. Rest for 30 to 45 seconds between each set.
Best Variations: Bent-knee leg drops, alternating leg drops, slow-tempo drops.
Form Tip: Move only as low as you can while keeping your lower back pressed down.
RELATED: 5 Daily Exercises That Restore Muscle Mass Faster Than Gym Machines After 55
Best Daily Habits to Reduce Belly Overhang After 55

Targeted core work delivers the best results when it pairs with supportive daily habits. The midsection responds well to frequent activation, steady movement, and consistent nutrition. In my experience coaching men and women over 55, the people who see the fastest changes focus on repeatable habits rather than occasional bursts of effort. Small daily wins add up quickly. Stay patient and keep stacking quality sessions. Use the tips below to reinforce your progress.
- Train your core most days of the week: Frequent activation builds endurance and control.
- Start your morning with protein: Aim for 25 to 30 grams to support muscle maintenance.
- Walk daily: Regular steps support fat loss and circulation.
- Focus on posture throughout the day: A tall, stacked position keeps your core lightly engaged.
- Progress your hold times gradually: Longer tension helps drive continued improvement.
- Stay consistent with short routines: Repeatable habits produce the strongest long-term results.
Stick with this seven-minute routine and these habits, and many adults over 55 begin to feel tighter through the waist with stronger, more confident core control.
References:
- Schumacher, Leah M et al. “Consistent Morning Exercise May Be Beneficial for Individuals With Obesity.” Exercise and sport sciences reviews vol. 48,4 (2020): 201-208. doi:10.1249/JES.0000000000000226
- Schumacher, Leah M et al. “Sustaining Regular Exercise During Weight Loss Maintenance: The Role of Consistent Exercise Timing.” Journal of physical activity & health vol. 18,10 1253-1260. 14 Aug. 2021, doi:10.1123/jpah.2021-0135
The post The 7-Minute Morning Routine That Shrinks Stubborn Belly Overhang Faster Than Ab Workouts After 55 appeared first on Eat This Not That.
]]>The post 5 Morning Exercises That Restore Full-Body Mobility Faster Than 30 Minutes of Stretching After 55 appeared first on Eat This Not That.
]]>Mobility requires strength through range, not just length. When you move actively, you pump synovial fluid into the joints, activate stabilizers, and reestablish posture before the day starts. That combination restores fluid motion faster than static stretching alone. The goal isn’t to force flexibility. The goal is to reclaim control.
The five exercises below take about eight to ten minutes total. Perform them in sequence with steady tempo and intentional breathing. Stay consistent and you’ll feel looser, stronger, and more balanced before breakfast.
RELATED: 5 Bed Exercises That Restore Back Strength Better Than Physical Therapy After 60
Standing Arm Circles With Thoracic Rotation
Shoulder and upper-back stiffness often dominate mornings after 55. Instead of stretching the chest passively, this drill restores active range while teaching the spine to rotate smoothly. I use this movement early in sessions because it immediately improves posture and breathing mechanics.
Stand tall and create large, controlled circles with your arms. Add gentle thoracic rotation as the arms move backward. Keep your ribs stacked over your hips and avoid arching your lower back. Controlled repetition wakes up the shoulder blades and mid-spine quickly.
How to Do It
- Stand tall with feet hip-width apart
- Extend arms out to sides
- Perform slow forward circles
- Reverse direction
- Add gentle upper-body rotation.
Hip Hinge to Overhead Reach
Full-body mobility depends heavily on hip function. This movement combines a hinge with an overhead reach to connect lower and upper body mechanics. I’ve seen clients dramatically improve morning stiffness once they integrate this pattern daily.
Push your hips back into a controlled hinge. As you stand, sweep your arms overhead and lengthen through your torso. Coordinate breath with movement to increase control. This drill restores both hip and shoulder range simultaneously.
How to Do It
- Stand with feet shoulder-width apart
- Push hips back into hinge
- Keep spine neutral
- Drive hips forward to stand
- Sweep arms overhead
- Repeat slowly.
RELATED: 5 Daily Exercises That Restore Muscle Mass Faster Than Gym Machines After 55
Standing Alternating Knee Hugs
Walking stiffly in the morning often signals limited hip mobility. Alternating knee hugs gently move the hip joint through flexion while challenging balance. I use this frequently with adults over 55 because it restores stride length and coordination without strain.
Lift one knee toward your chest and hold briefly. Keep your torso upright and core braced. Lower with control and switch sides. Smooth, balanced reps restore fluid hip movement quickly.
How to Do It
- Stand tall near support if needed
- Lift one knee toward chest
- Hold briefly
- Lower with control
- Alternate sides.
Bodyweight Reverse Lunge With Reach
Mobility improves when joints move under control through usable range. The reverse lunge with reach opens the hips while activating glutes and improving balance. Unlike static hip flexor stretches, this drill strengthens the movement pattern.
Step back into a lunge and reach both arms overhead. Maintain tall posture and steady tempo. Drive through the front heel to stand. Controlled motion enhances both mobility and stability.
How to Do It
- Stand tall with feet hip-width apart
- Step one leg back
- Lower into lunge
- Reach arms overhead
- Return to standing
- Alternate sides.
RELATED: If You Can Hold a Wall Sit This Long After 50, Your Leg Strength Is Top-Tier
Standing Torso Rotations With Control
Spinal rotation decreases steadily after 55 unless trained intentionally. Controlled standing rotations restore mobility without forcing end ranges. I program this movement for clients who wake up feeling stiff through the midsection and lower back.
Stand tall and rotate your torso gently side to side. Keep hips stable and movement smooth. Avoid jerking or bouncing. Consistent controlled reps improve rotational capacity and coordination within minutes.
How to Do It
- Stand with feet shoulder-width apart
- Place hands across chest
- Rotate torso slowly to one side
- Return to center
- Rotate to opposite side
- Continue alternating.
The post 5 Morning Exercises That Restore Full-Body Mobility Faster Than 30 Minutes of Stretching After 55 appeared first on Eat This Not That.
]]>The post 4 Exercises Men Over 55 Should Do Daily to Restore Upper Body Strength appeared first on Eat This Not That.
]]>The good news is that it’s never too late to build and maintain muscle, even later in life. Studies published in BMJ Open and the Journal of Strength & Conditioning Research consistently demonstrate that resistance training improves strength, joint stability, and muscle mass in older adults, regardless of previous training history or fitness level. Additionally, consistently doing strength-building exercises that focus on controlled movement and proper form as you age can reduce fall and injury risk while improving joint health.
We spoke with James Brady, personal trainer at OriGym, who says restoring upper body strength over 55 requires movements that balance pushing and pulling while protecting your shoulders and spine. “Elevating your hands during presses, reinforcing posture during rows, and building overhead stability are key components,” Brady explains. “Strength doesn’t have to come from heavy gym machines—it comes from consistent tension and proper mechanics.”
Read on for Brady’s top four exercises men over 55 should do daily to restore upper body strength, along with detailed instructions for each. And when you’re done, don’t miss these 7 Chair Exercises That Reverse Rounded Posture After 50, According to Experts.
Wall or Incline Pushups
Incorporating wall or incline pushups into your routine is a safe and effective way to restore pressing strength after 55. Elevating your hands reduces strain on your shoulders while still strengthening your chest, triceps, and core.
How to do it:
- Stand facing a wall or sturdy elevated surface.
- Place your hands slightly wider than shoulder-width apart.
- Step your feet back until your body forms a straight line.
- Engage your core.
- Bend your elbows and lower your chest toward the surface.
- Keep your elbows at a comfortable angle and avoid flaring them out.
- Press back to the starting position with control.
- Perform two to three sets of 8 to 15 reps, resting for 45 to 60 seconds between sets.
Resistance Band Rows
Resistance band rows are essential for counteracting rounded shoulder posture. Pulling strengthens your upper back and rear shoulders, which are muscles that stabilize your shoulder joints and help support pain-free movement.
How to do it:
- Anchor a resistance band to a secure surface at chest height.
- Stand tall while holding the band with both hands.
- Step back to create light tension.
- Keep your chest lifted and your ribs down.
- Pull your elbows back toward your ribs.
- Squeeze your shoulder blades together.
- Pause for one to two seconds at the end of the pull.
- Return slowly to the starting position with control.
- Complete two to three sets of 10 to 15 reps. Rest for 45 to 60 seconds between sets.
RELATED: 5 Standing Exercises That Rebuild Core Strength Faster Than Gym Classes After 50
Overhead Dumbbell or Band Press
The overhead press helps rebuild shoulder strength and maintain mobility since controlled overhead movement reinforces stability through your rotator cuff and upper back.
How to do it:
- Stand tall while holding dumbbells or a resistance band at shoulder height.
- Keep your feet hip-width apart.
- Flex your core and avoid arching your lower back.
- Press the weights overhead slowly.
- Extend your arms without locking them out (maintain a slight bend in your elbows).
- Lower the weights back to shoulder height with control.
- Aim for two to three sets of 8 to 12 reps, resting for 45 to 60 seconds between sets.
RELATED: If You Can Do These 4 Morning Stretches Pain-Free After 60, Your Joint Health Is Exceptional
Farmer’s Carry
Don’t let the simplicity of this exercise deceive you. The farmer’s carry is a powerhouse of a strength builder. That’s because holding weight at your sides activates your shoulders, grip, arms, and core all at once. It also reinforces balance and coordination, which become non-negotiable after 55.
How to do it:
- Hold a pair of dumbbells or heavy household objects at your sides.
- Stand tall with your shoulders relaxed and your chest lifted.
- Brace your core and walk forward at a steady pace.
- Keep your head neutral and your eyes forward.
- Avoid leaning to one side.
- Maintain a tight grip and controlled breathing.
- Perform two to three carries of 20 to 40 seconds each. Rest for 60 to 90 seconds between rounds.
RELATED: 5 Morning Exercises That Shrink Belly Pooch Faster Than Ab Workouts After 55
The Bottom Line

After 55, restoring upper body strength requires a balance of pressing and pushing exercises. Pressing strength helps build strength and confidence, pulling strength protects the shoulders, overhead stability improves mobility, and loaded carries boost full-body coordination. These four exercises, when done consistently at two to three times per week, can rebuild strength, improve posture, and help maintain independence as you age.
The post 4 Exercises Men Over 55 Should Do Daily to Restore Upper Body Strength appeared first on Eat This Not That.
]]>