The post 4 Ways to Upgrade Mashed Potatoes for the Holidays, According to Chefs appeared first on Eat This Not That.
]]>Roasted Garlic & Black Pepper Mash
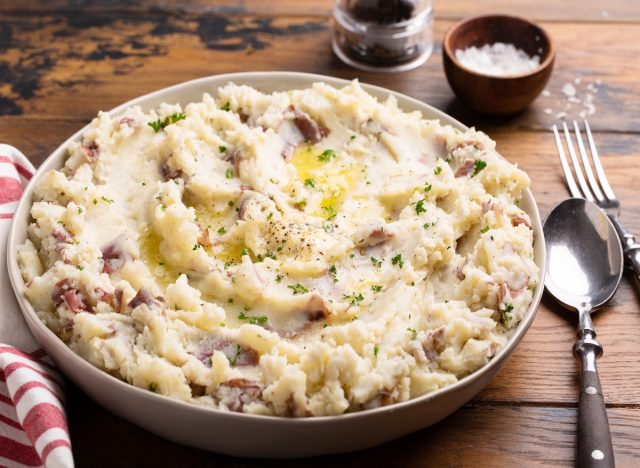
An easy way to level up your mashed potatoes is with roasted garlic and black pepper. “Slow-roasted garlic has been part of my toolkit since my banquet-prep days,” says Chef Richard. “Combined with fresh cracked black pepper, it creates a velvety mash with a kick that feels indulgent but remains incredibly straightforward.” He adds, “Roasting garlic low and slow became second nature during large-scale holiday banquets. The sweetness that develops balances beautifully with spicy black pepper.
Technique: Blend roasted garlic with warm cream, fold in with black pepper to create an aromatic finish.”
Whipped Potatoes with Crème Fraîche
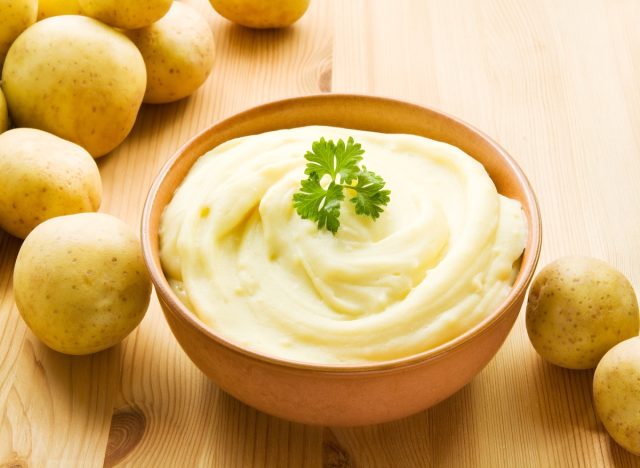
Whipped potatoes with crème fraîche feel special, but with the fuss. The dish delivers a luxurious mix of texture, richness, and tang that elevates a classic comfort food. “For a lighter, more refined profile, I turn to crème fraîche,” says Chef Richard. “Its tang cuts through the richness and gives the potatoes a bright, clean finish.” He further explains, “I’m a big believer in contrast, and crème fraîche brings that bright, tangy note that plays beautifully against the richness of the buttery potatoes. It’s a simple way to dial up the sophistication.
Technique: Whip potatoes until airy; fold in crème fraîche; finish with chives for brightness.”
RELATED: 7 Chain Restaurants That Serve Real Mashed Potatoes, Not Instant
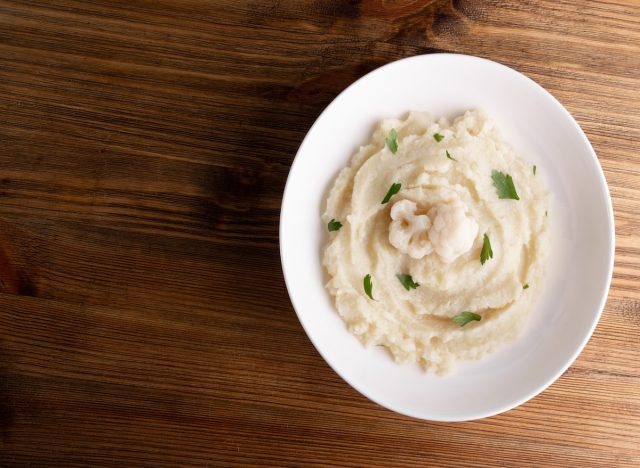
Truffle Salt & Parmesan Luxe Potatoes

Get restaurant-quality vibes at home with truffle salt and Parmesan luxe potatoes, which combines familiar comfort with unmistakable gourmet flair. “When I want to bring a little luxury to the table, truffle salt is my secret weapon,” notes Chef Richard. “A restrained amount makes a noticeable impact—just enough to elevate without overwhelming. Add a bit of Parmesan to bring in a nutty flavor.” He adds, “I love using truffle salt because it gives just enough of that earthiness without overpowering the dish. It’s a small touch that tastes like a big effort.
Technique: Mash potatoes with warm cream; fold in Parmesan; finish with a sprinkle of truffle salt.”
Crispy Shallot & Herb Potatoes
Crispy shallot and herbs can effortlessly bring together crunch, aroma, and fresh flavor in a way that feels both comforting and refined. “Texture matters, especially with something as soft as mashed potatoes,” says Chef Richard. “A crunchy shallot topping Is one of the easiest ways to make mashed potatoes feel restaurant ready.” He adds, “Throw in some fresh chopped herbs like parsley or thyme for some earthiness.”
The post 4 Ways to Upgrade Mashed Potatoes for the Holidays, According to Chefs appeared first on Eat This Not That.
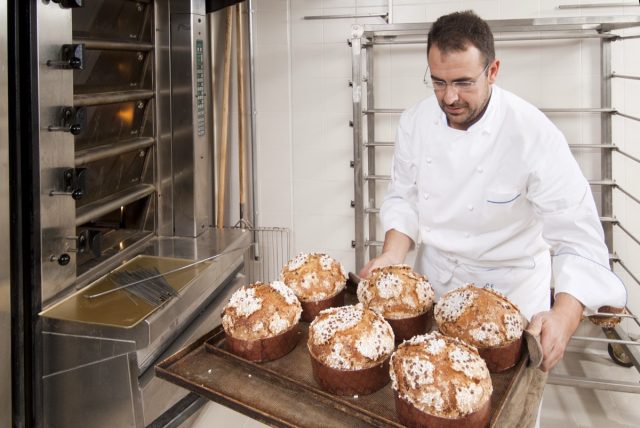
]]>The post 7 Butcher Tips That Make Christmas Prime Rib Come Out Perfect appeared first on Eat This Not That.
]]>
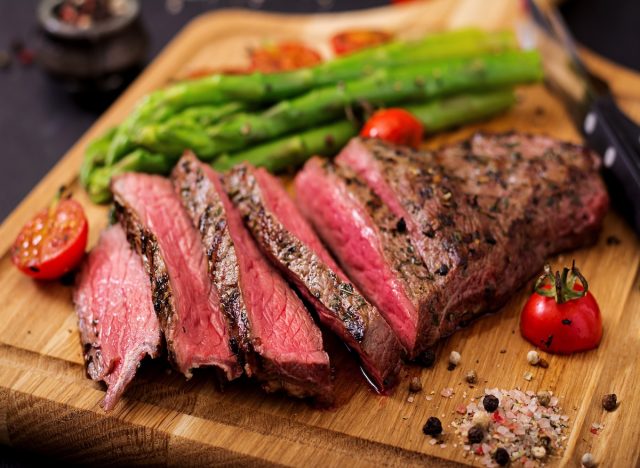
“Turkey is very hard to get just right,” Baych says about his preference for a holiday prime rib. “A few minutes too long in the oven and it is dry and bland. Prime rib on the other hand offers a little more grace. You can slow roast it to a medium or medium rare temperature and have a great meal. If your guests like theirs a little more done you can simply give them a slice from the edges which tend to be cooked more. And the biggest reason is beef just tastes better than turkey every time.”
Not only did Baych give invaluable tips on prepping and cooking the prime rib, he also shared some of his recipes for the sides, taking all the stress out of your holiday meal and sharing a few hacks I have never heard of before (the recipe for Ultimate Mashed Potatoes alone is absolutely fascinating). If you want to make a beautiful prime rib this holiday season but have no experience doing so, you will be a pro by the end of this article thanks to Baych. Happy cooking!
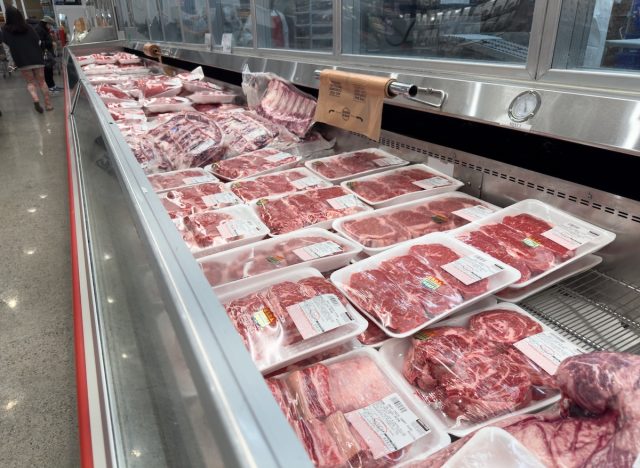
Cut Your Own Prime Rib
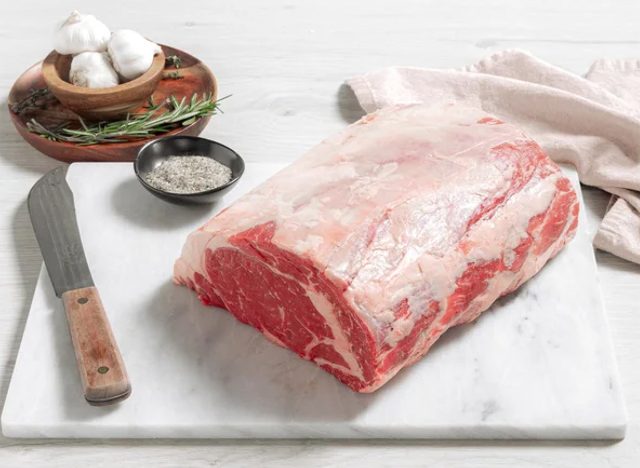
Beef is expensive right now, and Baych encourages people to cut their own prime rib to save money. “I know this may sound like a daunting task but it is actually very easy,” he says. “You can buy a whole ribeye subprimal cut from your local membership club (Sam’s Club, Costco, BJ’s). You then take a sharp knife and simply cut the prime rib to whatever size you like. I usually recommend a roast that is about 1″ per person long.” Baych also recommends waiting for a good sale. “Chain grocery stores love to put prime rib on a significant discount around the holidays,” he says. “They do this in hopes that you will buy all the other items you will need for your holiday dinner at the store. If you can find one of those sales, definitely take advantage.”
Don’t Skimp In Seasoning
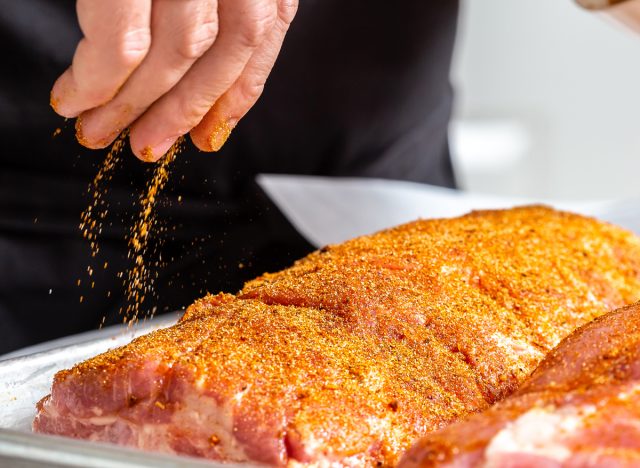
There is nothing more disappointing than an underseasoned prime rib—Baych recommends going to town on flavor. “Make sure you season your roast well,” he says. “Use more seasoning that you think you will need. When your guest eats their prime rib it is only the outside edge that has the seasoning. You want to season appropriately to ensure great flavor.”
Use a Good Thermometer

Baych recommends using a decent thermometer to check the temperature of your meat (I personally love the MEATER brand). “Use a wireless thermometer to manage your cook,” he says. “There are great thermometers that you can leave in the roast and will tell you through an app on your phone how long the roast has until it is done. Take advantage of the technology so you don’t have to worry about overcooking it.”
Let It Rest!
Do not touch that beautiful roast for at least a half hour after it comes out of the oven. “Let it rest for 30 minutes before you cut the roast,” Baych recommends. “It has plenty of residual heat to keep it hot, so don’t worry about that. The resting process ensures the juiciest roast possible.”
With that, let’s get into the recipes!
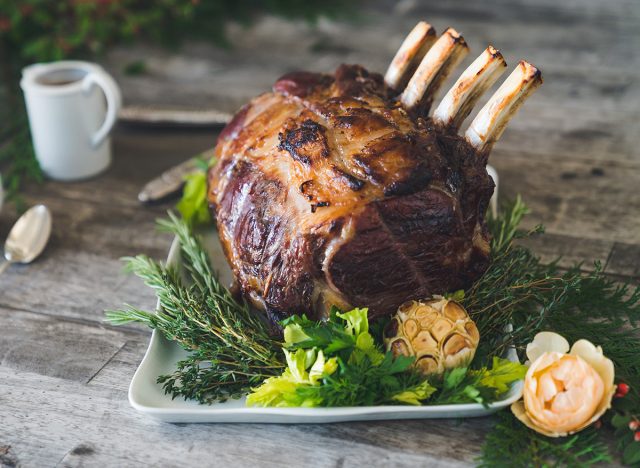
Brad Baych’s Bone-in Prime Rib
Bone-in Prime Rib
Yield: 6 servings
Prep time: 10 minutes
Cook time: 1 hour 15 minutes to 1 hour 40 minutes
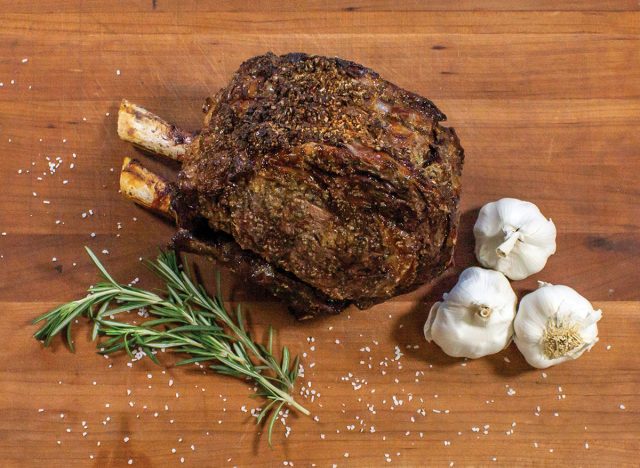
A bone-in prime rib is one of the most popular beef dishes for special occasions. It’s often served as the main event at Christmas or Easter gatherings and is a cornerstone at carving stations in fancy hotels. A prime rib roast serves a large group of guests and allows for different degrees of doneness depending on which slice you choose. The rosemary crust adds a perfect contrast to the tender, juicy meat. If you happen to have leftovers, be sure to set them aside to enjoy as a Prime Rib Steak Sandwich (page 105).
1 tablespoon chopped fresh rosemary
2 teaspoons kosher salt
1 teaspoon garlic powder
½ teaspoon ground black pepper
2 tablespoons Worcestershire sauce
2 tablespoons Dijon mustard
1 (5-pound) bone-in prime rib roast
- Preheat the oven to 325°F.
- In a small mixing bowl, combine the rosemary, salt, garlic powder, and pepper. In a separate small bowl, whisk together the Worcestershire sauce and mustard.
- Rub the entire prime rib roast with the mustard sauce, then crust on all sides with the seasoning mix. Place the roast on a sheet pan fitted with a wire rack.
- Put the pan in the oven and roast to 10 degrees less than your desired doneness with the guidance of a meat thermometer—generally, 15 to 20 minutes per pound for medium doneness. Remove from the oven and allow to rest for 30 minutes before slicing and serving.
Brad Baych’s Red Wine–Braised Mushrooms

Red Wine–Braised Mushrooms
Yield: 4 servings
Prep time: 20 minutes
Cook time: 40 minutes
Have you ever wondered how the braised mushrooms at your favorite upscale steakhouse taste so delicious? The secret is in layering different flavors and taking time to reduce the red wine. I like to use a mid-priced Cabernet, Merlot, or even a red blend; opt for a red wine you’d enjoy drinking along with your perfectly cooked steak. This dish tastes best when you cook it low and slow, giving the onions and garlic time to meld with the wine and beef stock.
1 cup chopped yellow onions
2 tablespoons avocado oil
2 tablespoons chopped garlic
3 pounds button mushrooms, quartered
2 cups red wine
2 cups beef stock, homemade (page 266) or store-bought
1 tablespoon kosher salt
¼ teaspoon ground black pepper
¼ teaspoon finely chopped fresh thyme, plus a few sprigs fresh thyme for garnish if
desired
- In a 6-quart stockpot or 7-quart enameled Dutch oven, sauté the onions in the avocado oil over medium heat until translucent, about 5 minutes. Add the garlic and sauté for 2 minutes, or until lightly browned. Add the mushrooms and cook over high heat for 10 minutes, or until softened.
- Add the red wine, lower the heat to medium, and simmer for 10 minutes, or until reduced by about half. Pour in the beef stock and continue to cook over medium heat for 15 minutes to reduce the liquid to a sauce thick enough to coat the mushrooms.
- Season with the salt, pepper, and thyme. Serve garnished with a few thyme sprigs, if desired.
Ultimate Mashed Potatoes
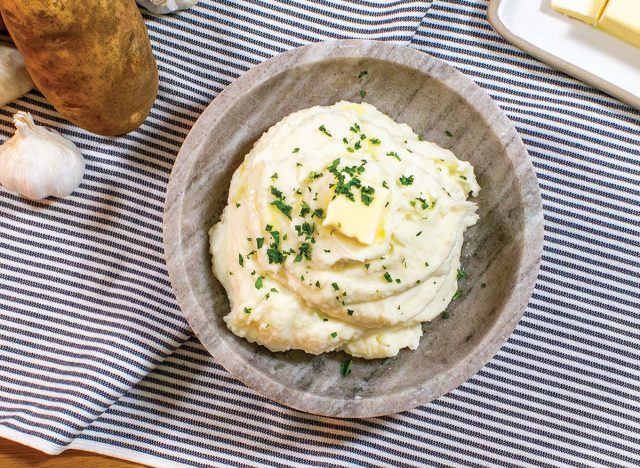
Ultimate Mashed Potatoes
Yield: 4 servings
Prep time: 10 minutes
Cook Time: 30 minutes
Everyone knows how to make basic mashed potatoes: You boil potatoes, add some butter or cream, and mash them up. In an effort to make mashed potatoes even more delicious, I examined the basics of this process. After boiling the potatoes, I realized you lose a lot of the starch and flavor when you pour out the water. By boiling the potatoes in a combination of cream and half-and-half that is mashed back into the cooked potatoes, you create a creamier, more flavorful side dish. This recipe has become such a family favorite that my kids now ask for the “fancy mashed potatoes” as the old run-of-the-mill kind are no longer good enough!
2 pounds Idaho potatoes
4 cloves garlic, peeled
2 cups half-and-half, plus more if needed
2 cups heavy cream
2 teaspoons kosher salt
¼ teaspoon ground white pepper
For garnish:
1 tablespoon unsalted butter
1 teaspoon chopped fresh flat-leaf parsley
The post 7 Butcher Tips That Make Christmas Prime Rib Come Out Perfect appeared first on Eat This Not That.
]]>The post 8 Secrets for Cooking the Best Steak That Only Chefs Know appeared first on Eat This Not That.
]]>Thaw the Meat to Room Temperature
When prepping to cook, a big thing to take note of is the temperature of the steak. According to Chef David Rose, executive chef for Omaha Steaks,it’s a game changer. “It’s very important to make sure your steak is fully thawed and brought to room temperature before you grill it,” he says. “Doing this ensures the steak cooks evenly, consistently, and gets a beautiful char on the outside. Cooking a cold steak will result in an undercooked steak, with inconsistent doneness.” Chef Thomas Odermatt, Founder of Roli Roti Food Trucks and Butcher’s Bone Broth agrees and suggests pulling the steaks out of the fridge 1-3 hours before cooking. “This allows the meat to settle, reducing temperature shock. This simple step gives you better control over doneness and helps ensure your steak cooks evenly to your liking.”
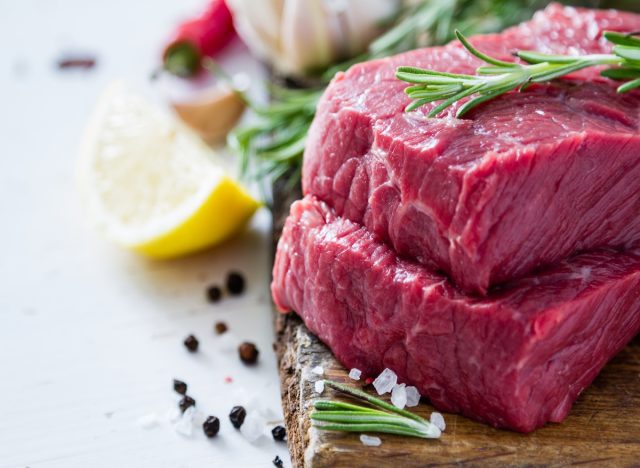
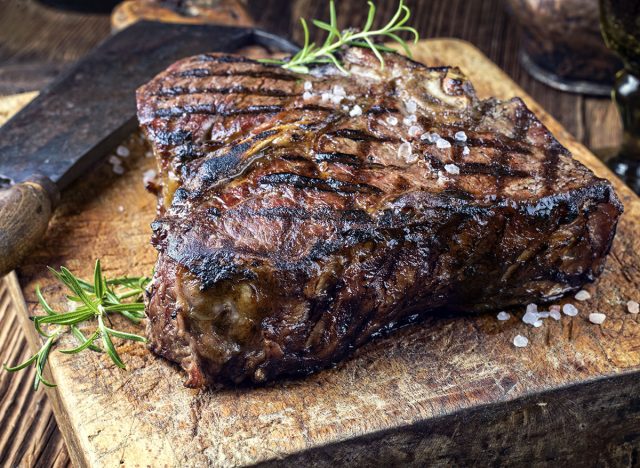
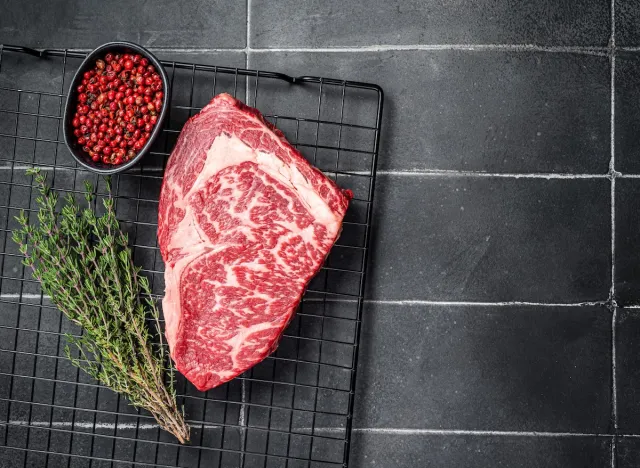
Marbling Matters

Look for cuts like with even marbling throughout–the white specks in meat. It’s fat or marbling and fat gives flavor. Well-marbled cuts are “forgiving in a pan or on the grill, and don’t demand fancy technique,” says Chef Thomas. “With a hot skillet, some salt, and maybe a knob of butter, you can turn out a steak that rivals what you’d order at a steakhouse. And even if you splurge on a prime cut, it’s still less than half the price of dining out.”
RELATED: 4 Best Cuts of Steak For Grilling, According to a Pitmaster
Avoid Meat With Purple Coloring
When buying steak, the color is important. “You should search out cuts in a deep, healthy red hue, avoiding anything on the purple-side as that could indicate the cow was older (and less palatable),” says Chef Greg Mueller, BBQ expert and Director of Culinary Innovations for recteq.
Don’t Skip Butcher’s Cuts

Another tip Chef Greg gives is to not over the butcher’s cut. “Don’t sleep on butcher’s cuts like flat iron or Denver,” he says. ” They can be both affordable and tasty.” And don’t be afraid to get to know your local butcher. “Trust their advice; they won’t ‘steer’ you wrong,” he says.
Always Marinate Flank Steak
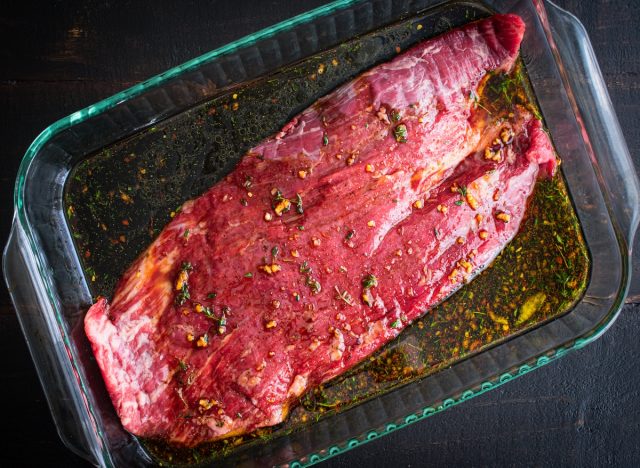
Flank steak is a lean cut from the cow’s abdominal area and while it’s known to have a flavorful beer taste, it can be tough when not cooked properly. But there’s an easy trick to help ensure it’s tender when served. “Marinate flank steak for a few hours and cook it quickly over high heat to medium-rare, then slice against the grain,” says Dennis Turcinovic, owner and managing partner of Delmonico’s Hospitality Group.
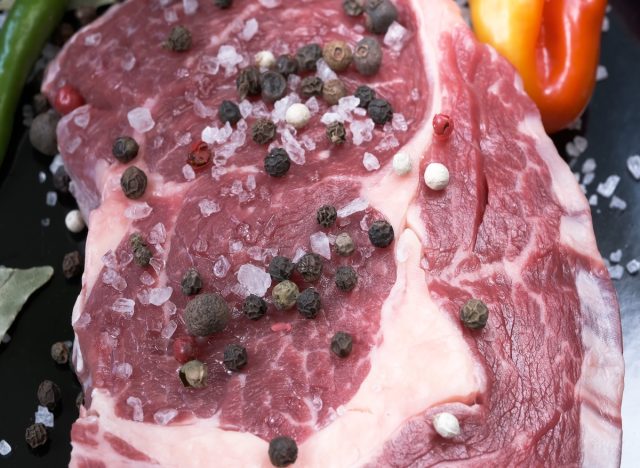
Light Cherry Coloring Means More Flavor

As mentioned earlier, color is key to cooking a delicious steak and according to Jason Kennedy, an in-house meat expert with Verde Farms, a light cherry color means more flavor. “If I want to indulge, I choose a prime ribeye, preferably from Angus cattle, with a light cherry color,” he says. “I specifically look for cuts from the chuck end of the ribeye, which is made up of two main muscles.” He explains, “The spinalis, or ribeye cap, is one of the most tender and flavorful parts of the animal, and the longissimus dorsi, which at this point is starting to taper, eventually becomes the striploin. At the chuck end it is more flavorful and juicier than the striploin side.”
Skip Modified Atmosphere Packaging
Choosing the right meat beforehand makes cooking more seamless, but there’s a lot to pay attention to when buying steak. “At retail, I prefer vacuum-packed options such as thermoformed, roll stock or skin-packed,” Kennedy explains. “These packaging methods not only extend shelf life but also allow the meat’s natural enzymes to continue breaking down the muscle, a process known as wet aging.” He adds, “The downside is that the meat will not have that bright cherry-red color, since there is no oxygen in the pack. Understanding this helps make the right choice.” Kennedy further explains that he avoids modified atmosphere packaging (MAP) because research shows it does not improve eating quality and can have a negative effect on tenderness. MAP products also cannot be USDA certified organic due to the gases used in the packaging process.”
RELATED: 12 Fast-Food Chains That Use 100% Ground Beef In Their Burgers
Know What Occasion You’re Cooking For
Steak is often served for celebrations and each cut is for a different occasion. Knowing that ahead of time will help you in the kitchen. “Sirloin stands up to marinade and bolder flavor profiles work well with this cut (i.e. carne asada tacos),” says Jennifer Borchardt, Culinary Director at Pre Brands. “Ribeye/NY Strip are fantastic choices if you want steak to be the star of the show and filet is always an elevated choice for special occasions.” Going in with a game plan and knowing how many people you’re feeding, your budget and how to prepare the steak ahead of time is also vital, according to Jessica Lancaster, Senior Director Product Quality & Safety Research at Beef It’s What’s For Dinner. “Sirloin steaks provide a great balance of flavor and tenderness, they work well with dry rubs and are a perfect choice for those who appreciate a lighter, tastier option on top of a salad or as the center of the plate next to grilled veggies,” she says. She adds, “On the flip side, flank steak is a cut that works well for feeding groups, like in fajitas or an Asian stir fry. What you cook will depend on who you plan to feed and how.”
The post 8 Secrets for Cooking the Best Steak That Only Chefs Know appeared first on Eat This Not That.
]]>The post 8 Baking Secrets They Only Teach You in Pastry School appeared first on Eat This Not That.
]]>Mise En Place
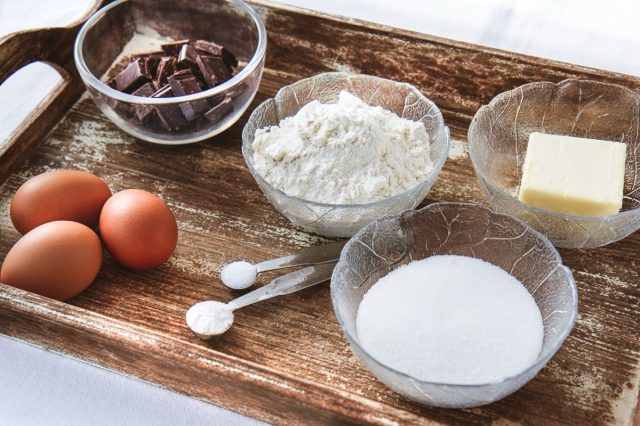
Prepping to bake makes all the difference, according to Chef Trina. “Mise En Place is a French term for everything in its place,” she says. “Essentially this means that before even beginning a baking project, to read the recipe thoroughly, and prep all your ingredients ahead of time by weighing them.” But that’s not all. You have to set up your area for success and have all of your ingredients and baking tools ready to go.”Being as prepared as possible helps make the baking process go way smoother,” she says.
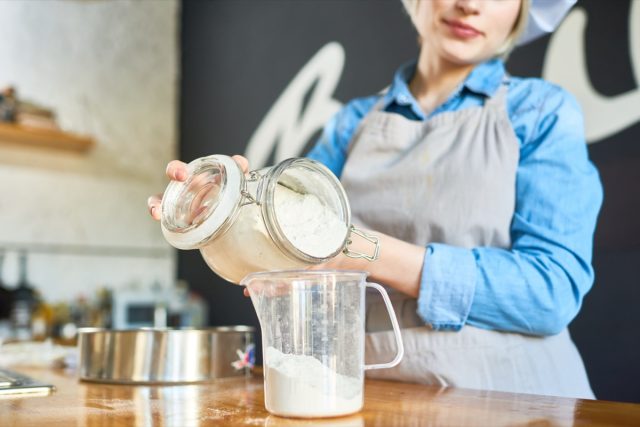
Get on Board with a Digital Scale
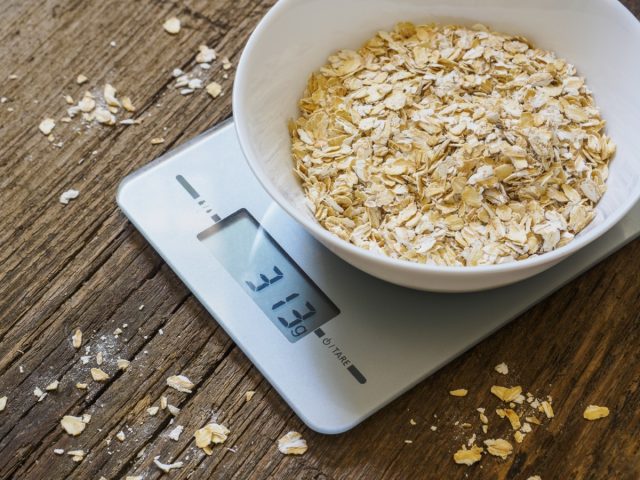
If you want to take up your baking ability, Chef Trina says to invest in a digital scale. “This may sound like a relatively optional tip, but keep in mind that baking/pastry is a science, she says. “This means you are constantly creating chemical reactions when baking, which is why the best recipes are weighed in grams, not in cups.” She adds, “This gives you the most consistent result each time you bake, and is an essential tool for anyone who is serious about baking.”
RELATED: The #1 Restaurant Appetizer You Should Avoid, According to Chefs
Rotate Your Trays
Rotating your tray during baking might seem like a trivial thing to do, but Chef Trina explains why it’s so necessary. “Unless a recipe has a meringue base (and in that case, do NOT rotate or open your oven unless specifically told to) ALWAYS rotate your trays halfway through baking. Even the best ovens in the world have hot spots (spots in your oven that produce more heat than others). If you want an even bake for all of your baked goods, rotating your pans is a must do.”
Timing is Everything

Precise timing is key when it comes to perfecting any baked item. “In my viennoiserie lab in pastry school, we focused really heavily on time management,” says Chef Trina. “Especially if you are working with laminated doughs, there are several stretches of rest time in-between folding, and the timing is based on how slowly/quickly the butter warms and cools.” She adds, “Setting phone alarms to remind you of folding/stretching times, all the way to remind you when to take things out of the oven is so important. This will also help you multitask!”
Room Temp is the Right Temp

The right temperature is something to take note of when prepping for baking. “Before baking, ensuring that all your ingredients are room temperature (unless otherwise indicated) will help your baked goods have the best overall texture,” says Chef Trina. “This means even making sure your eggs are room temperature will help make your batters, doughs, and mixtures have the best chance of being homogenous.”
Stiff Peak Trick

Another tip Chef Trina says she learned in pastry school is the stiff peak test. “Wondering if you are at a stiff peak when whipping your meringues? There’s a few initial indicators. 1: it will look very glossy. 2: it will feel thick to the touch. 3: (the most fun) if you tip your mixing bowl upside down and nothing falls out you’re there!”
Silicone Whisks for Curds
The type of tools used for baking is important, says Chef Trina. “Have you ever made a curd and it tastes metallic? Sometimes the metal flavor transfers into your curds if you are using improper equipment,” she explains. “To reduce this risk, try using a silicone whisk while stirring your curd! This generally eliminates a metallic taste and saves you a ton of time not having to redo it!”
Baking is a Science
Baking can be tailored to your needs and Chef Trina says to use that to your advantage. “Baking is all chemical bond reactions. Essentially this means that if you have an ingredient you need to sub out, find one with a similar bond structure,” she explains. “This is helpful not only if you have allergies/dietary restrictions, but also if you’re trying to change a flavor profile, while maintaining a similar appearance or crumb structure.”
The post 8 Baking Secrets They Only Teach You in Pastry School appeared first on Eat This Not That.
]]>The post 4 Worst Steaks To Cook at Home, According to Chefs appeared first on Eat This Not That.
]]>Porterhouse
A good porterhouse steak offers a generous portion of tender, juicy meat and a rich buttery flavor, but it’s not so easy to make at home. While it looks impressive because of its T-shaped bone with tenderloin on one side and strip steak on the other, it’s a challenge. “The problem is, those two cuts cook at different rates,” says Chef Thomas Odermatt, Founder of Roli Roti Food Trucks and Butcher’s Bone Broth. “By the time the strip is perfectly medium-rare, the tenderloin is usually overdone.” He explains, “In a restaurant, where chefs have blazing broilers and decades of experience, they can manage that balancing act. At home, though, it often means one side is overcooked while the other is underwhelming.”
RELATED: 7 Restaurant Chains That Serve the Freshest Steaks
Filet Mignon
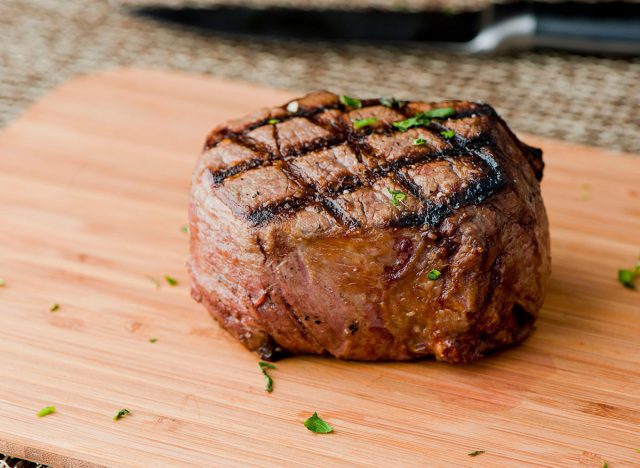
Filet Mignon is a delicate cut with low marbling that’s seen as a premiere steak due to its melt-in-your-mouth texture and natural buttery flavor, but it can be challenging to get it right at home, according to Chef David. “Since the filet mignon is such a tender, decadent cut of meat, it can sometimes stick to the grill if the cooking surface isn’t oiled properly,” he says. “You should always use oil as a binder to season your steaks, but with the filet, I also recommend adding a bit of oil to the grates of your grill right before cooking to help avoid this extra sticking.”
Skirt Steak
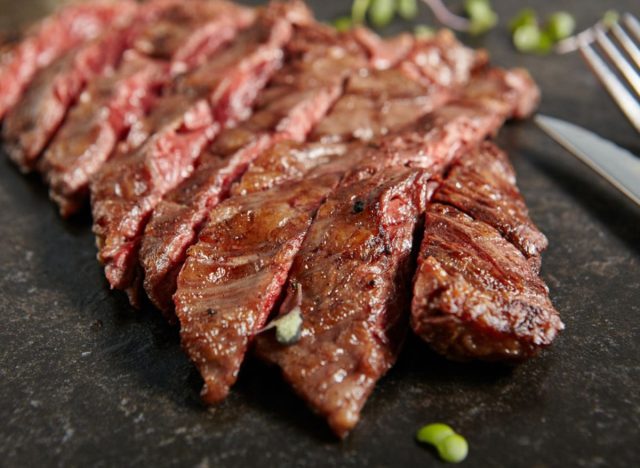
Known for its rich, beefy flavor, a skirt steak can soak up seasoning and marinades in a way other cuts can’t, making it delightfully tasty, but Chef David explains why a skirt steak is challenging to cook. “It’s a thin cut of meat and preparing a skirt steak is a little different from most steaks, but incredibly important”, he says. “Since it’s such a thin cut of meat, it will cook quickly, but it’s easy to burn if you don’t keep an eye on it.” He adds, “I recommend cooking this steak over high heat for 2-3 minutes. Typically, once both sides appear browned, the interior is likely cooked to medium-rare (I like to keep a meat thermometer handy when preparing any type of meat, as it’s a surefire way to check for doneness).”
Flank Steak
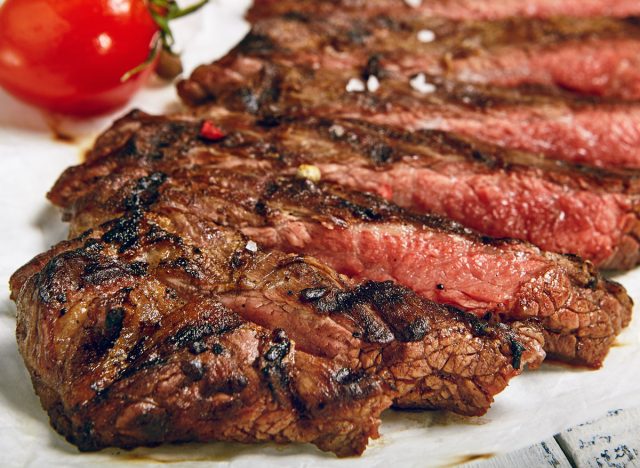
Flank steak is an affordable and popular cut known for its lean texture, burst of flavor and value. However, Dennis Turcinovic, owner and managing partner of Delmonico’s Hospitality Group says flank steaks can be rough for home cooks. “While it’s full of flavor, it can be tough and chewy if not cooked correctly. Marinate flank steak for a few hours and cook it quickly over high heat to medium-rare, then slice against the grain. Overcooking makes it very tough. The same issue and process apply to skirt steak, but I recommend choosing skirt steak over flank because it has a higher fat content.”
How to Spot a Great Steak at the Grocery Store
When browsing the meat section, look for steaks with plenty of fine marbling—those thin streaks of fat running through the meat—as they melt during cooking and deliver more flavor and tenderness. The color should be a vibrant, rich red, which signals freshness, while the cut itself should be at least an inch thick to allow for a good sear without overcooking. Avoid steaks that look dull, dry, or discolored, and when possible, choose cuts that feel firm to the touch.
The post 4 Worst Steaks To Cook at Home, According to Chefs appeared first on Eat This Not That.
]]>The post 8 New Blue Zones Recipes That Could Add Years to Your Life appeared first on Eat This Not That.
]]>Now the #1 New York Times best-selling author and host of Netflix’s Emmy award–winning Live to 100 just released a cookbook I will be using faithfully over the coming months: The Blue Zones Kitchen, 100 one-pot and one-pan recipes inspired by the blue zones way of eating. As a busy mother who loves nothing more than one-sheet and one-pot recipes on busy nights, this book is a gamechanger, especially as every single recipe is inspired by the diets of blue zone communities.
Eat This, Not That! was lucky enough to get an early peek at the book and share some recipes which are going to become staples in your home. Here are eight one-pot blue zones recipes that could add years to your life—and don’t forget to pick up a copy of Buettner’s Blue Zones Kitchen on September 2.
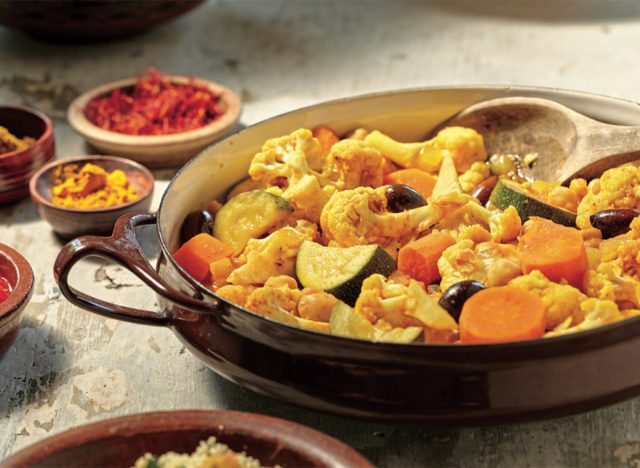
Moroccan Tagine
COOK TIME: 40 minutes | MAKES: 4 servings
In Morocco, “tagine” refers to both a shallow ceramic vessel with a tall conical lid and the savory stews cooked in it. But you don’t need a tagine to make this dish—any deep skillet or casserole with a lid works perfectly. This recipe is loaded with veggies, chickpeas, and warm spices for a hearty, flavorful meal.
Ingredients
- 2 tablespoons extra-virgin olive oil
- 1 onion, diced
- 3 garlic cloves, chopped
- 2 teaspoons ras el hanout (Moroccan spice blend)
- 2 teaspoons ground cumin
- 1 teaspoon ground coriander
- ½ teaspoon turmeric powder
- ¼ teaspoon freshly ground black pepper
- ¼ teaspoon cayenne
- Pinch of saffron threads (optional)
- 1 bay leaf
- ¼ preserved lemon, finely chopped (or juice and zest of one lemon)
- 1 carrot, peeled and cut into 1-inch rounds
- 1 zucchini, halved lengthwise and cut into half moons
- 1 cauliflower, cut into bite-size florets
- 2 cups chickpeas, cooked
- ¼ cup niçoise or kalamata olives
- 2 cups vegetable stock
- ½ cup tomato puree
- 2 teaspoons salt
- Cilantro for garnish (optional)
Instructions
- Heat the oil in a large skillet or casserole over medium-high heat until shimmering.
- Add the onion and sauté until softened, about 3 minutes.
- Add the garlic and cook for 2 more minutes.
- Stir in the spices and bay leaf, cooking for 3 minutes. Add the preserved lemon and cook for another 2 minutes.
- Add the vegetables, chickpeas, and olives, stirring gently to coat in the spice mixture.
- Pour in the stock, tomato puree, and salt, then stir gently. Once the liquid boils, reduce the heat to medium-low, cover, and simmer until the vegetables are very tender, about 30 minutes.
- Remove the bay leaf, taste for seasoning, and adjust if needed.
- Garnish with cilantro, if desired, and serve with couscous or harissa on the side.
Tip: Preserved lemons and ras el hanout can be found online or in specialty shops. If you don’t have preserved lemons, substitute with the juice and zest of one fresh lemon.
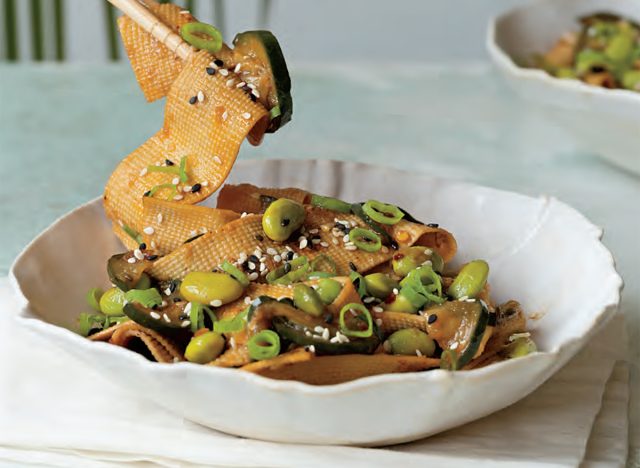
Yuba Noodle Stir-Fry With Chile Crisp
COOK TIME: 5 minutes | MAKES: 4 servings
Yuba is a great high-protein, legume-rich alternative to pasta. A byproduct of tofu making, it’s formed into dry sheets that soften into wide noodles—similar to pappardelle or udon—after soaking in hot water for 10 minutes. Most brands of chile crisp are quite spicy, so if you prefer a milder dish, reduce the amount by half and add an extra teaspoon of sesame oil.
Ingredients
For the Sauce
- ¼ cup soy sauce
- 3 tablespoons rice vinegar
- 2 tablespoons chile crisp
- 2 teaspoons fresh ginger, grated
- 2 garlic cloves, grated
- 1 teaspoon sesame oil
- ¼ teaspoon cornstarch
For the Stir-Fry
- 2 tablespoons avocado oil
- ½ pound yuba sheets, soaked in hot tap water for at least 10 minutes, drained, then sliced into noodle-size strips
- 1 cup edamame
- 1 cucumber, halved lengthwise and sliced about ⅛ inch thick
- 1 tablespoon toasted black and white sesame seeds (for garnish)
- 2 scallions, thinly sliced (for garnish)
- More chile crisp (optional, for garnish)
Instructions
- Whisk together all the sauce ingredients in a small bowl until thoroughly combined. Set aside.
- Heat the avocado oil in a wok or large sauté pan over high heat until shimmering.
- Add the yuba and toss to coat, cooking for about 30 seconds.
- Stir in the edamame and cucumber, mixing well.
- Add the sauce and toss everything to combine. Cook until the sauce begins to thicken slightly, about 3 minutes.
- Transfer the stir-fry to a serving bowl, sprinkle with sesame seeds and scallions, and serve with more chile crisp on the side if desired.
Tip: Be sure to buy yuba sheets, not sticks. The sticks are thicker and require cooking or a much longer soak to hydrate.
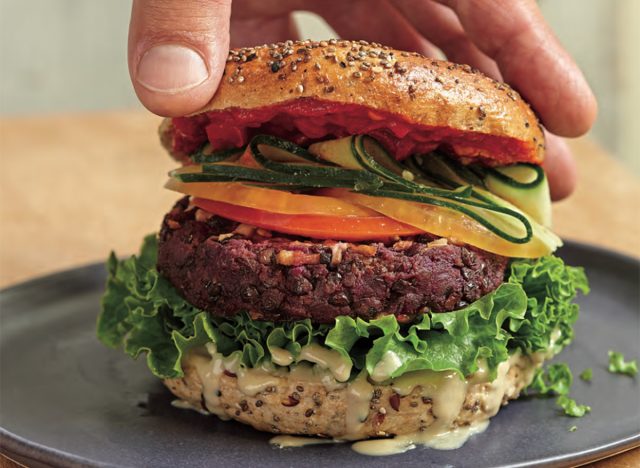
Blue Zones Burgers
COOK TIME: 20 minutes + 1 hour set time | MAKES: 4 patties
Americans love burgers—averaging about 60 per year—but traditional versions aren’t always the healthiest choice. These Blue Zones-inspired burgers combine two powerhouse ingredients—legumes and purple sweet potatoes—to create patties that are both nutritious and delicious. The grated mushroom coating gives them extra flavor and a beautiful crust, making them perfect on a bun or over a salad.
Ingredients
- 2 tablespoons extra-virgin olive oil, divided
- 1 cup cooked black lentils
- ½ cup purple sweet potato flesh (from 1 medium potato, baked until very soft and peeled)
- 1 teaspoon liquid aminos or fish sauce
- 1 teaspoon salt
- 1 teaspoon apple cider vinegar
- 1 teaspoon smoked paprika (hot or sweet, to taste)
- 1 garlic clove, grated
- 1 cup shiitake mushroom caps, grated or very finely chopped
- 4 whole wheat burger buns (optional)
Note: For quick-baked potatoes, follow microwave instructions provided on page 62.
Instructions
- Preheat the oven to 515°F.
- Lightly oil a 13×9-inch sheet pan with 1 tablespoon of olive oil.
- In a large bowl, combine the remaining 1 tablespoon of olive oil with the lentils, sweet potato flesh, liquid aminos (or fish sauce), salt, apple cider vinegar, smoked paprika, and grated garlic. Use a potato masher to thoroughly mix until most lentils are broken and everything is evenly blended.
- Cover and chill the mixture for at least 1 hour to help the patties set.
- Place a 4-inch ring mold on the oiled sheet pan. Add 2 tablespoons of grated mushrooms inside the ring, spreading evenly. Spoon ¼ of the burger mixture into the mold and use a spatula to flatten into a ⅜-inch-thick patty.
- Sprinkle another 2 tablespoons of mushrooms over the top and press gently so they stick. Repeat for the remaining three patties.
- Brush the tops of all patties with any remaining oil.
- Bake for 20 minutes, flipping halfway through, until both sides form a golden-brown crust.
- Serve on buns, over a salad, or on plates with your favorite condiments and toppings.
Make-Ahead & Storage
- The patty mixture can be made up to 2 days ahead and stored tightly covered in the fridge.
- To freeze, arrange patties on parchment paper and place directly in the freezer. Once frozen solid, transfer to a tightly sealed freezer bag for up to 1 month.
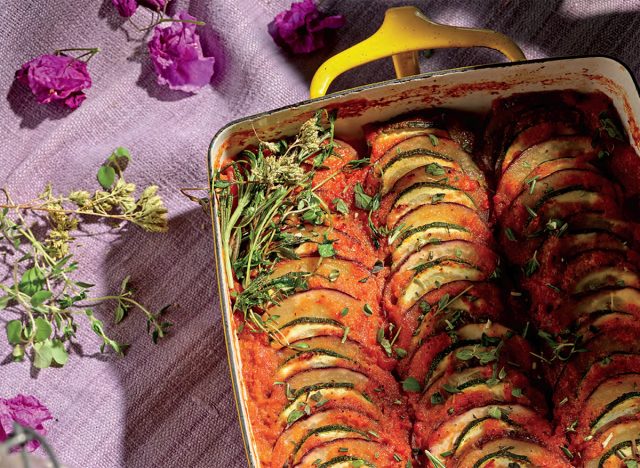
Roasted Ratatouille
COOK TIME: 40 minutes | MAKES: 4 servings
This Provençal-inspired dish highlights summer’s bounty of nightshades—tomatoes, peppers, eggplant, and zucchini—in a savory, flavorful bake. This simplified version delivers classic ratatouille taste while borrowing a bit of the beautiful layered presentation made famous by the movie of the same name.
Ingredients
- 2 zucchini, cut into ⅛-inch rounds
- 1 eggplant (or 2–3 thin Japanese eggplants), cut into ⅛-inch rounds
- 1 teaspoon salt, divided
- ¼ cup + 2 tablespoons extra-virgin olive oil, divided
- 1 red bell pepper, seeded and roughly chopped
- ½ onion, roughly chopped
- 2 plum tomatoes, roughly chopped
- 2 garlic cloves, chopped
- 4 sprigs thyme, leaves stripped, divided
- 4 sprigs oregano, leaves stripped and chopped, divided
- 1 sprig rosemary, leaves stripped and chopped, divided
- ¼ teaspoon freshly ground black pepper
Instructions
- Preheat the oven to 375°F.
- In a large bowl, toss the zucchini and eggplant slices with ½ teaspoon salt. Add ¼ cup olive oil and toss again until evenly coated. Set aside.
- In a blender, combine the bell pepper, onion, tomatoes, garlic, half the herbs, remaining salt, and black pepper. Blend until smooth to form a puree.
- Pour half of the puree into a wide, round casserole dish, spreading it into an even layer.
- Arrange the zucchini and eggplant slices on top, alternating slices to create a scalloped, layered pattern.
- Spread the remaining puree evenly over the vegetables, then sprinkle with the remaining herbs.
- Bake for 40 minutes, then remove from the oven and drizzle with the remaining 2 tablespoons olive oil.
- Let rest for 5 minutes before serving.
Tip: Ratatouille tastes even better the next day. Make it ahead of time, refrigerate, and reheat before serving.
‘Shroom Bowls With Creamy Dressing
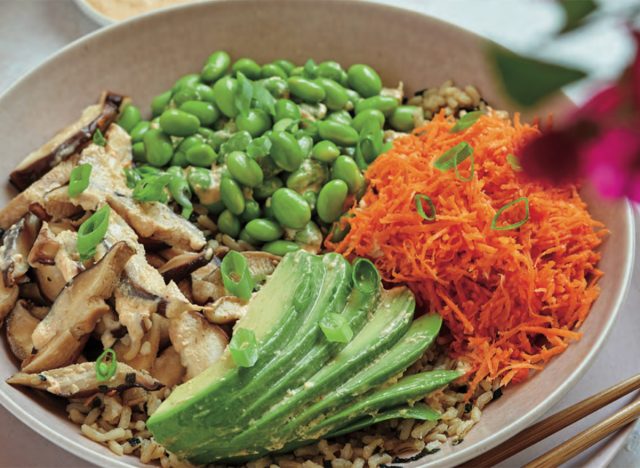
PREP TIME: 20 minutes | MAKES: 4 servings
In just one bowl, you can pack fiber-rich grains, gut-healthy veggies, and bold flavors for a satisfying meal. These versatile bowls come together quickly, especially if you have pre-cooked rice on hand, and they’re perfect for make-ahead lunches during the workweek. Keep the dressing on the side until ready to serve.
Ingredients
For the Marinated Mushrooms
- 4 large shiitake mushrooms (fresh, not dried), stems removed
- 1 tablespoon soy sauce
- 1 tablespoon rice vinegar
- 1 teaspoon fresh ginger, thinly sliced
- 1 garlic clove, sliced
- ¼ cup boiling water
For the Dressing
- ½ cup kimchi
- ½ cup Kewpie mayo
For the Bowls
- 4 cups cooked brown jasmine rice
- 1 tablespoon sesame oil
- 2 tablespoons furikake seasoning
- 1 cup cooked edamame
- 1 carrot, peeled and grated
- 1 avocado, sliced
- 1 scallion, thinly sliced (for garnish)
Instructions
Marinate the Mushrooms
- Place mushrooms in a medium bowl and add soy sauce, rice vinegar, ginger, and garlic. Toss to combine.
- Pour the boiling water over the mixture, cover, and let sit for 10 minutes.
- Remove mushrooms, let cool slightly, and slice thinly. Set aside.
Make the Dressing
- In an immersion or regular blender, combine kimchi and Kewpie mayo. Blend until smooth, scraping down the sides as needed. Set aside.
Prepare the Rice Base
- In a medium bowl, toss the cooked rice with sesame oil and furikake until evenly coated.
Assemble the Bowls
- Place 1 cup of the rice mixture into each serving bowl, pressing lightly to form a flat surface.
- Arrange ¼ cup edamame, ¼ of the grated carrot, ¼ of the avocado, and ¼ of the sliced mushrooms over the rice.
- Drizzle dressing over the top and garnish with scallions.
Tip: To save time, prep the mushrooms and dressing ahead of time and store separately. Assemble just before serving for the freshest flavor.
Lemon-Ginger Granola
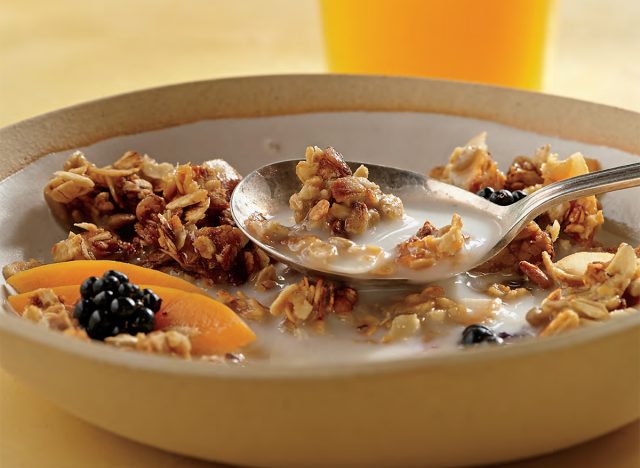
COOK TIME: 20 minutes | MAKES: About 3 cups
Lemon isn’t just for dinner or dessert—it shines in this homemade granola, adding a bright, refreshing flavor to your breakfast bowl. This simple, cost-effective recipe makes a crunchy, flavorful alternative to store-bought cereals. It’s also easy to double or triple, so you can prep enough for the whole week or longer.
Ingredients
- 2 cups rolled oats
- ¼ cup walnuts, chopped
- ¼ cup sunflower seeds
- ¼ cup crystallized ginger, chopped
- ¼ cup flaked or shredded coconut
- 3 tablespoons honey
- 3 tablespoons extra-virgin olive oil
- ⅛ teaspoon lemon extract
- ⅛ teaspoon vanilla extract
- Zest of 1 lemon
Instructions
- Preheat the oven to 350°F.
- In a large bowl, combine the oats, walnuts, sunflower seeds, crystallized ginger, and coconut. Toss with honey, ensuring the mixture is evenly coated but allowing some clusters to form.
- Add the olive oil, lemon extract, and vanilla extract, then toss again until fully combined.
- Spread the mixture evenly on a sheet pan and bake for 20 minutes, stirring once halfway through. The granola should look lightly toasted, but avoid overbaking, as it can become bitter.
- Remove the pan from the oven and toss with the lemon zest.
- Let the granola cool completely before eating or storing.
Storage & Variations
- Store in an airtight jar in a cool, dry place for up to one month.
- Swap in your favorite nuts, seeds, or dried fruit to customize flavor and texture.
Brûlée Pears With Spiced Yogurt & Muesli
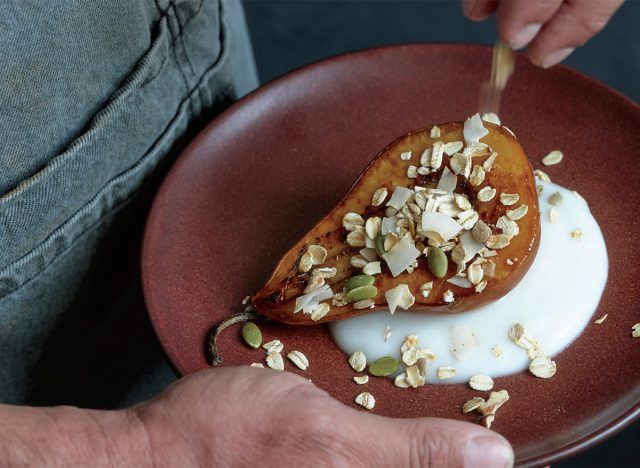
COOK TIME: 5 minutes | MAKES: 4 servings
Perfectly ripe pears have a delicate, almost tropical aroma that pairs beautifully with warming spices like cardamom and cinnamon. Broiling them with a sprinkle of sugar deepens their flavor, while creamy spiced yogurt and crunchy muesli make this a satisfying, nutritious dessert—or an indulgent breakfast treat.
Ingredients
- ½ cup muesli (page 97 or store-bought)
- 1 cup coconut yogurt
- ¼ teaspoon ground cardamom
- ¼ teaspoon ground cinnamon
- 2 ripe pears, halved lengthwise and cored
- 1 teaspoon coconut sugar
- Fresh mint sprigs (for garnish)
Instructions
- Preheat your oven to broil on high.
- In a shallow ovenproof pan large enough to hold all pear halves, toast the muesli over medium-high heat for about 3 minutes, until fragrant. Transfer to a small bowl and set aside.
- In a separate small bowl, combine the yogurt, cardamom, and cinnamon. Mix well and set aside.
- Place the pear halves in the same pan, cut side up, and sprinkle with coconut sugar.
- Broil the pears for 3 to 5 minutes, until the sugar browns and caramelizes.
- To serve, spoon ¼ cup spiced yogurt onto each plate, place a pear half on top, and sprinkle with toasted muesli. Garnish with fresh mint.
Tip: Swap pears for peaches, plums, or apples when in season for a versatile twist.
Hibiscus-Mint Tea

PREP TIME: 10 minutes | MAKES: 4 (1-cup) servings
Tea is a cornerstone beverage in Blue Zones like Okinawa, Sardinia, and Ikaria, where centenarians enjoy it daily. This version combines tart, fruity hibiscus flowers with refreshing mint, bright lime peel, and a touch of honey for natural sweetness. Enjoy it hot, iced, or topped with sparkling water for a refreshing twist.
Ingredients
- ½ cup fresh mint leaves, plus extra sprigs for garnish
- ¼ cup wildflower honey
- ½ cup dried hibiscus flowers
- Peel from ¼ lime, sliced
- 4 cups boiling water
Instructions
- Place the mint leaves and honey in a large heatproof jar or pitcher.
- Muddle with a wooden spoon to gently crush the leaves and release their oils.
- Add the hibiscus flowers and lime peel.
- Pour in the boiling water, cover, and let steep for 5 minutes.
- Strain into cups and serve hot, or chill and serve over ice.
- Garnish each serving with a sprig of fresh mint.
Tip: Add a splash of seltzer for a sparkling, refreshing variation.
The post 8 New Blue Zones Recipes That Could Add Years to Your Life appeared first on Eat This Not That.
]]>The post 7 Budget-Friendly July 4th Dishes Chefs Swear By appeared first on Eat This Not That.
]]>The holiday weekend is around the corner but you still have time to get your menu in order and deliver a cost-effective, but unforgettable meal that will impress your guests. From salads to flavorful sides, here are seven food items and recipes from chefs to serve at your Fourth of July bash that beat restaurant prices right now.
Tortellini Pasta Salad
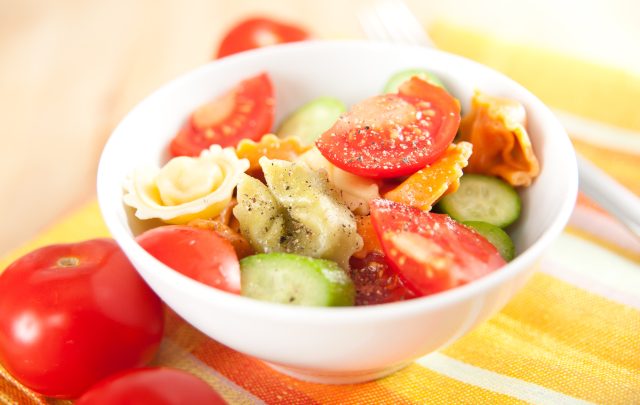
Everyone loves a good pasta salad and Dennis Littley, Chef and Recipe expert at Ask Chef Dennis says you can feed eight people for around $12 to $15, which works out to less than $2 per serving with his Tortellini Pasta Salad.
”One of my go-to dishes for the Fourth of July is my tortellini pasta salad, especially when I’m cooking for a crowd,” he says. “It’s a dish that feels a little elevated thanks to the cheese-filled pasta, but it’s surprisingly budget-friendly and easy to pull together.”
Here’s how to make it:
16 oz tri-color cheese tortellini
1 cup extra virgin olive oil
⅓ cup red wine vinegar more or less to your taste preference
2 tablespoon fresh lemon juice
1 cup cucumbers sliced and cut in half
1 cup cherry tomatoes cut in half
1 cup red onion diced
½ cup shredded carrots
1 cup chickpeas optional
1 teaspoon salt
1 teaspoon black pepper
1 teaspoon garlic powder
1 teaspoon Italian seasoning
1 tablespoon Italian parsley (or basil) finely chopped for garnish
“I start with one pound of cheese tortellini, cook just until tender and then rinse under cold water to stop the cooking process,” Chef Dennis explains. “Once it’s cooled, I toss it with whatever fresh vegetables I have on hand. This is usually a combination of cherry tomatoes, red bell pepper, sliced black olives, and red onion for some bite and color.”
The next step is the dressing.
“The real magic comes from the vinaigrette. A simple mix of red wine vinegar, good olive oil, a bit of garlic, dried oregano, and salt and pepper pulls everything together. It’s bright, tangy, and really cuts through the richness of the tortellini, which is exactly what you want on a hot day. I always recommend letting the salad sit in the fridge for at least an hour before serving. This gives the pasta a chance to soak up the flavor and makes the whole dish taste even more vibrant.”
To add a little something extra, Chef Dennis says you can elevate the pasta salad by tossing in some chopped sun-dried tomatoes, artichoke hearts, or fresh basil.
“It’s one of those dishes that gives you room to be creative without requiring extra effort or cost. And at a time when so many people are trying to cut back on dining out, this kind of hearty, make-ahead meal really hits the sweet spot. Very easy, affordable, and guaranteed to impress.”
Oeufs Diablo (Deviled Eggs)
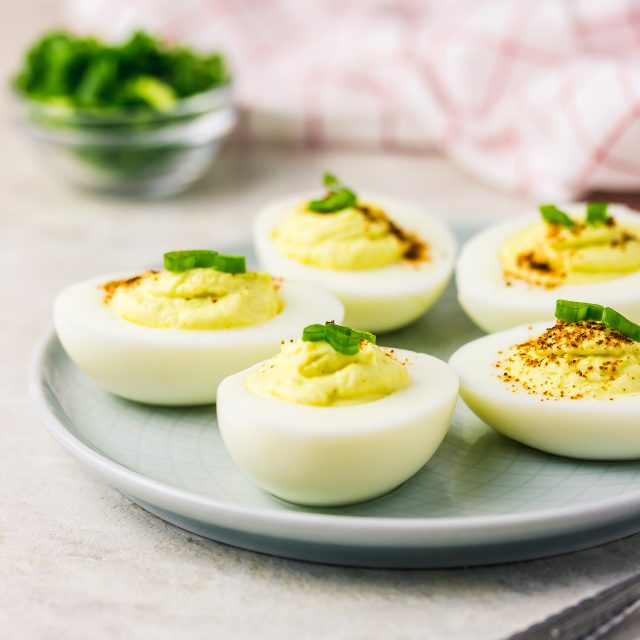
Deviled Eggs strike a satisfying balance of taste and texture and it’s a go-to dish for Chef Brian Theis. His recipe is around $10 to make as long as you already have some of the ingredients in your pantry and it serves 24 people.
The TV personality and author of “The Infinite Feast: How to Host the Ones You Love—Recipes from the Big Easy . . . and Beyond” shares his recipe below.
1 tablespoon salt
2 tablespoons distilled white vinegar
12 large eggs
¼ cup mayonnaise
2 teaspoons Dijon mustard
2 tablespoons butter, softened
1 teaspoon white vinegar
1 teaspoon sugar
1 teaspoon finely ground pepper
1 ½ tablespoons finely minced parsley
Smoked paprika for garnish
1 ½ tablespoons minced chives for garnish
In a large pot, bring three inches water, salt, and vinegar to a rolling boil. With a slotted, or other spoon, place eggs in water, reduce heat to a simmer, cook for 12 to 13 minutes uncovered.
Plunge eggs in a large bowl of ice water for 5 minutes. Tap each on the flat end to break the shell then peel under the cold water in the bowl.
Slice in half lengthwise. Remove yolks to a medium bowl. Add mayo, mustard, butter, vinegar, sugar, pepper, parsley, and mash together thoroughly with a fork and/or spoon till smooth enough to pipe (no chunks or lumps). Be patient, and vigorous.
Into a pastry bag with a large open star tip (not too narrow on end), spoon mixture then pipe into each of the whites. Top each with a sprinkle of paprika and a pinch of chives and serve to a 21-gun salute.
Sweet ‘n Sour Picnic Slaw
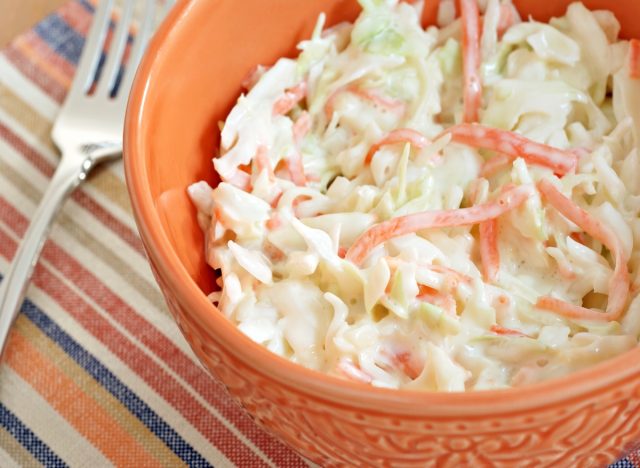
Slaw is a staple at a Fourth of July get-together and Chef Brian says he calls his Sweet ‘n Sour Picnic Slaw a “tart and tempting recipe picnic because it has no mayo and will last longer in the park on your holiday!”
The Sweet ‘n Sour Picnic Slaw serves eight generous portions and is also around $10 to prepare.
Here’s how to make it:
1/3 cup red wine vinegar
Juice of 1 lemon
1/3 cup light brown sugar
1 generous tablespoon honey
1 tablespoon Tabasco Green Jalapeño Sauce
1 scant teaspoon salt
2 teaspoons freshly ground black pepper
1/2 cup olive oil
1 pound (or a bit more) shredded cabbage, red cabbage, carrots
1 medium red onion, sliced in thin half rings
In a large bowl, briskly whisk together vinegar, lemon juice, sugar, honey, hot sauce, salt, pepper. Slowly whisk in olive oil to complete the dressing. To bowl, add cabbages, carrots, and onion.
Toss with dressing, lightly combine all. Chill, covered, at least one hour before serving.
You can find your cabbages and carrots pre-cut in some stores, or, like the photo below, do the knife work all by your amazing self!
Mexican Corn on the Cob
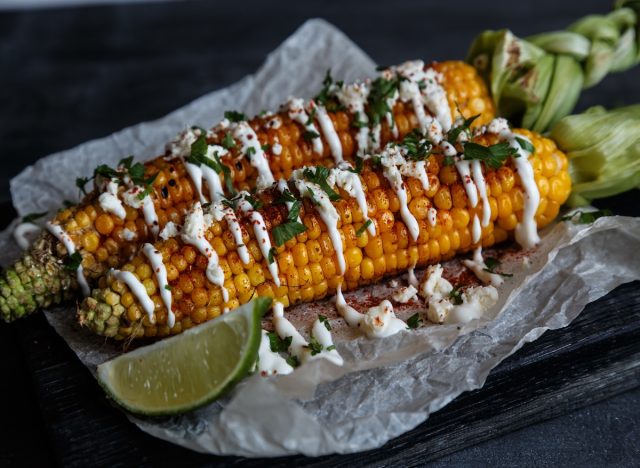
Mexican Corn on the Cob can be a festive side to serve at your Fourth of July event. It’s delicious and affordable.
“Corn is cheap and abundant in summer, and the toppings are just refrigerator basics,” says Marissa Stevens, recipe developer and founder of Pinch and Swirl who shares her recipe for Mexican Corn on the Cob, which serves four and is around $7 to prepare.
Here’s how to make it:
4 ears fresh corn on the cob husks pulled back and silks removed
2 tablespoons cold butter
1 teaspoon chili powder
1/4 cup mayonnaise
1/2 cup chopped fresh cilantro
2 ounces crumbled cotija cheese
smoked paprika to taste
1 lime cut into wedges
Butter fresh ears of corn and grill until lightly charred. Slather with chili mayo and sprinkle with cotija cheese, chopped cilantro, smoked paprika, and a squeeze of lime.
Caesar Pasta Salad
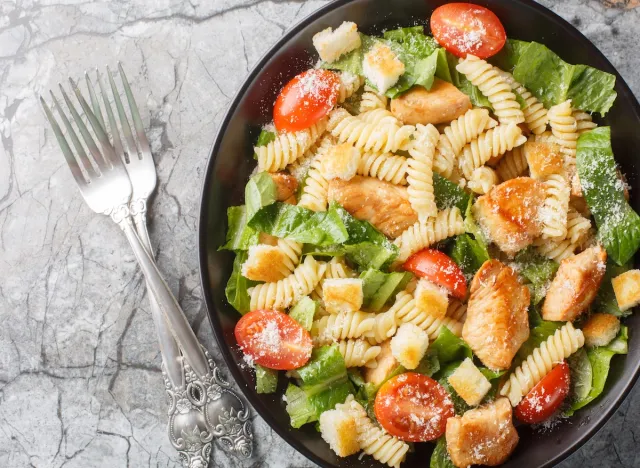
A Caesar pasta salad can work as a side or main dish and Stevens says her recipe is not only “crave-worthy,” but affordable. It serves six to eight people and costs around $7–9.
Here’s how to make it:
12 ounces rotini pasta or other short pasta
To make the dressing:
2 tablespoons fresh lemon juice
2/3 cup mayonnaise
2 teaspoons Dijon mustard
1 clove garlic minced, or more
1 teaspoon Worcestershire sauce or more
1 teaspoon anchovy paste optional but recommended, plus more to taste
salt and freshly ground black pepper to taste
For the ‘croutons’:
2 tablespoons olive oil
1 clove garlic minced
1/2 cup panko breadcrumbs
pinch kosher salt
For the salad:
2 large romaine hearts washed, dried and torn into small, bite size pieces
1/2 cup grated Parmesan cheese plus more for garnish
Toss cooked rotini and chopped romaine with a homemade Caesar-style dressing, toasted panko “croutons,” and Parmesan. Bold flavors, great texture, easy to prep ahead.
Watermelon and Arugula Salad
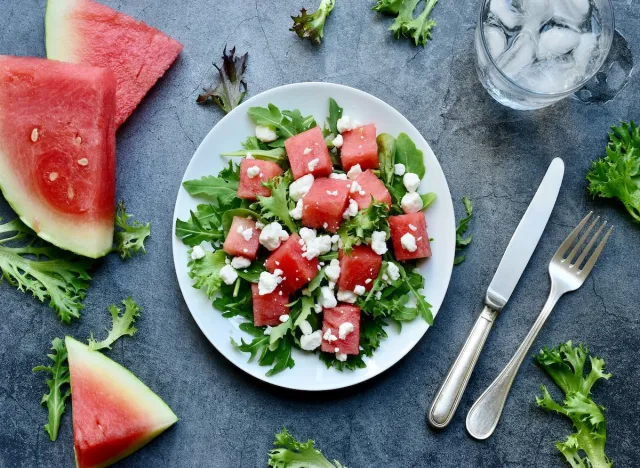
A Watermelon and Arugula Salad is a light side that’s a refreshing way to cool down and it’s ideal to serve during the Fourth.
“A small watermelon goes a long way, and the rest is minimal,” says Stevens. Her recipe serves six to eight people and costs about $9-$12.
For the Vinaigrette:
2 tablespoons fresh lime juice juice of 1 whole lime
2 tablespoons champagne vinegar or white wine vinegar
1 tablespoon finely chopped shallot
1/2 small jalapeño seeded and finely chopped
2 teaspoons fresh thyme leaves
1/2 cup olive oil
Kosher salt and freshly ground black pepper to taste
For the Salad:
1/2 small seedless watermelon ‘small’ is a 5-6 pound watermelon, see recipe notes
5 ounces baby arugula
4 ounces feta cut into 1/4-inch squares or crumbled
Kosher salt and freshly ground black pepper to taste
Layer watermelon cubes, baby arugula, and feta. Drizzle with a quick vinaigrette of lime juice, vinegar, shallot, jalapeño, and olive oil. Refreshing and a little unexpected.
Cajun Potato Salad

Potato salad is a must-have for the Fourth and Stevens says her Cajun Potato Salad is “made with simple pantry and fridge staples, this bold, creamy salad feeds a crowd and keeps well.” Her recipe serves 10 people and costs around $7–$8.
Here’s how to make it:
3 pounds Yukon gold potatoes or red potatoes or new potatoes, cut into 3/4-inch cubes
1 cup mayonnaise
3 tablespoons whole grain mustard
1 tablespoon Cajun seasoning or more to taste
1/2 teaspoon kosher salt, optional
1/4 teaspoon freshly ground black pepper
1 small green bell pepper diced small
1 small white onion diced small
3 ribs celery diced
1/4 cup dill pickle relish
1/4 cup finely chopped fresh flat-leaf parsley plus more for garnish if desired
6 hard-boiled eggs chopped
Boil cubed potatoes and stir into a Cajun-spiced mayo-mustard dressing with celery, onion, relish, bell pepper, parsley, and chopped hard-boiled eggs. Chill and serve.
The post 7 Budget-Friendly July 4th Dishes Chefs Swear By appeared first on Eat This Not That.
]]>The post Red Robin Fan-Favorite Burger Returns for “Limited Time” appeared first on Eat This Not That.
]]>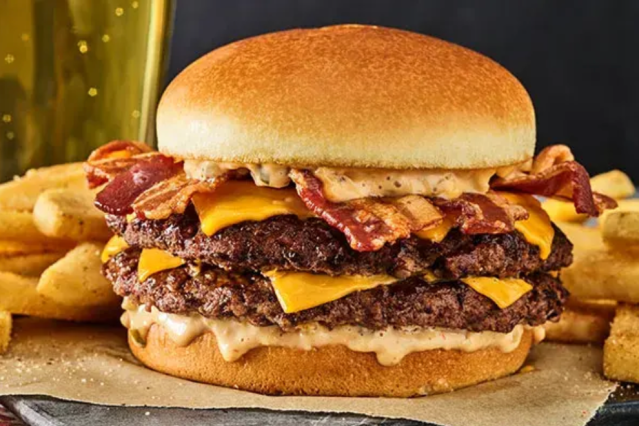
Now through June 13, the Buzzer Beater Bacon Cheeseburger, a slam-dunk of a burger, will be available at participating Red Robin locations. It comes in two options. The first is a “three-pointer” stacked high with three juicy patties, four strips of hardwood-smoked bacon, six slices of American cheese, and dribbled with Red’s Secret Tavern Sauce. You can also order it as a double patty, which has all the same things with just two patties instead of three. The Buzzer Beater Bacon Cheeseburger is available for dine-in, to-go and third-party delivery.
It is already on the limited-time menu. “Served with your choice of side. Don’t miss your shot to try this classic! Stacked high with two juicy patties, four strips of hardwood-smoked bacon, four slices of American cheese and dribbled with Red’s Secret Tavern Sauce,” the description for the smaller burger reads on the website.
The brand also shared about the burger on social media, teasing it in a June 4 post. “If this gets one like we’ll bring back the Buzzer Beater Bacon Cheeseburger,” it wrote. The next day, it shared on Instagram that it was coming back. “Only takes one like to make sure you can eat the best burger for the finals 
 ,” it said.

“BRING IT BACK! BRING IT BACK,” one person commented. “Wait, that was too easy. But we’re not mad about it
  ,” added another. “My prayers have been answered,” a third chimed in. “Yummy,” another said.
“Your favorite Buzzer Beater Bacon Cheeseburger is back just in time for the finals! ,” they captioned another Instagram post. “Make it permanent,” one fan commented.
The post Red Robin Fan-Favorite Burger Returns for “Limited Time” appeared first on Eat This Not That.
]]>The post 18 Best Mother’s Day Recipes to Make Mom Feel Special appeared first on Eat This Not That.
]]>Turkey-Sweet Potato Breakfast Hash
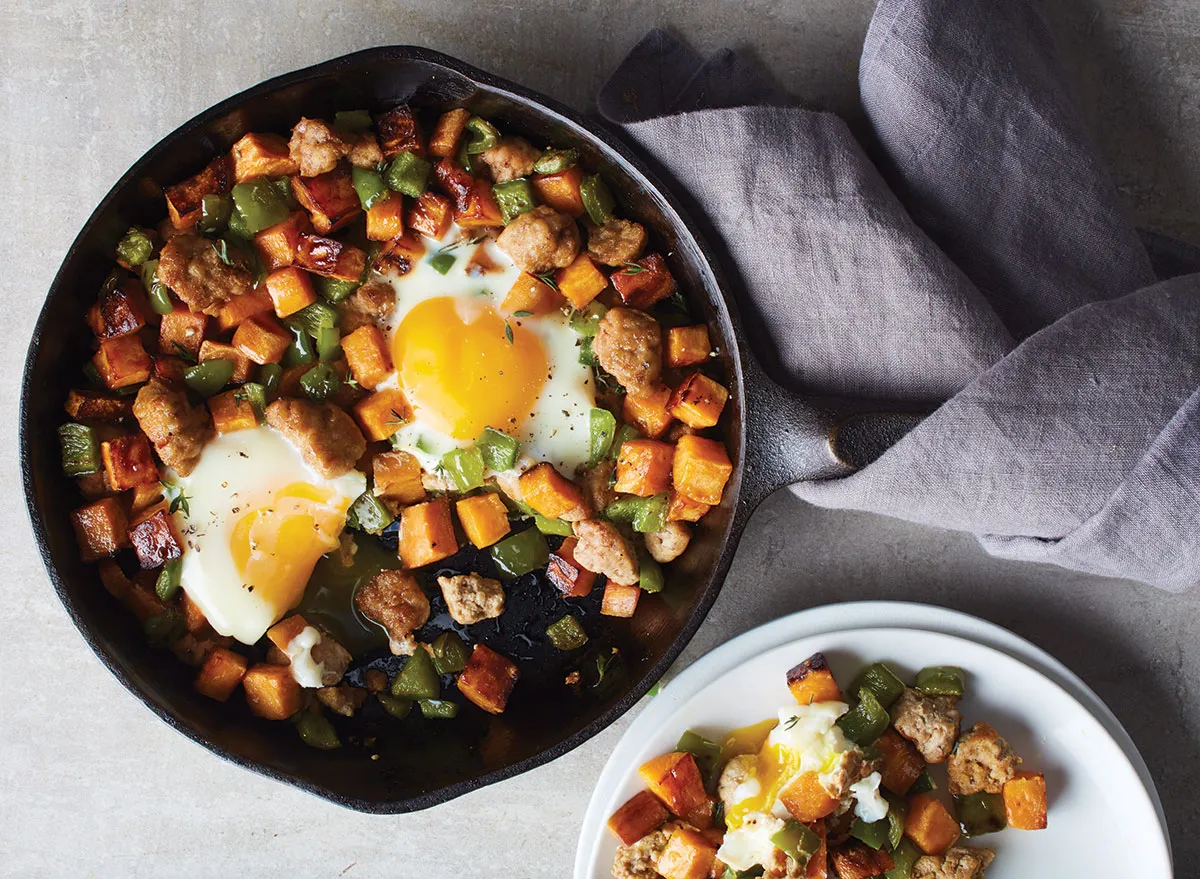
Not only is this a recipe that’s easy to serve the whole family on Mother’s Day, but it’s got all kinds of great nutrients to start your morning. Packed with protein and fiber, this hash features sweet potato and green bell peppers, along with protein-boosting eggs and turkey sausage.
MAKES 2 SERVINGS
INGREDIENTS
1/2 cup 3/4-inch cubes peeled sweet potato
1 Tbsp olive oil
1/2 cup chopped green bell pepper
1/4 tsp paprika
1/4 tsp salt
4 oz lean ground turkey sausage
2 eggs
Ground black pepper
1/4 cup salsa verde (optional)
2 Tbsp chopped fresh cilantro (optional)
HOW TO MAKE IT
- In a medium skillet, cook sweet potato, covered, in hot oil over medium-low heat for 10 minutes, stirring occasionally. Add green pepper, paprika, and half the salt. Cook, uncovered, for 5 to 7 minutes more or until vegetables are just tender, stirring occasionally. Remove vegetables from the skillet; set aside.
- In the same skillet, cook sausage over medium heat until no longer pink, using a spoon to break up sausage as it cooks; drain off any fat if needed. Stir in potato mixture. Push mixture around to create two 3-inch-diameter holes. Reduce heat to medium-low.
- Carefully crack one egg into each of the holes. Sprinkle eggs with remaining salt and a little black pepper. Cover; cook for 2 to 3 minutes or until egg whites are completely set and yolks are to the desired doneness.
- Divide hash and eggs between two serving plates. If desired, top with salsa and cilantro.
Cranberry Orange Scones

Baking scones at home is much easier than you think! Don’t have dried cranberries and an orange? You can make all kinds of scone varieties using the same dough, like a lemon blueberry or a chocolate chunk scone. While it’s one of the easiest Mother’s Day brunch recipes to make, they’re also great for meal prep!
MAKES 8 SERVINGS
INGREDIENTS
Zest of 1 orange
2 cups unbleached all-purpose flour
3 teaspoons baking powder
1/4 cup unsalted butter, cold
1 egg
2 Tbsp honey
1/2 tsp vanilla extract
1/2 cup heavy cream
¼ cup dried cranberries
HOW TO MAKE IT
- Preheat the oven to 400 degrees.
- In a large bowl, add the orange zest, flour, and baking soda. Mix together with a fork.
- Grate the cold butter using a cheese grater. Add to the bowl of dry ingredients and mix again with your fork, working the butter into the flour.
- In a stand mixer (or a large bowl with a whisk), whisk together the egg, honey, vanilla extract, and heavy cream for 30 seconds.
- Add in the flour to the wet ingredients and mix to form a dough. The dough will stick together like cookie dough, so if you don’t have a stand mixer, mix the dough with a rubber spatula or clean hands.
- Sprinkle in the dried cranberries and mix into the dough.
- Move the scone dough to a floured surface. Form the dough into a flat circle.
- Using a knife or a pizza cutter, slice the dough into 8 slices.
- Place the scones on a baking sheet lined with parchment paper.
- Put the baking sheet of scones in the fridge for 15 minutes.
- After chilling, bake the scones for 18-20 minutes.
- Remove the scones to a cooling rack to cool (they may get darker on the bottom if you leave them on the pan).
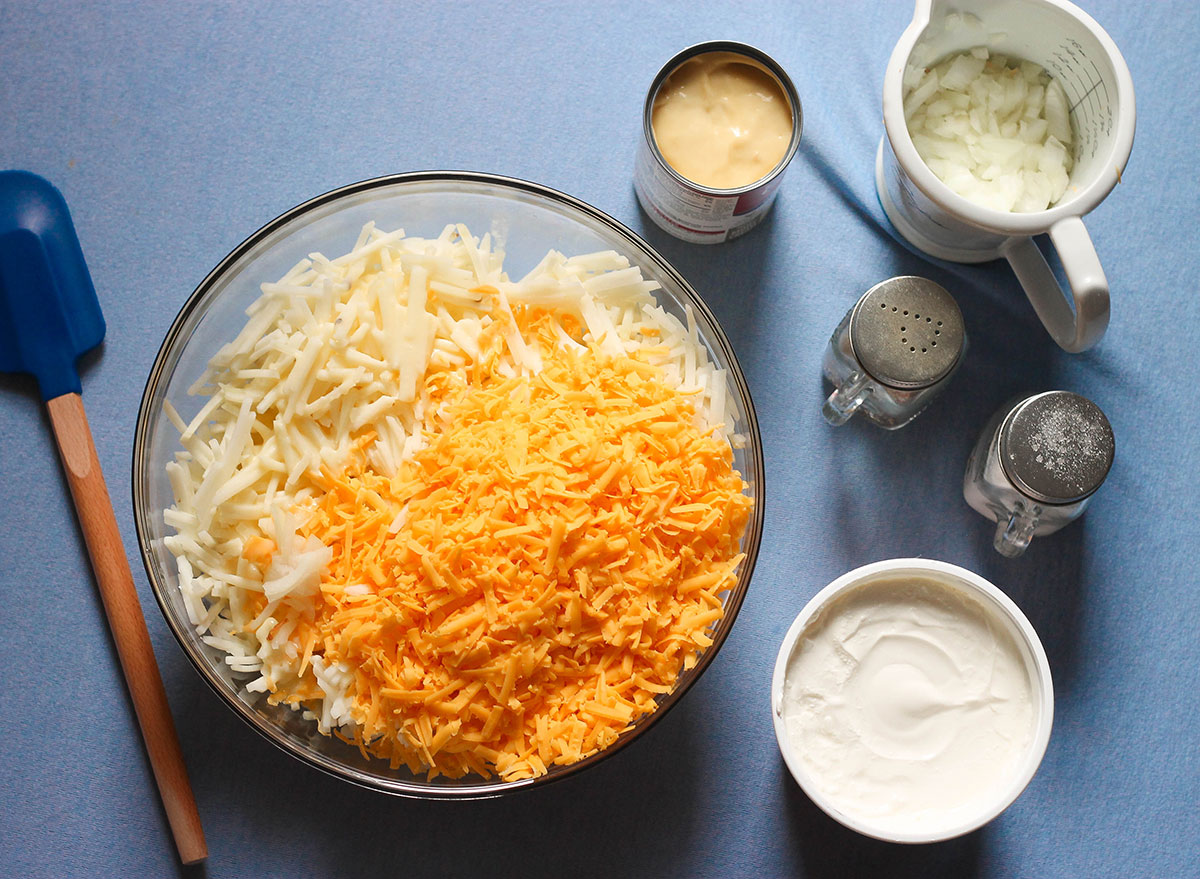
Loaded Hashbrown Casserole
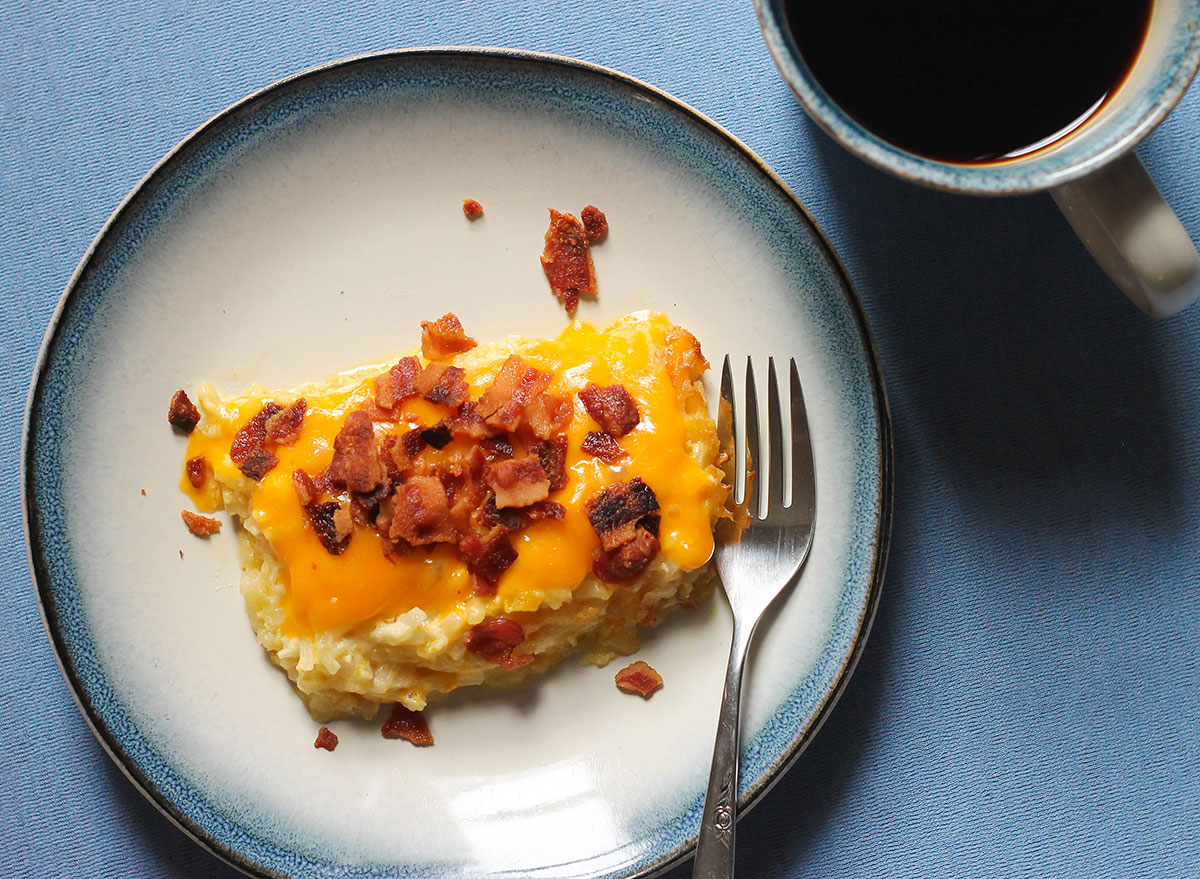
Scramble up a huge skillet of eggs and serve it with this copycat Cracker Barrel loaded hashbrown casserole! The loaded hashbrown casserole is a slice of the hashbrown casserole finished off on the grill with a slice of Colby jack cheese and bacon.
MAKES 12 SERVINGS
INGREDIENTS
1 bag frozen hashbrowns (about 2 lbs.)
1/2 medium onion, diced
1 stick butter, melted (1/2 cup)
1 10 oz. can cream of chicken
16 oz. sour cream
2 cups shredded cheddar cheese
Cooking spray
Bacon, optional
Colby jack slices, optional
HOW TO MAKE IT
Mix all the ingredients
 Kiersten Hickman/Eat This, Not That!
This step is pretty simple, but I need to give you a fair warning: You’ll want a big bowl for this. I made a huge mess while trying to mix all of these ingredients (except for the optional bacon and Colby jack, which is for the loaded casserole.) Get the biggest bowl you have!
One small note about cheese: I personally like to shred up an entire block of cheddar cheese instead of buying shredded cheddar in the bag. I find that the cheese melts easier within the casserole.
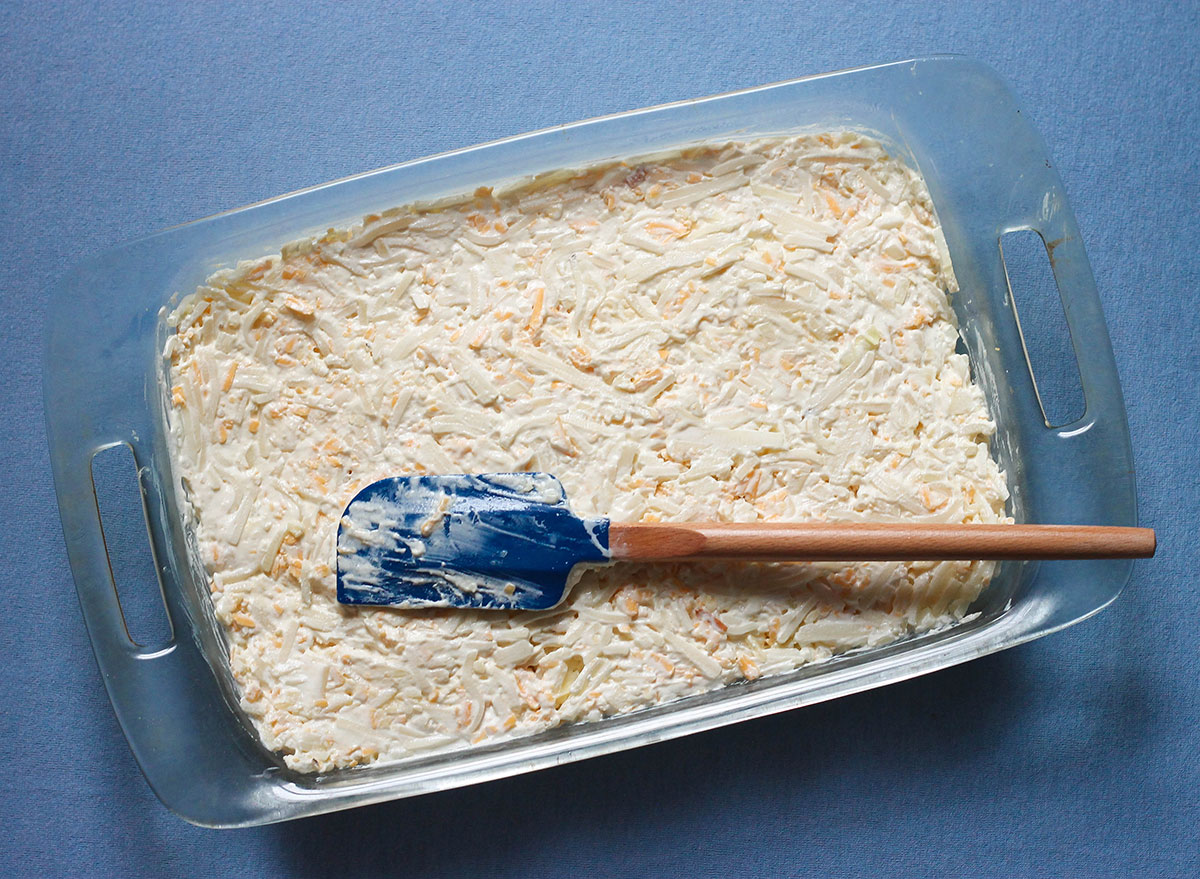
Pour into the dish
 Kiersten Hickman/Eat This, Not That!
Use the cooking spray to coat your casserole dish, and dump the hashbrown mixture into the pan. This may be a two-person job because, again, it’s a lot of food and things may get messy! Have one person hold the bowl and the other person scoop it in.
Evenly spread the hashbrown mixture in the dish so the food all sits at the same level.
Easy, healthy, 350-calorie recipe ideas you can make at home.
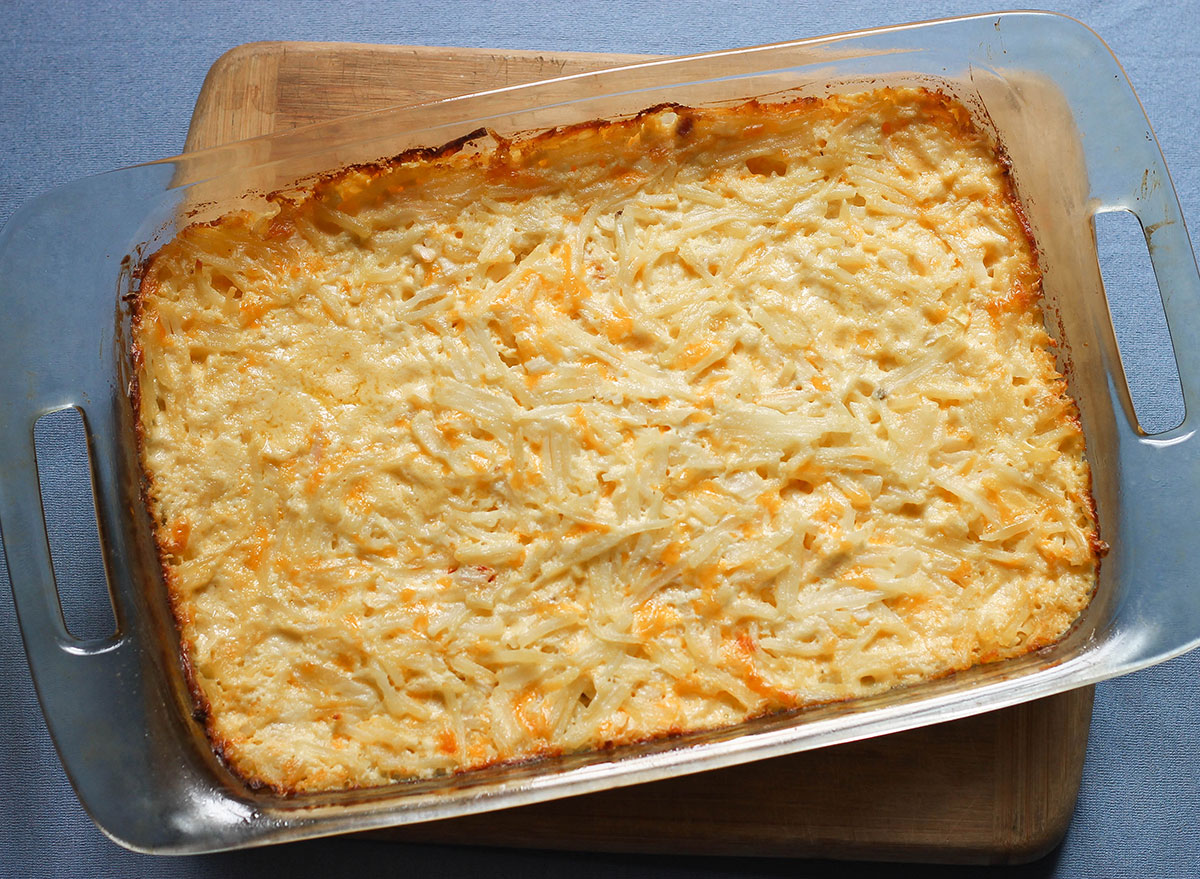
Bake it at 375 degrees
 Kiersten Hickman/Eat This, Not That!
Bake in the oven for 45 to 60 minutes at 375 degrees. I found it took my casserole a full 60 minutes until it was done, but it may vary based on the oven. Check it at 45 minutes, and if the middle is still uncooked and not golden-brown, leave it in there.
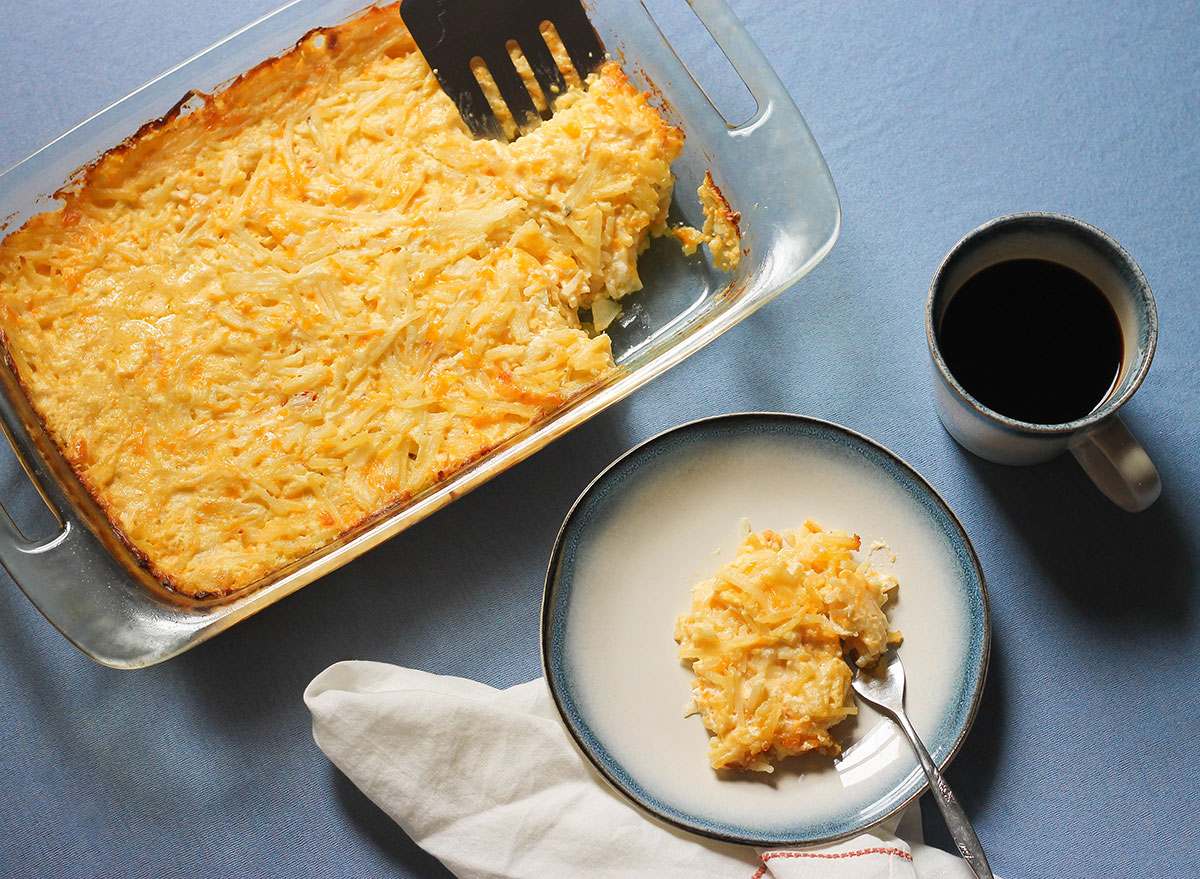
Make it loaded
Kiersten Hickman/Eat This, Not That!
If you want the Cracker Barrel loaded casserole, the additions are pretty easy to throw together. Melt a slice of Colby jack cheese (or sharp cheddar cheese, which is what I prefer) and add some bacon crumbles on top. Not sure how to cook your bacon? Here’s my personal favorite way to cook bacon.
You can either melt the cheese on top of a slice in the microwave, “grill it” in a pan on the stove (the authentic Cracker Barrel way), or if you want the whole casserole to be loaded, add the slices of cheese on top of the casserole during the last 10 minutes of cooking.
Cracker Barrel Hashbrown Casserole Full Recipe
 Kiersten Hickman/Eat This, Not That!
- Preheat the oven to 375 degrees.
- Mix together the frozen hashbrowns, onion, melted butter, cream of chicken, sour cream, and shredded cheddar cheese in a large bowl.
- Spray down a deep casserole dish with cooking spray. Dump the hashbrown mixture into the pan.
- Spread evenly in pan with a rubber spatula.
- Bake in the oven for 45-60 minutes, or until the top is golden brown and the edges start to crisp.
- Want a loaded hashbrown casserole? Melt slices of Colby jack cheese on top and sprinkle on some bacon. If you want the whole casserole to be loaded, add slices of cheese on top of the casserole during the last 10 minutes of cooking.
Red and Green Breakfast Salad
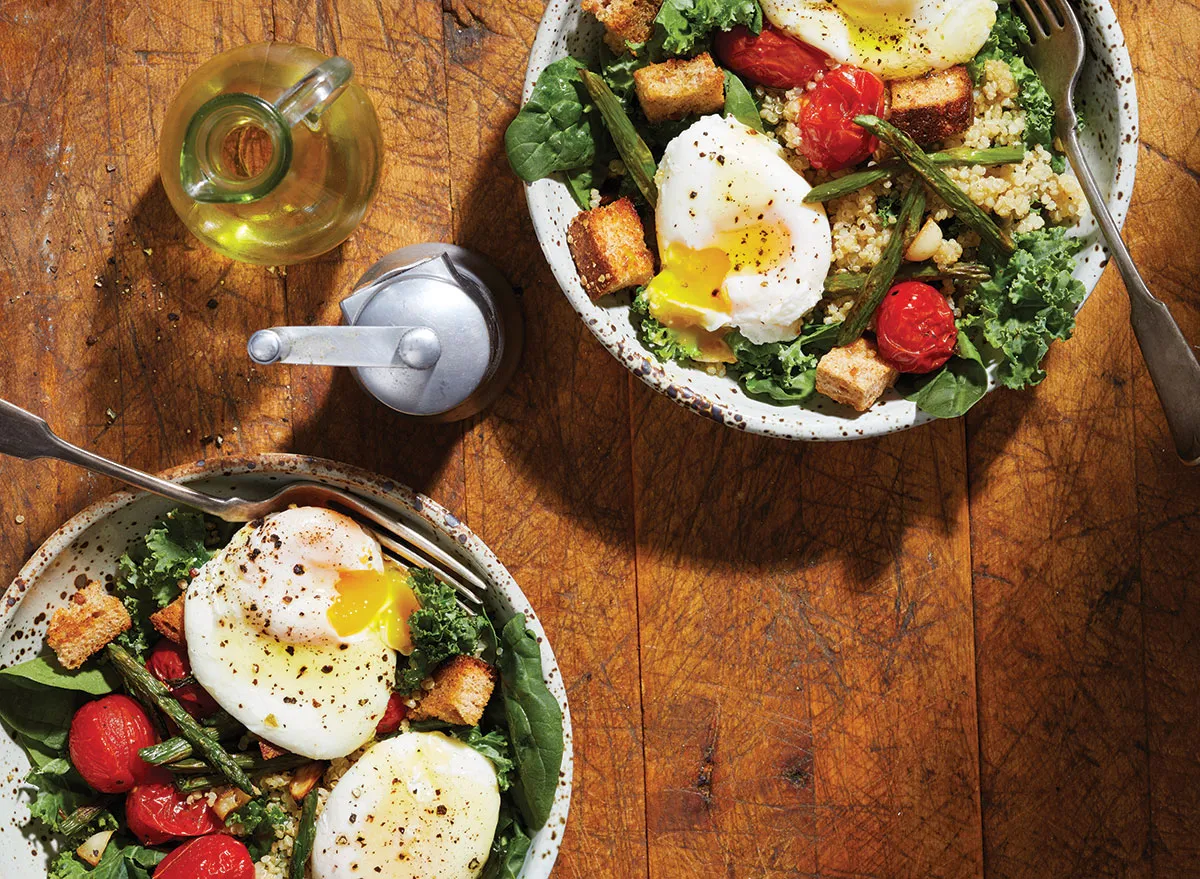
Does mom love her salads and super greens? Serve her what she loves on her special day! With this red and green breakfast salad recipe, you can enjoy a crunchy bowl of veggies for Mother’s Day brunch.
MAKES 4 SERVINGS
INGREDIENTS
1 lb asparagus, trimmed and cut into 2-inch pieces
1 lb cherry or grape tomatoes
6 cloves garlic, quartered
1 Tbsp plus 2 tsp extra-virgin olive oil
2 slices whole-wheat bread, cubed
3 cups chopped stemmed kale
3 cups baby spinach
1 1/2 cups cooked quinoa, chilled
4 cups water
1 Tbsp vinegar
8 eggs
1 Tbsp red wine vinegar (optional)
Salt and black pepper to taste
HOW TO MAKE IT
- Preheat oven to 425°F. Place asparagus, tomatoes, and garlic in a single layer on a 15 x 10 x 1-inch baking pan. Drizzle with 2 tsp oil. Roast for 10 to 12 minutes, or until asparagus is tender. Place bread cubes on a rimmed baking sheet and bake for 5 minutes or until crisp and browned.
- Portion kale and spinach into four serving bowls. Top with quinoa, roasted vegetables, and croutons.
- Meanwhile, add the water and vinegar to a large skillet. Bring vinegar mixture to boiling; reduce heat to simmering. Break an egg into a cup and slip egg into the simmering water. Repeat with three more eggs. Simmer eggs for 3 to 5 minutes, or until whites are completely set and yolks begin to thicken but are not hard. Remove from water with a slotted spoon. Repeat with remaining four eggs. Serve atop salad.
- Drizzle with 1 Tbsp oil and the red wine vinegar, if desired. Season with salt and pepper.
STAY INFORMED: Sign up for our newsletter to get the latest coronavirus foods news delivered straight to your inbox.
Eggs Diablo
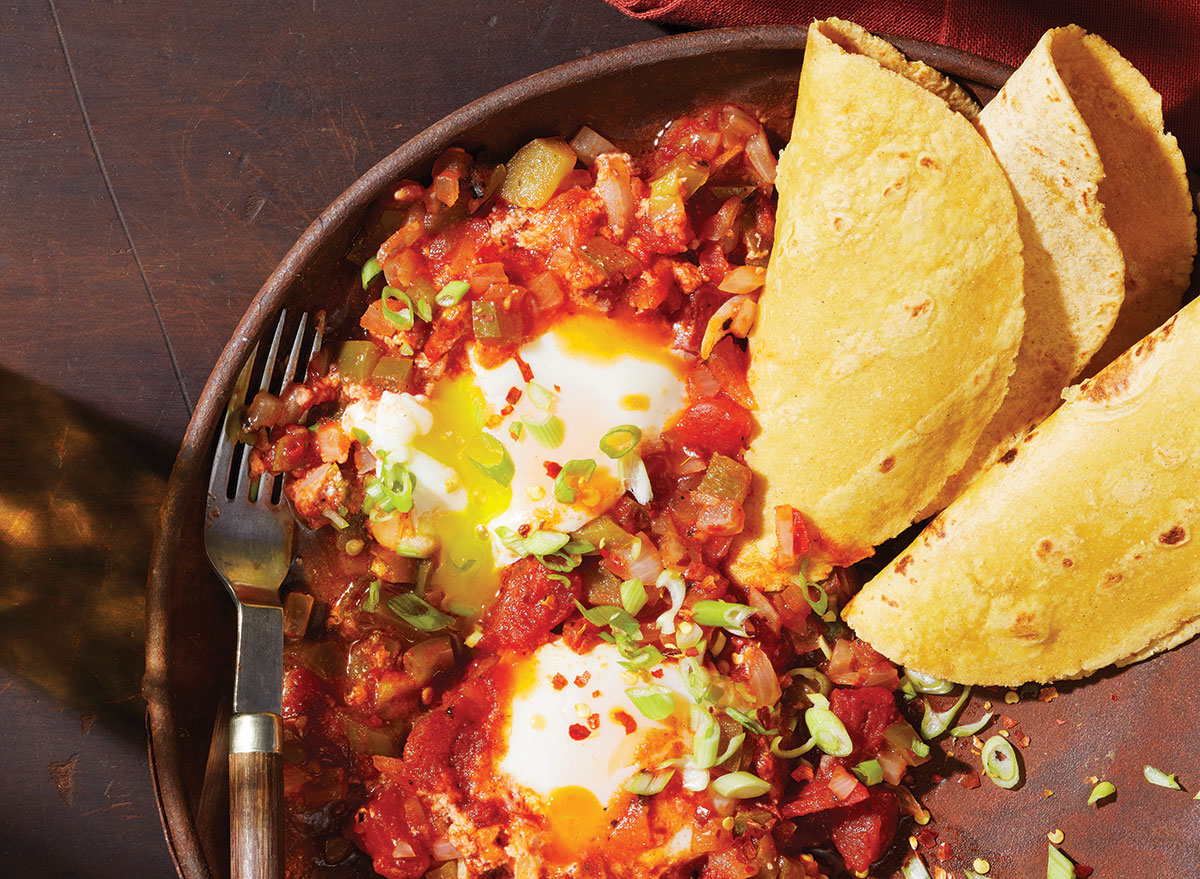
Have a few cans of diced tomatoes you need to use up? This is one of those Mother’s Day brunch recipes that will help you use up those pantry staples! With crushed red pepper and fire-roasted tomatoes, along with green peppers and onions, this dish is bursting with flavor and nutrition.
MAKES 4 SERVINGS
INGREDIENTS
1 Tbsp olive oil
1 medium onion, chopped
1 medium green bell pepper, chopped
1 Tbsp minced garlic
1 14.5-oz can no-salt-added fire-roasted diced tomatoes, undrained
1 8-oz can no-salt-added tomato sauce
1/2 tsp crushed red pepper flakes
8 eggs
2 Tbsp sliced green onions (scallions)
8 corn tortillas, warmed
Salt and black pepper to taste
HOW TO MAKE IT
- In a large skillet, heat oil over medium heat. Add the chopped onion, pepper, and garlic. Cook for 3 to 4 minutes, stirring occasionally until vegetables are tender. Add tomatoes, tomato sauce, and red pepper flakes. Cook for 5 minutes, or until sauce is bubbling around edges.
- Form a small indentation in the sauce. Break an egg into a cup and slip into sauce; repeat with remaining eggs. Cover pan and cook 3 to 5 minutes, or until egg whites are completely set and yolks start to thicken.
- Sprinkle eggs with green onions. Serve with corn tortillas. Season with salt and pepper.
Buttermilk Pancakes

You can’t go wrong with a stack of fluffy pancakes on Mother’s Day! This recipe makes classic buttermilk pancakes, and we also have a version of buttermilk flaxseed pancakes if mom would prefer those instead. Or any of these pancake recipes work well for your Mother’s Day brunch.
MAKES 5 SERVINGS
INGREDIENTS
1 cup all-purpose flour
3/4 teaspoon baking powder
1/2 teaspoon baking soda
1/2 teaspoon salt
1 cup buttermilk
1 egg
2 tablespoons butter, melted
Extra butter, for the griddle
Pure maple syrup
HOW TO MAKE IT
- Mix the flour, baking powder, baking soda, and salt in a large bowl together. I recommend using an electric mixer if you have one (I love my KitchenAid!)
- In a smaller bowl, whisk an egg. Add in the buttermilk and the melted butter.
- Mix in buttermilk egg mixture with dry ingredients until the batter is smooth
- Run a stick of butter over a warmed griddle (or a large, flat frying pan.) Be careful, you don’t want it too hot! This will scorch the pancakes…and your hands.
- For larger pancakes similar to Cracker Barrel’s, pour on a 1/2 cup batter for each pancake (makes about 5)
- For smaller pancakes, pour on a 1/4 cup batter for each pancake (makes about 10)
- Serve with Cracker Barrel maple syrup and butter.
Breakfast Loaded Sweet Potato
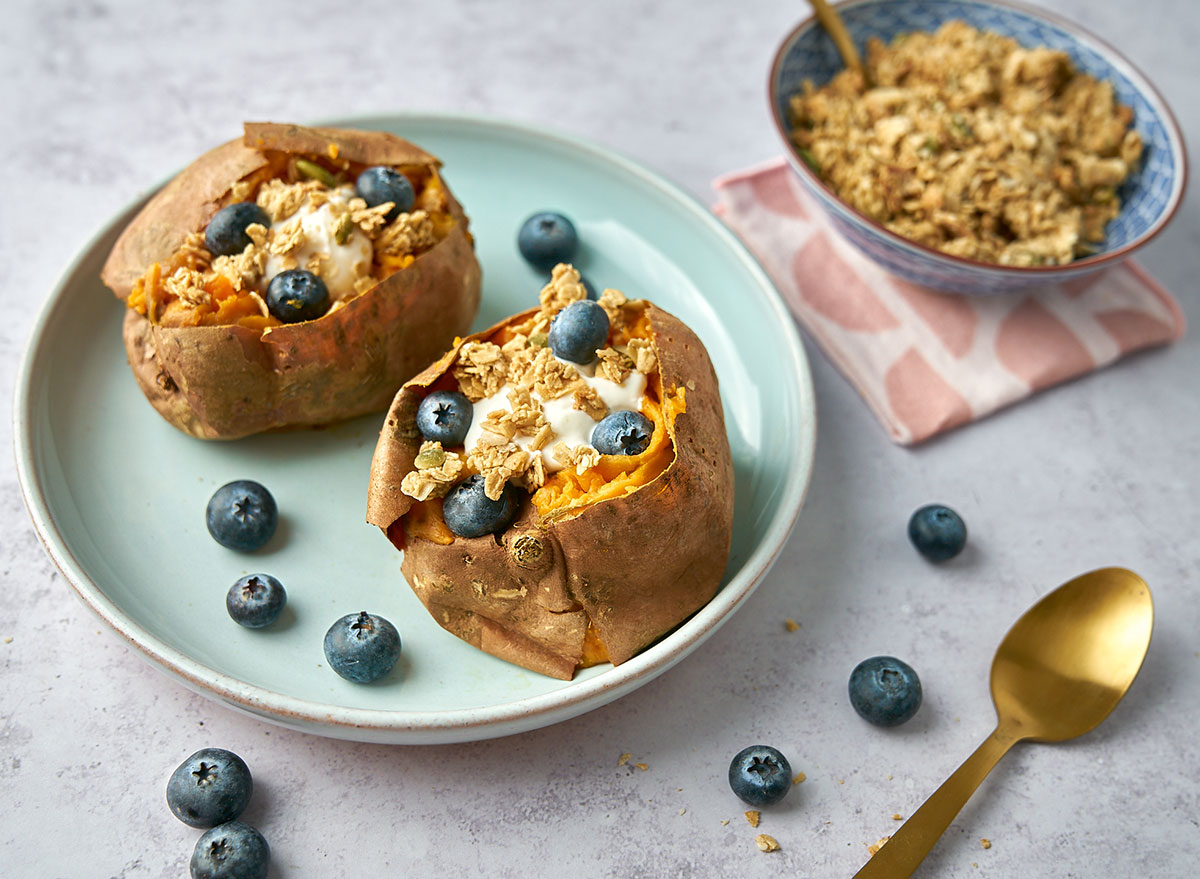
Loaded sweet potatoes aren’t just for dinner, you know! Serve a unique Mother’s Day recipe with this plant-based breakfast loaded sweet potato, stuffed with yogurt, blueberries, and granola.
MAKES 1 SERVING
INGREDIENTS
1 medium sweet potato
2 Tbsp whole milk vanilla Icelandic yogurt
1/4 cup blueberries
2 Tbsp Bob’s Red Mill granola
HOW TO MAKE IT
- Preheat oven to 375°F.
- Wash sweet potatoes and prick with a fork for steam to escape.
- Place on a baking sheet for 45 minutes until sweet potatoes are soft and can be pierced with a fork.
- Open sweet potatoes with a knife and add a dollop of yogurt, blueberries, and top with granola. Serve immediately.
- To make ahead, store baked sweet potatoes in the fridge and microwave to reheat.
Plum Muffins
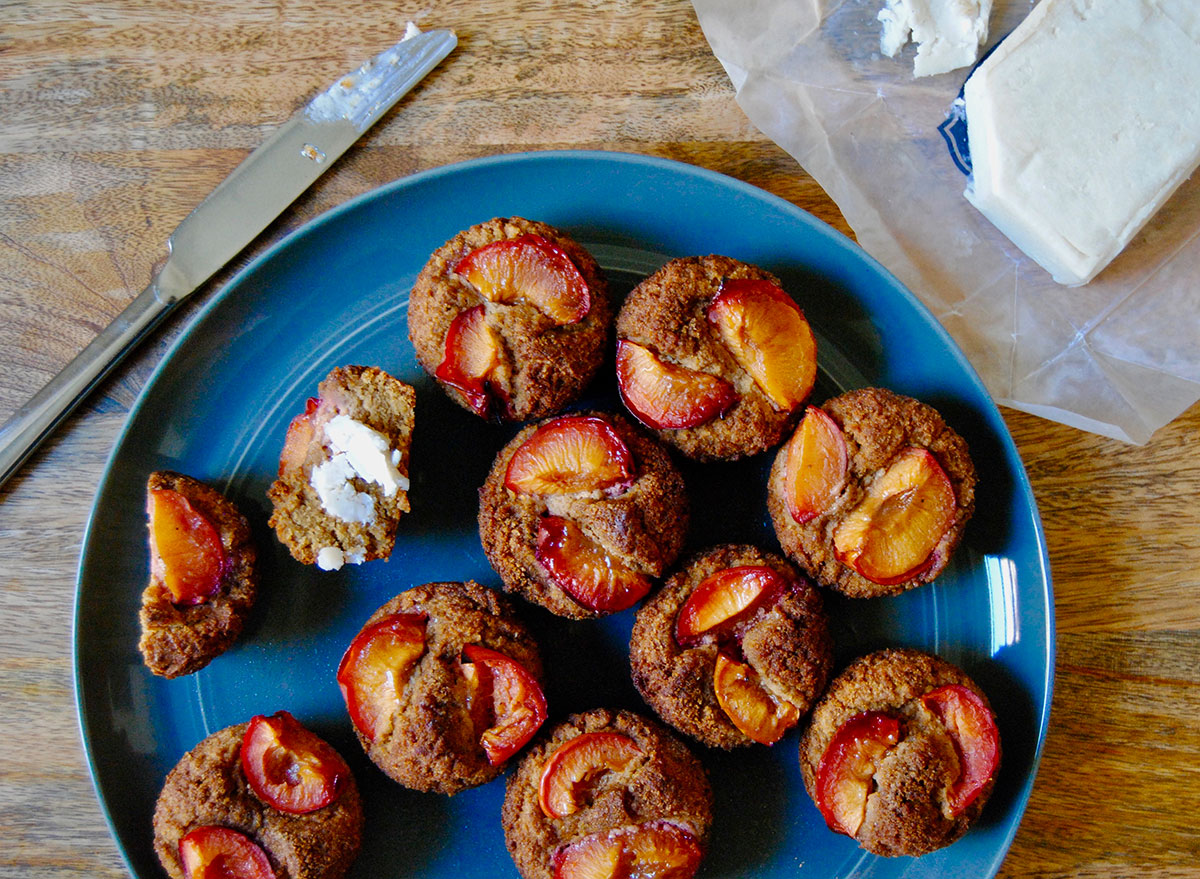
Does mom love her baked goods? Serve mom something she loves with these easy plum muffins. Plus, they’re paleo!
MAKES 12 MUFFINS
INGREDIENTS
3 eggs
½ cup coconut sugar, plus extra for sprinkling
⅓ cup melted and slightly cooled coconut oil
⅓ cup olive oil
2 teaspoons orange zest
2 tablespoons ground flaxseed
1 teaspoon vanilla extract
1 ½ cups almond flour
½ cup coconut flour
2 teaspoons baking powder
1 teaspoon kosher salt
1 teaspoon cinnamon
6 small plums or pluots, pitted and quartered
HOW TO MAKE IT
-
- Preheat oven to 350ºF. Line a 12-cup muffin pan with cupcake liners or grease with nonstick cooking spray.
- In a medium bowl, whisk together eggs, coconut sugar, coconut oil, olive oil, orange zest, flaxseed, and vanilla.
- Whisk in almond flour, coconut flour, baking powder, salt, and cinnamon.
- Evenly divide batter among muffin cups.
- Press 2 plum slices into the center of each muffin and sprinkle with more coconut sugar.
- Bake for 30-35 minutes, or until a toothpick stuck into the center of a muffin comes out clean. Store in airtight containers at room temperature or in the refrigerator for about 1 week, or in the freezer for 2 months.
Made-To-Order Omelets

Treat mom to a whole cooking experience by making her a made-to-order omelet. Using our guide on how to make the best omelet, sprinkle in mom’s chosen fillings and serve her the omelet of her dreams this Mother’s Day.
MAKES 1 SERVING
INGREDIENTS
2 eggs
1 tsp heavy cream
1/2 Tbsp butter
Desired fillings
HOW TO MAKE IT
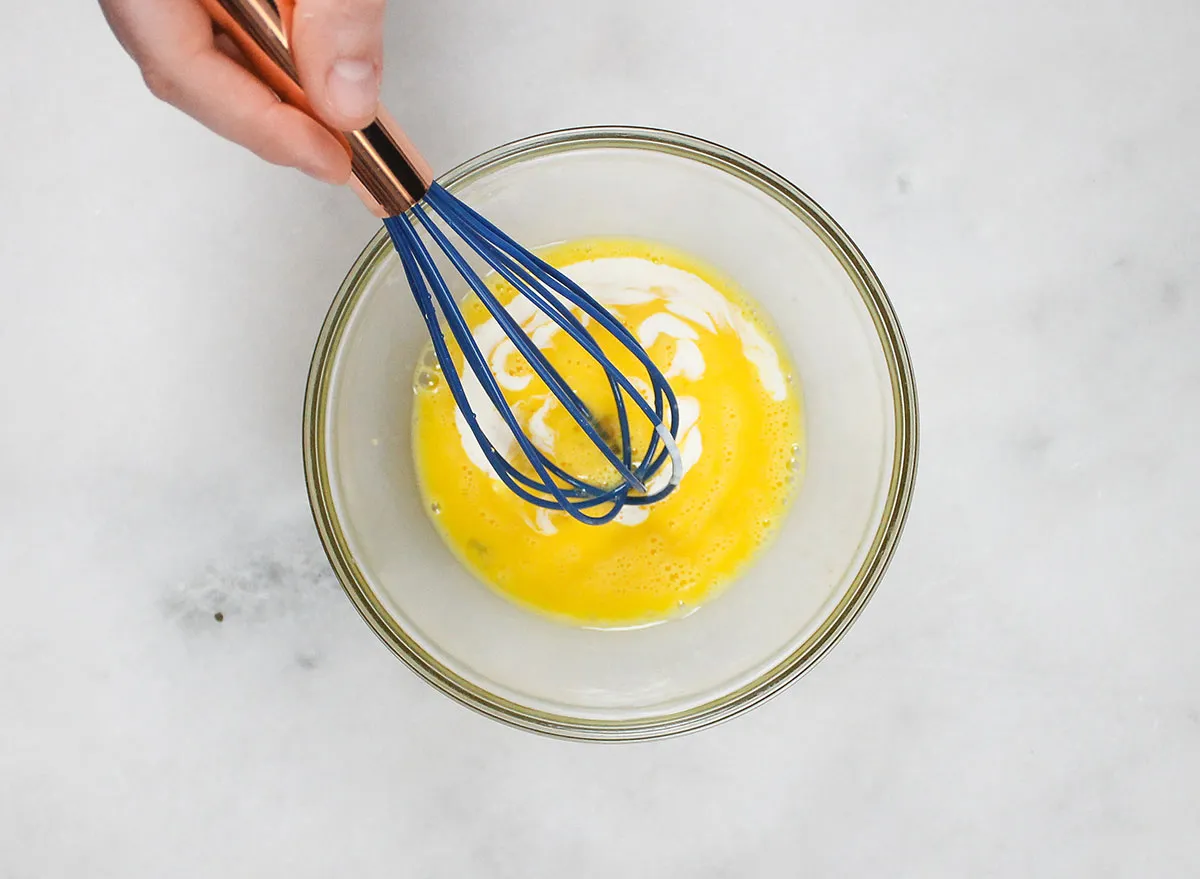
Whisk together eggs and heavy cream
 Kiersten Hickman/Eat This, Not That!
“I like to put a drop of heavy cream in the mixture,” says Vargas. “It adds a little bit of extra fat and it tastes better.” For this omelet, I whisked together two eggswith a “drop” of heavy cream, which equated to about 1 teaspoon.
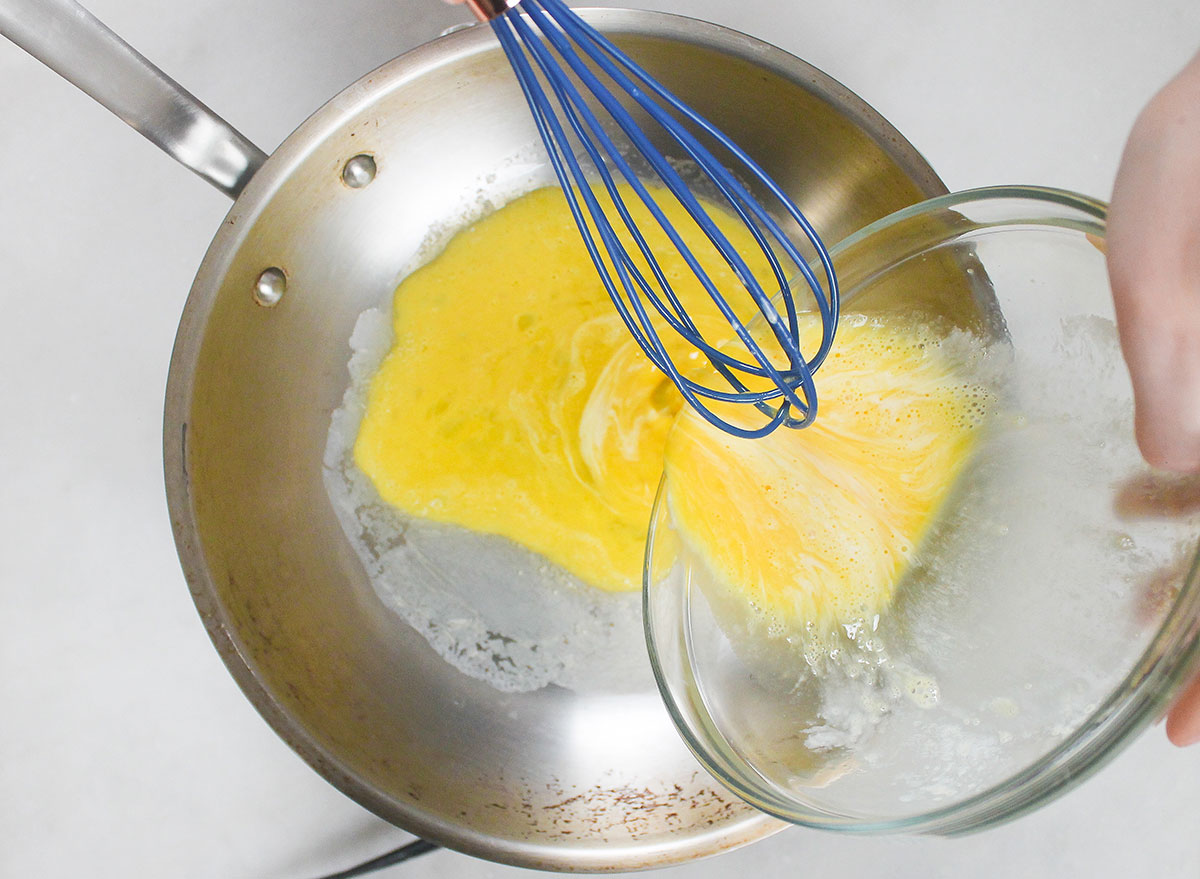
Pour the egg mixture on a non-stick pan
 Kiersten Hickman/Eat This, Not That!
Heat a non-stick pan over medium heat. Add in some butter (about 1/2 tablespoon) and move it around to coat. Vargas specifically recommends using clarified butter, if you have it. “That way it doesn’t burn it,” he says. “I like the omelet to be a nice yellow color with no burnt or brown spots.”
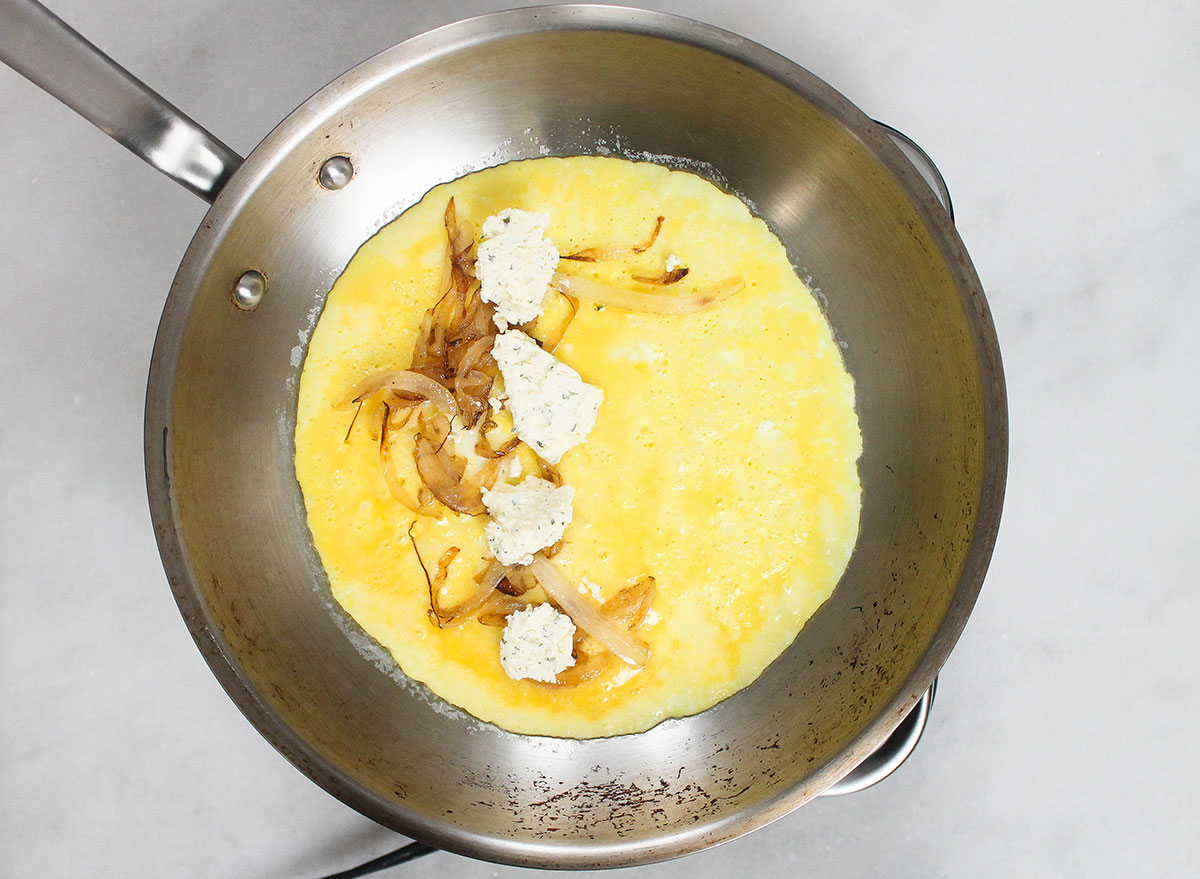
Add in the fillings
 Kiersten Hickman/Eat This, Not That!
When the egg mixture is cooked around the edges (about 1 minute), add your fillings. “My favorite omelet has caramelized onions and Boursin cheese,” says Varas. “That’s a pretty classic French omelet.” Try spinach, cherry tomatoes, and feta cheese for another effortless combination.
Not sure how to caramelize onions? It’s easy! Slice up an onion real thin. On very low heat, melt 1 tablespoon of butter then add the onion slices. Continually stir on low for at least 20 minutes.
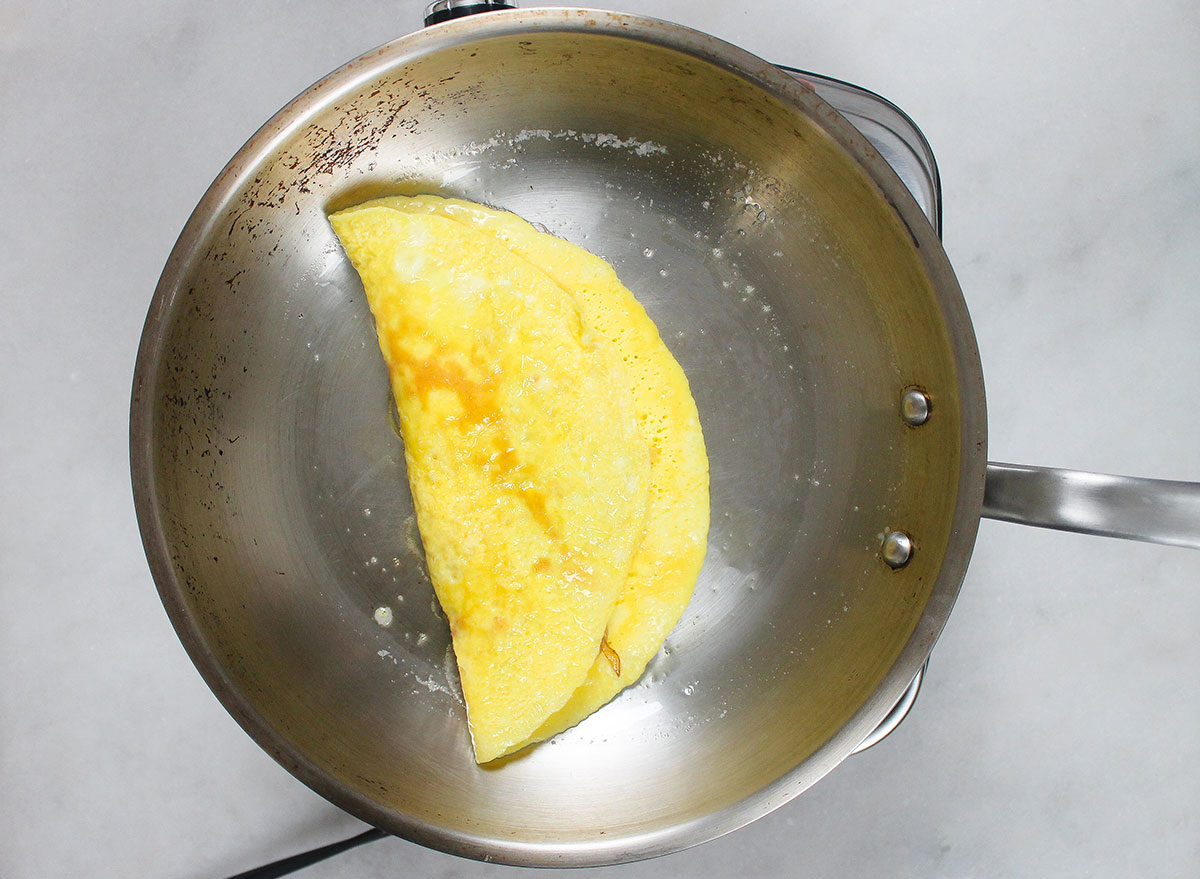
Flip the omelet
 Kiersten Hickman/Eat This, Not That!
Using a spatula, fold the eggs in half. If the egg mixture isn’t cooked all the way in the middle, this is okay! Vargas even recommends it, saying the omelet should be “nice and moist.” In total, the omelet should cook for 3 minutes.
Enjoy with salt, pepper, and chopped parsley
 Kiersten Hickman/Eat This, Not That!
Slide the omelet onto a plate, and serve immediately. For an extra touch of flavor, sprinkle on some fresh coarse salt and pepper. If you have it, chop up some parsley and sprinkle on top.
FULL OMELET RECIPE
- Whisk together the eggs and heavy cream in a small bowl.
- Heat a non-stick pan over medium heat. Melt the butter on the pan.
- Pour in the egg mixture and cook the eggs for 1 to 2 minutes—or until the eggs are halfway cooked.
- Place your desired fillings in the middle of the omelet.
- Using a spatula, fold the omelet in half. Cook for another 30 seconds, then slide the omelet to a plate. Serve immediately.
Homemade Donuts

No need to run out for donuts! If mom’s got a sweet tooth and wants a few delicious hot donuts with her morning coffee for Mother’s Day, treat her to some homemade donuts right at home! Serve with a vanilla glaze and her favorite toppings like sprinkles or chocolate chips!
MAKES 16 SERVINGS
INGREDIENTS
For the donuts
4 cups flour
1/2 tsp salt
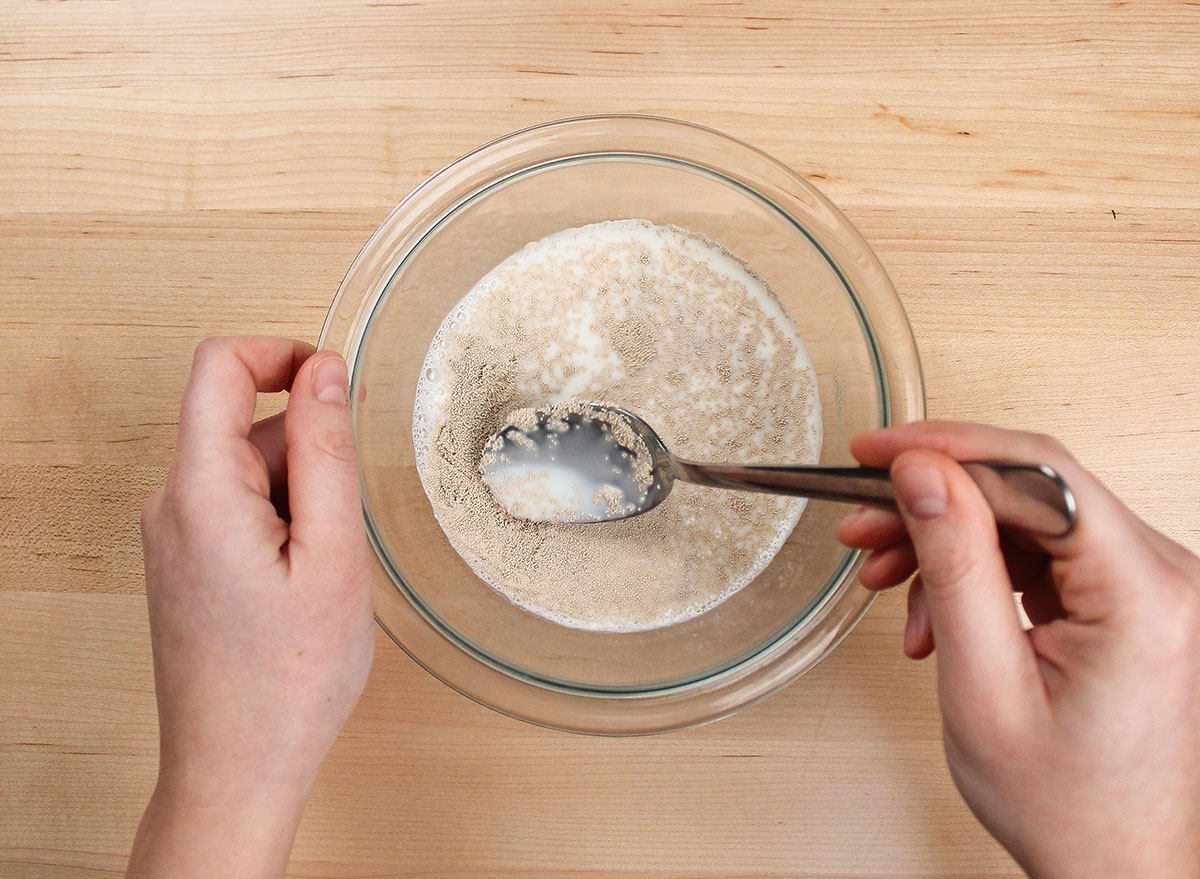
1 packet dry yeast (about 2 1/4 tsp)
2/3 cup milk
1/4 cup & 1 tsp sugar, separated
2 eggs
1 tsp vanilla extract
1 stick butter, melted
Canola oil
Cooking spray
For the glaze
1/2 cup milk
2 cups powdered sugar
HOW TO MAKE IT
Activate the yeast
 Kiersten Hickman/Eat This, Not That!
To activate the dry yeast, warm up the 2/3 cup of milk in the microwave for 45 seconds. Add in the 1 teaspoon of sugar and the packet of dry yeast. Stir and let it sit for at least 8 to 10 minutes until the yeast has bloomed (it will get bubbly on the top).
Hot tip: If the yeast does not bloom, your milk was probably too hot. Try again, but this time heat up the milk for a shorter period of time. It should be warm, but not steaming hot.
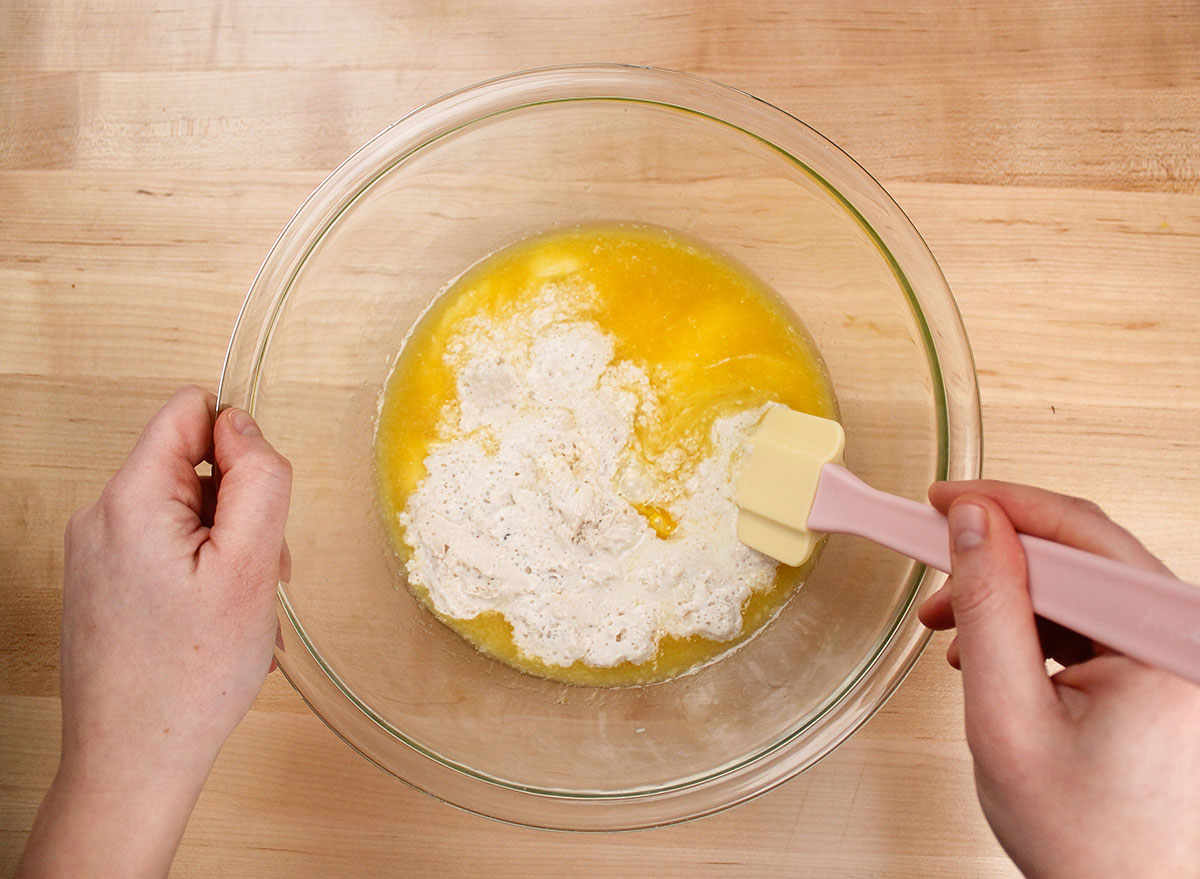
Mix the yeast with wet ingredients
 Kiersten Hickman/Eat This, Not That!
In a large bowl, whisk together the melted butter, eggs, vanilla extract, and 1/4 cup of sugar. Stir in the yeast mixture.
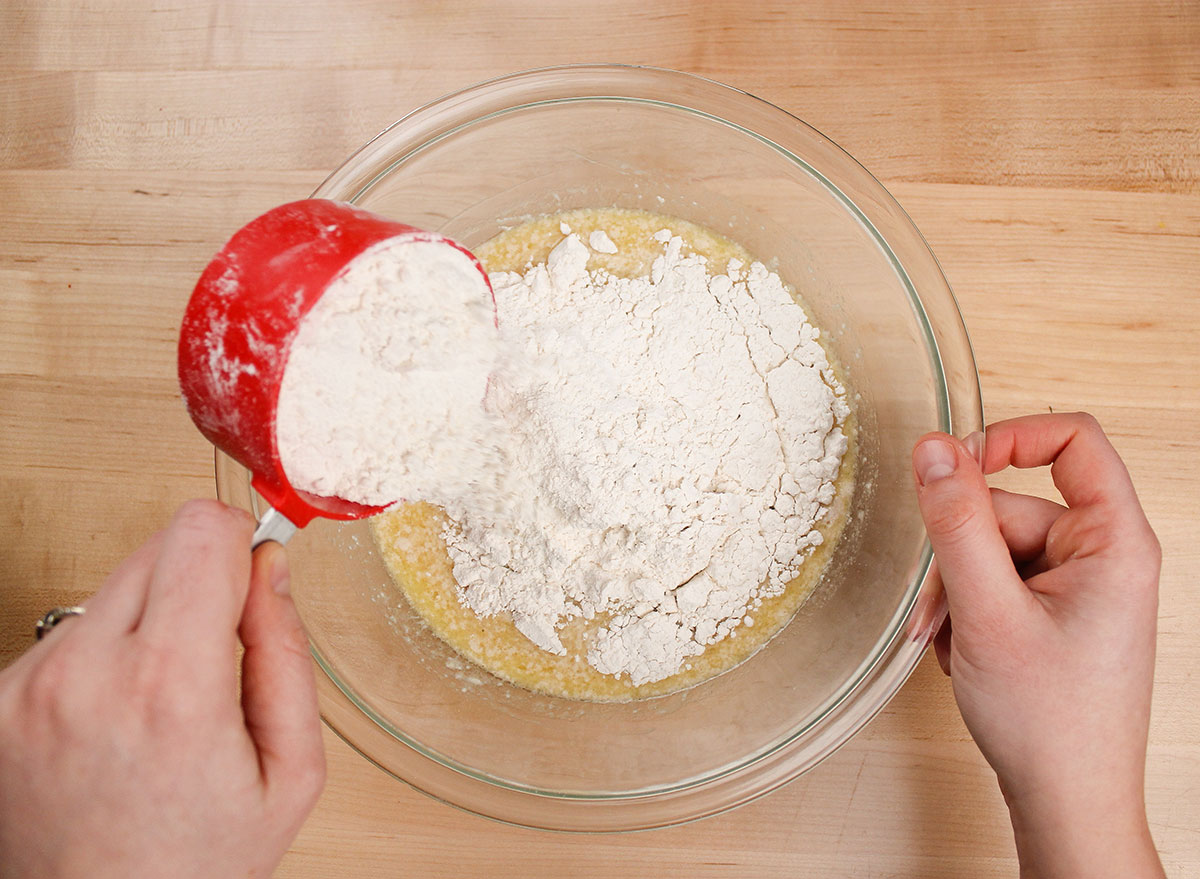
Add flour and salt
 Kiersten Hickman/Eat This, Not That!
Sprinkle in the flour and the salt. Mix with a spatula. When the dough starts to form, you will have to start to mix the dough with your hands.
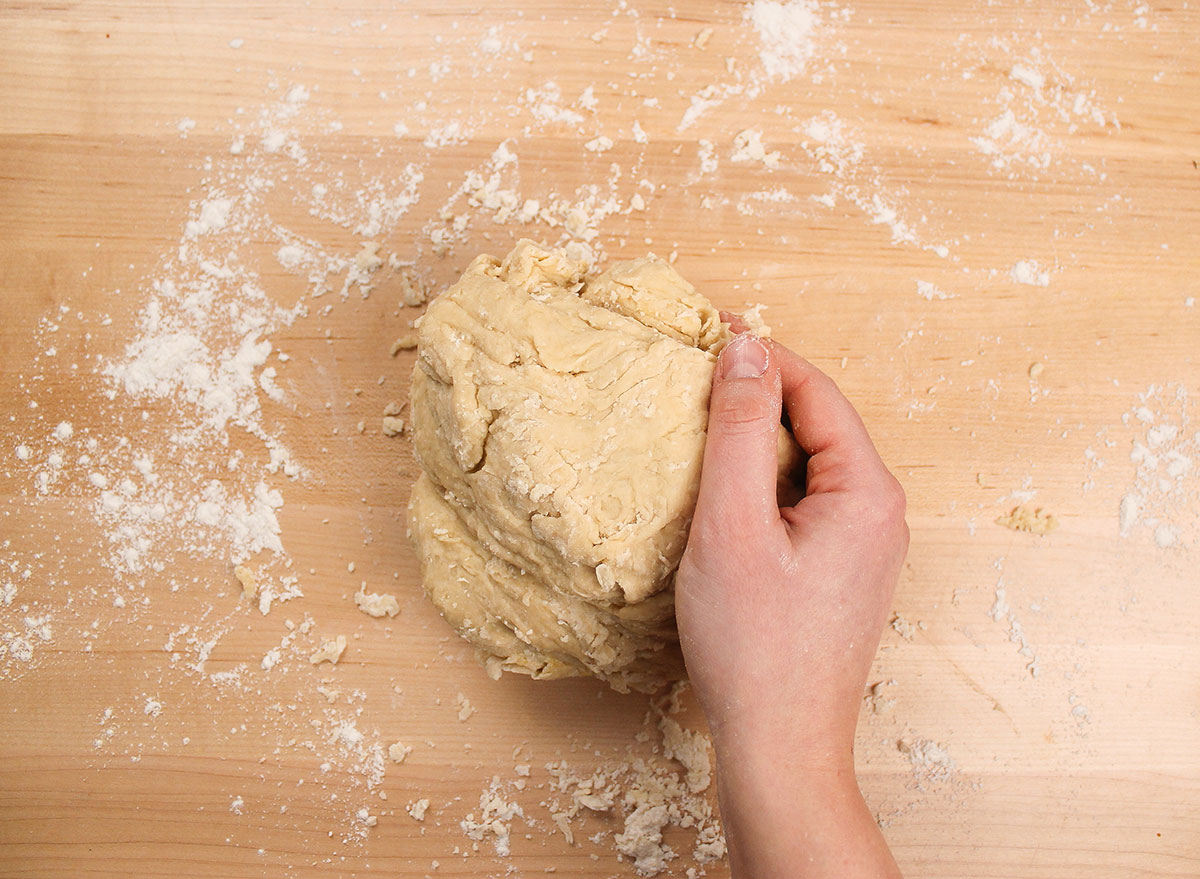
Knead the dough on a floured surface
 Kiersten Hickman/Eat This, Not That!
Sprinkle flour on a clean counter and move the dough to the floured surface. Knead the dough until it becomes elastic—this should only take a few minutes. If you would rather not knead with your hands, you could always mix and knead the dough using a dough hook with a stand mixer (like the one on this Kitchen Aid set).
Shape into a ball
 Kiersten Hickman/Eat This, Not That!
To shape the dough, pinch the bottom of the dough together in the center.
Place in a greased bowl and cover
 Kiersten Hickman/Eat This, Not That!
Spray a clean bowl with some cooking spray, then place the dough in the bowl. Cover it with a kitchen towel, then place it in a warm spot.
Let it rise for 1 1/2 hours
 Kiersten Hickman/Eat This, Not That!
Leave the dough to rise for at least an hour, but it will most likely need 1 1/2 hours to fully form.
Roll out the dough
Place the risen dough back on a floured surface and roll it out with a rolling pin. The dough should be about 1/2-inch thick.
Shape into donuts
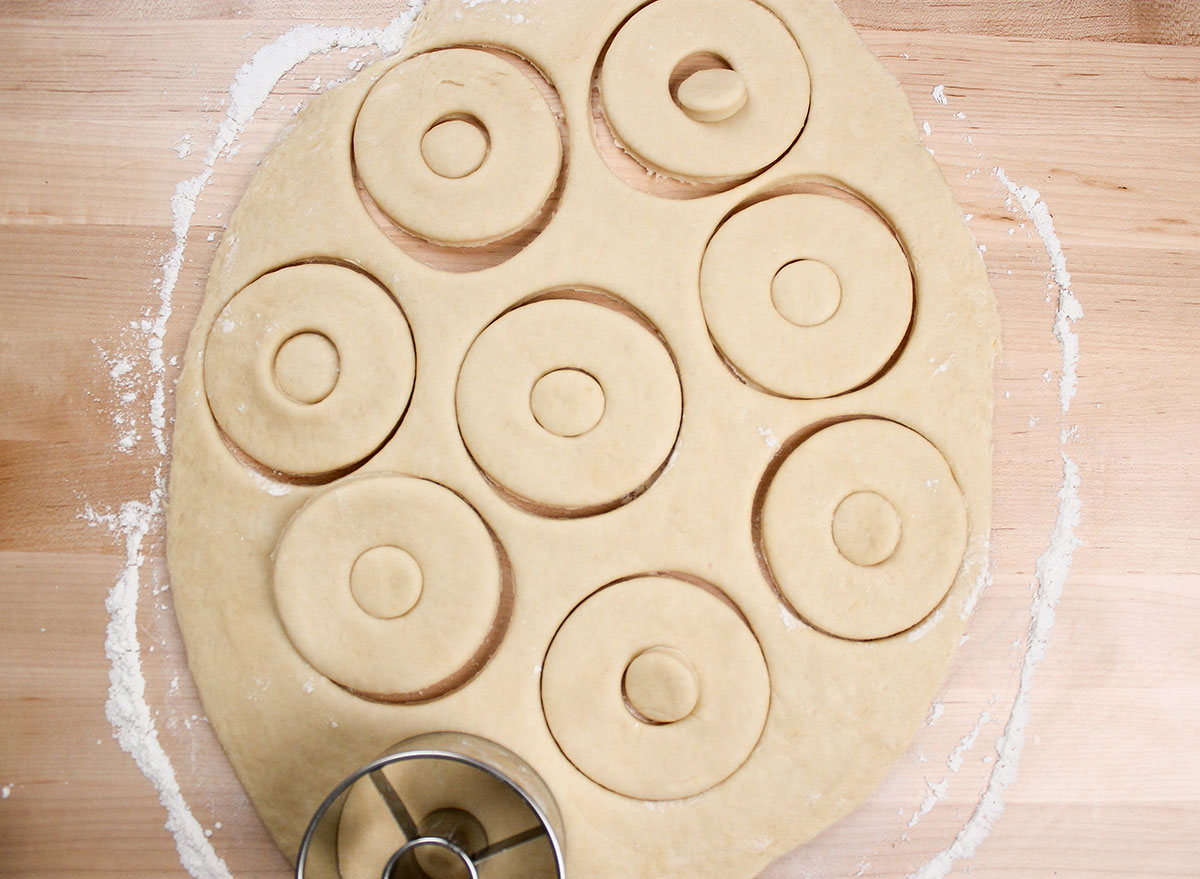 Kiersten Hickman/Eat This, Not That!
Using a donut cutter, cut donut shapes in the dough. Once you’ve cut enough, remove the donut shapes to a sheet pan, roll the dough, and continue the process until you don’t have enough dough left. You should have enough to shape 16 donuts.
Let the donut shapes rise for 30 minutes
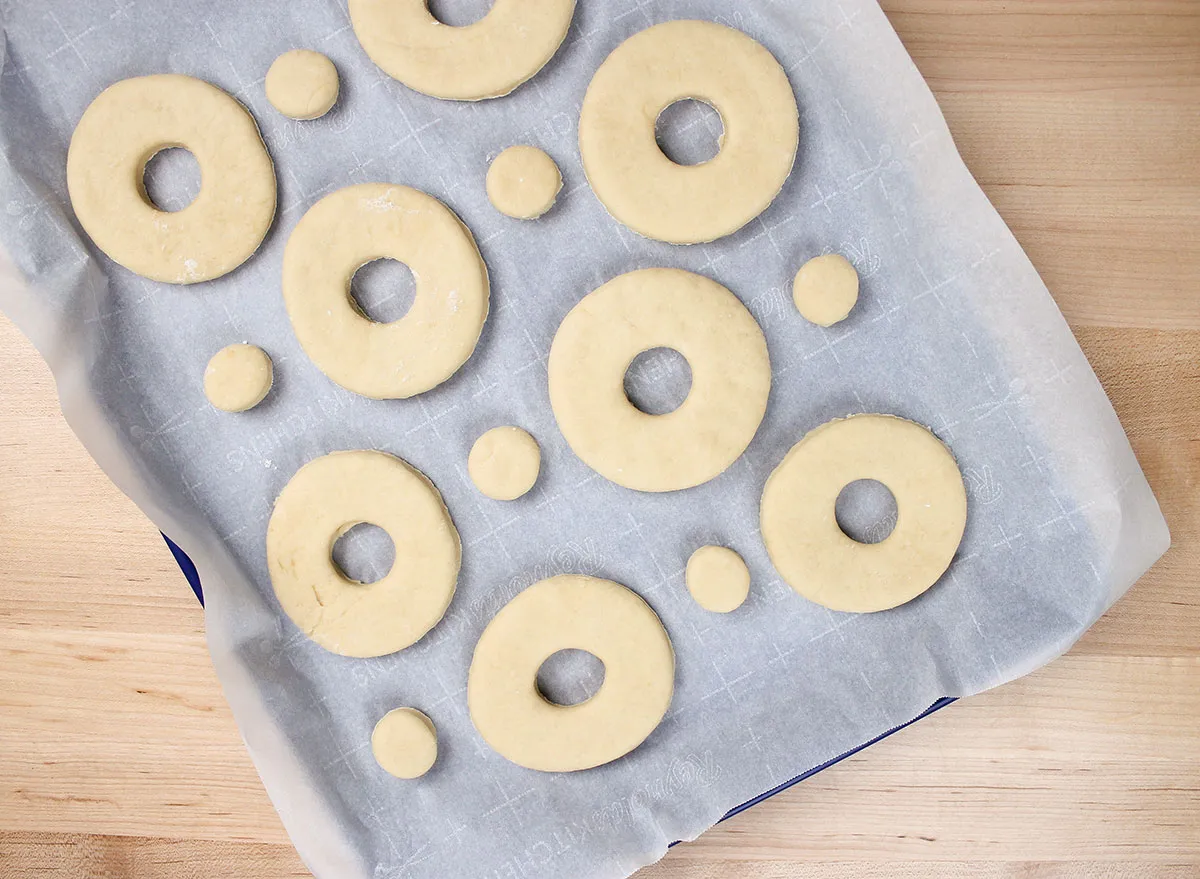 Kiersten Hickman/Eat This, Not That!
Place the donut shapes on a sheet pan with parchment paper, and cover with a towel for a second rise. This time you’ll only need 30 minutes.
Fry in heated oil
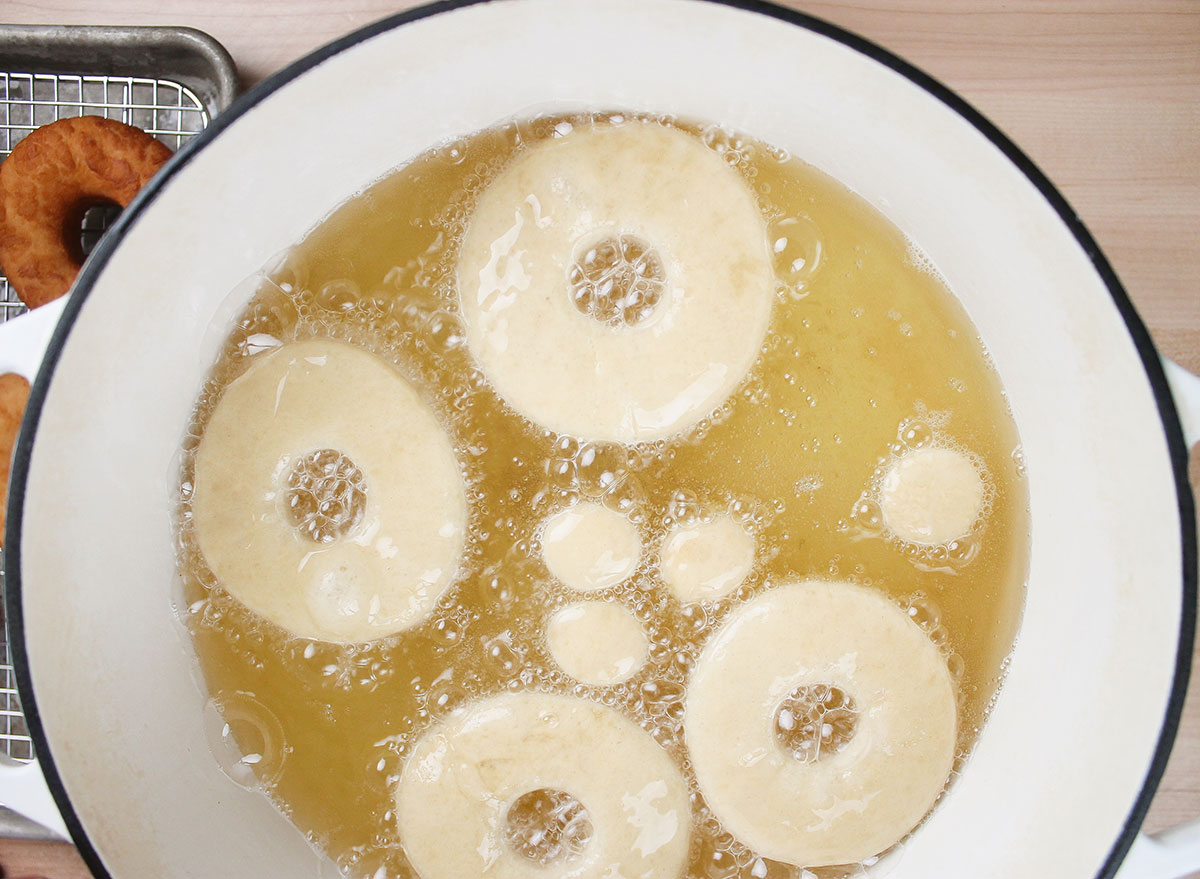 Kiersten Hickman/Eat This, Not That!
While the donuts are rising a second time, fill a pot (like this Dutch oven) with canola oil. It will take a while to heat, so this would be good to do during the rise. When the oil starts to visibly move, it is hot enough (typically around 350 to 375 degrees).
Flip the donuts after 1-2 minutes
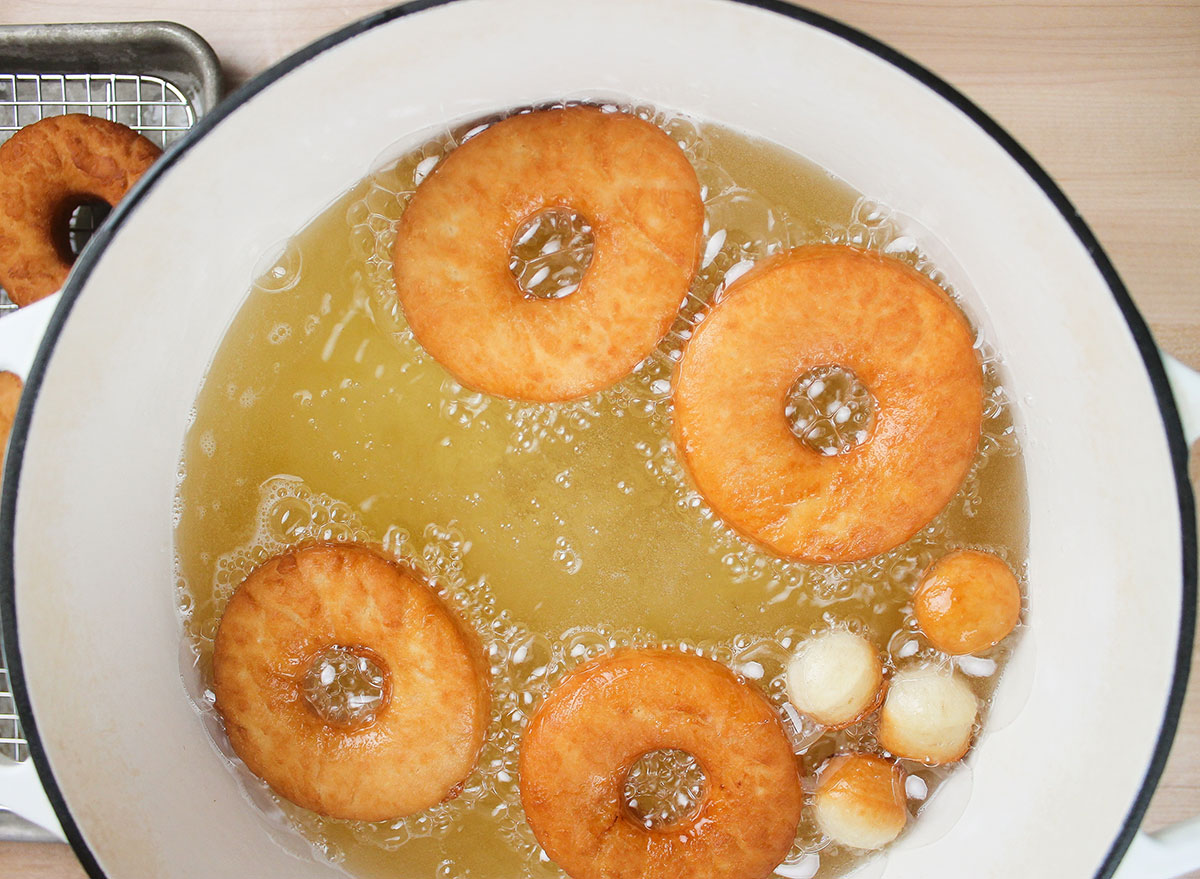 Kiersten Hickman/Eat This, Not That!
Slowly place the donuts (and donut holes) in the frying oil using a spider strainer. Let the donuts cook on each side for 1 to 2 minutes, or until golden brown. The donut holes will likely cook faster! Move the cooked donuts to a cooling rack.
Dip into a glaze
 Kiersten Hickman/Eat This, Not That!
In a small, whisk the milk and powdered sugar for the glaze. Dip the warm donuts into the glaze and place them on parchment paper.
Add toppings!
 Kiersten Hickman/Eat This, Not That!
Sprinkles, edible glitter, nuts, or even dried fruit! Add whatever toppings your donut-loving heart desires. You could even top it with our caramel sauce!
FULL DONUT RECIPE
- Heat the milk in the microwave for 45 seconds.
- Mix in 1 tsp sugar and the dry yeast packet. Let it stand for 8-10 minutes.
- In a separate bowl, mix eggs, melted butter, vanilla, and sugar. Pour in yeast mixture when it is ready and mix.
- Add in flour and salt. Mix together until a dough has formed.
- Flour a surface and knead the dough until it is elastic. This should only take a few minutes.
- Spray down a large bowl with cooking spray and place the shaped dough ball in it. Cover with a dish towel and let it rise in a warm place for 1 1/2 hours.
- Move dough to a floured surface and roll out with a rolling pin until 1/2-inch thick. Cut out donut shapes with a donut cutter.
- Move cut donuts (and donut holes!) to a baking sheet lined with parchment paper. Cover with a towel and let it rise for 30 minutes.
- While the dough is rising again, prep the oil. Pour canola oil into a large pot or Dutch oven and heat. Make sure it’s hot enough (around 350 to 375 degrees).
- Fry donuts and donut holes on each side for 1-2 minutes on each side. Remove to a cooling rack.
- Whisk the ingredients together for the glaze in a small bowl. Dip warm donuts in the glaze, then move to parchment paper.
- If desired, add sprinkles! Then devour.
Eggs and Bacon Breakfast Tacos

For all those moms that love tacos, breakfast tacos are probably one of the easiest Mother’s Day brunch recipes you can make. This classic recipe is made with eggs, bacon, and cheese, but you could honestly fill it with whatever toppings Mom wants with those scrambled eggs.
MAKES 2 SERVINGS
INGREDIENTS
4 eggs
4 slices of bacon, cooked
4 tortillas
taco cheese
salsa
butter (for cooking)
HOW TO MAKE IT
- Scramble up the eggs in a bowl.
- Heat up a skillet with a small sliver of butter. Once the butter is completely melted, pour the eggs onto the hot skillet.
- Scramble until the eggs are completely cooked through.
- Separate the eggs into four tortillas. Crumble the bacon and sprinkle on, along with the taco cheese and salsa.
- Serve immediately.
Spring Vegetable Frittata
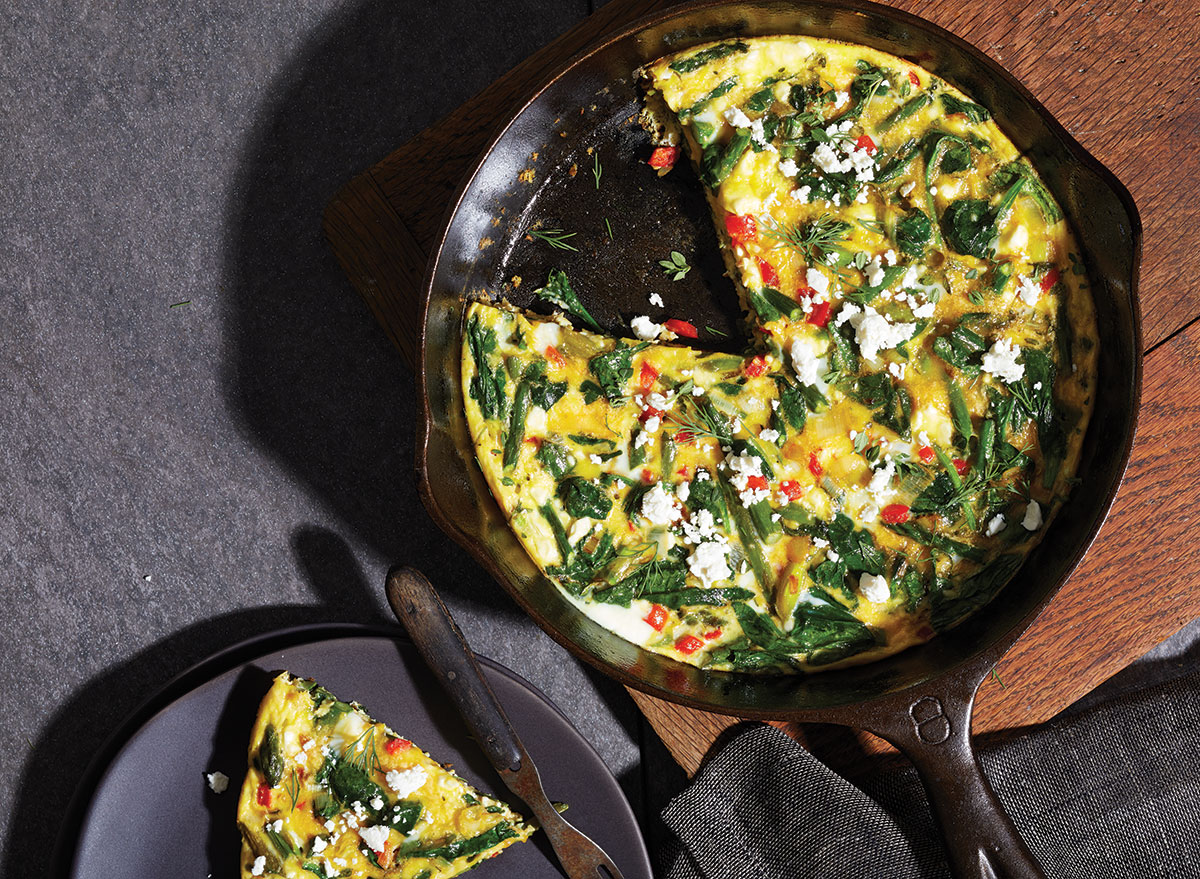
Frittata’s are pretty versatile, especially when it means using up any leftover vegetables you have in the fridge! Make a spring vegetable frittata for Mom this mother’s day to round out your brunch spread.
MAKES 4 SERVINGS
INGREDIENTS
8 eggs
1/2 cup crumbled feta cheese
1 tsp snipped fresh dillweed
1/2 tsp snipped fresh thyme
Nonstick cooking spray
2 cups fresh asparagus cut into 1-inch pieces
1/2 cup chopped leek
1/2 cup chopped red bell pepper
4 cups fresh spinach
1 Tbsp olive oil
Salt and black pepper to taste
HOW TO MAKE IT
- In a large bowl, beat eggs. Add 1/4 cup of the cheese, the dillweed, and thyme; whisk to combine. Set aside.
- Coat a large nonstick skillet with cooking spray and heat over medium heat. Add asparagus, leek, and pepper. Cook for 4 minutes, stirring occasionally. Add spinach and cook until spinach is wilted, tossing with tongs. Add oil to skillet; toss to coat. Spread vegetables evenly. Pour eggs over vegetables; do not stir. Cook over medium heat.
- As mixture sets, run a spatula around the edge of the skillet, lifting egg mixture so uncooked portion flows underneath. Continue cooking and lifting egg mixture for about 10 minutes, until it is nearly set. Sprinkle with remaining 1/4 cup cheese.
- Remove skillet from heat. Let stand, covered, for 3 to 4 minutes, or until top is set. Season with salt and pepper.
Build-Your-Own Yogurt Station with Cranberry-Orange Granola
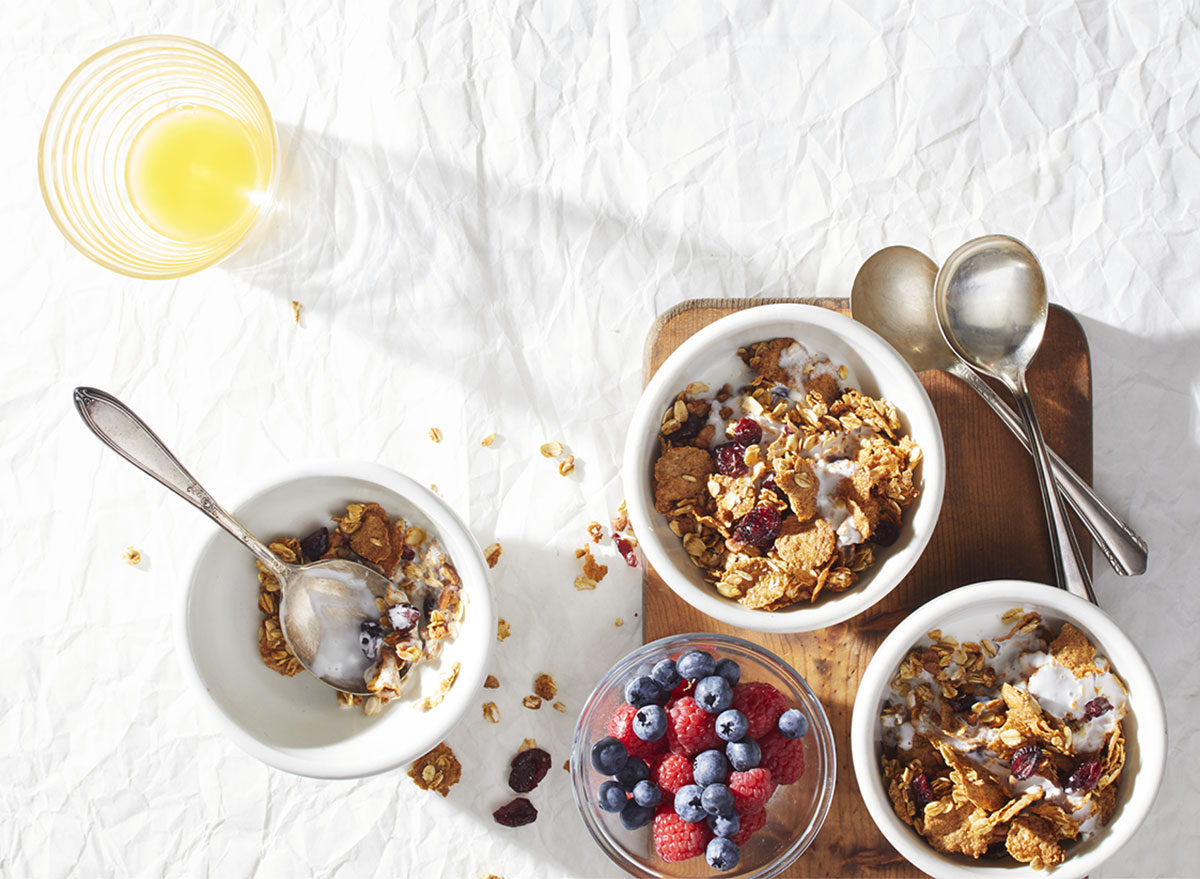
Let mom build her own yogurt bowl with a special yogurt station! Bake some of this delicious cranberry-orange granola instead of buying an expensive bag of sugary granola at the store.
MAKES 10 SERVINGS
INGREDIENTS
Nonstick cooking spray
2 1/2 cups regular rolled oats
1 cup wheat flakes
1/3 cup whole bran cereal such as Grape-Nuts
1/3 cup coarsely chopped pecans
1/2 cup orange juice
2 Tbsp pure maple syrup
2 tsp orange zest
1/2 tsp pumpkin pie spice
1/2 cup dried cranberries
Fat-free milk, nonfat yogurt, or fresh fruit (optional)
HOW TO MAKE IT
- Preheat oven to 325°F. Coat a 15 x 10 x 1-inch pan with nonstick cooking spray or line with parchment paper; set aside.
- In a large bowl, stir together oats, wheat flakes, bran cereal, and pecans. In a small saucepan, stir together orange juice, maple syrup, orange zest, and pumpkin pie spice. Cook and stir just until boiling. Remove from heat. Pour over oat mixture; toss just until coated.
- Spread oat mixture evenly in prepared pan. Bake for 30 to 35 minutes, or until oats are lightly browned, stirring twice. Remove from oven and stir in dried cranberries.
- Immediately turn out onto a large piece of foil; cool completely. Serve with milk or use to make a breakfast parfait with nonfat yogurt and fresh fruit.
- Store in an airtight container in the refrigerator for up to 2 weeks or in the freezer for up to 3 months.
Italian Hash With Eggs
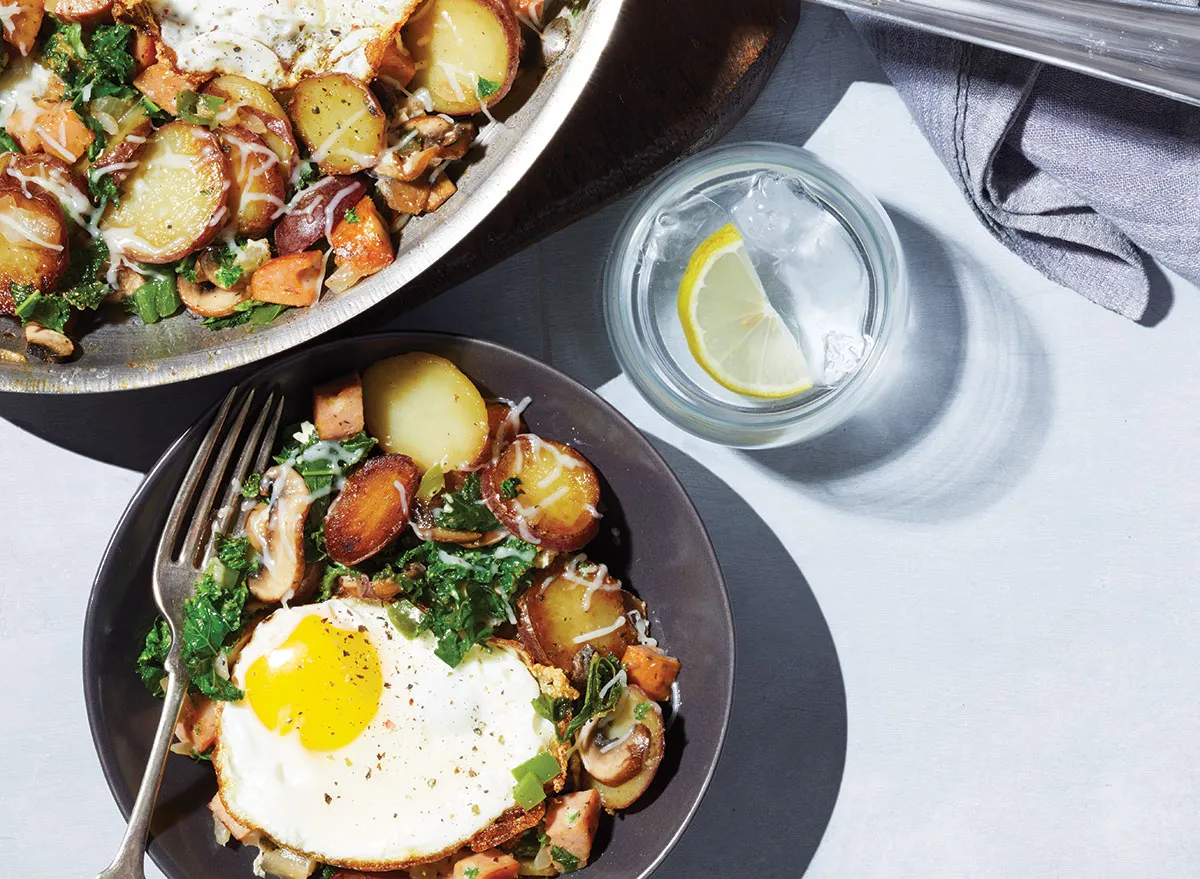
You really can’t go wrong with a hearty egg and potato dish for your Mother’s Day brunch. This recipe includes chicken sausage and sliced kale for a truly filling brunch.
MAKES 4 SERVINGS
INGREDIENTS
2 Tbsp olive oil
1 lb small red potatoes, cut into thin slices
1 1/2 cups sliced cremini mushrooms
1/2 cup chopped fresh banana peppers
1/2 cup chopped onions
1 tsp Italian seasoning
8 oz precooked Italian-style chicken sausage, quartered lengthwise and cut into 1/4-inch slices
2 cups thinly sliced kale
1/4 cup grated Asiago cheese
Nonstick cooking spray
4 eggs
Salt and black pepper to taste
HOW TO MAKE IT
- In a large skillet, heat oil over medium heat. Add potatoes; cover and cook for 10 minutes, stirring once, until potatoes are nearly tender.
- Add mushrooms, banana peppers, onion, and Italian seasoning; cook 3 minutes. Add sausage and kale; cook for 3 to 5 minutes, or until kale has wilted and all vegetables are tender. Sprinkle with cheese.
- Meanwhile, spray a nonstick skillet with cooking spray. Heat over medium heat. Break eggs into skillet. Reduce heat to low; cook eggs for 3 to 4 minutes, or until whites are completely set and yolks start to thicken.
- Serve fried eggs over hash. Season with salt and pepper.
Acai Bowls
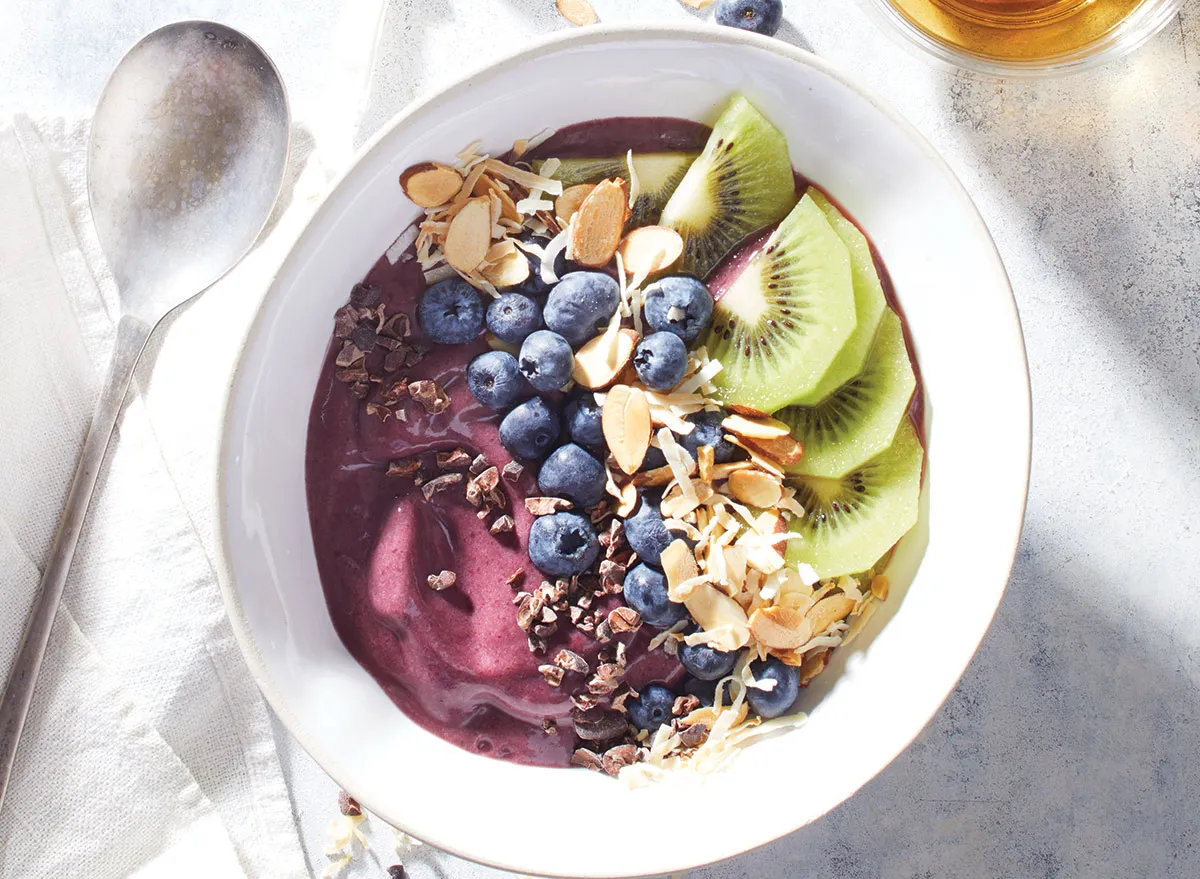
If mom is a huge fan of smoothies and smoothie bowls, give her what she loves by making her own smoothie bowl at home. This acai bowl is perfect for Mother’s Day, packed with blueberries, bananas, kiwi, coconut, and almonds. Or let her choose her own toppings! It is her day after all.
MAKES 2 SERVINGS
INGREDIENTS
3.5-oz package frozen acai pulp
2 ripe bananas, cut into 1-inch chunks and frozen for at least 2 hours
1 Tbsp honey
4-5 Tbsp water
1 cup fresh or frozen blueberries
1 kiwi, peeled and sliced
2 Tbsp sliced almonds, toasted
2 Tbsp unsweetened coconut, toasted
2 Tbsp cocoa nibs
HOW TO MAKE IT
- In a food processor or high-powered blender, place frozen acai pulp, frozen banana chunks, and honey. Process until smooth, scraping down sides as needed and adding enough water to make it soft and spoonable.
- Portion into two bowls. Top with remaining ingredients, or use your favorite toppings!
Sunny-Side Up Egg Pizza
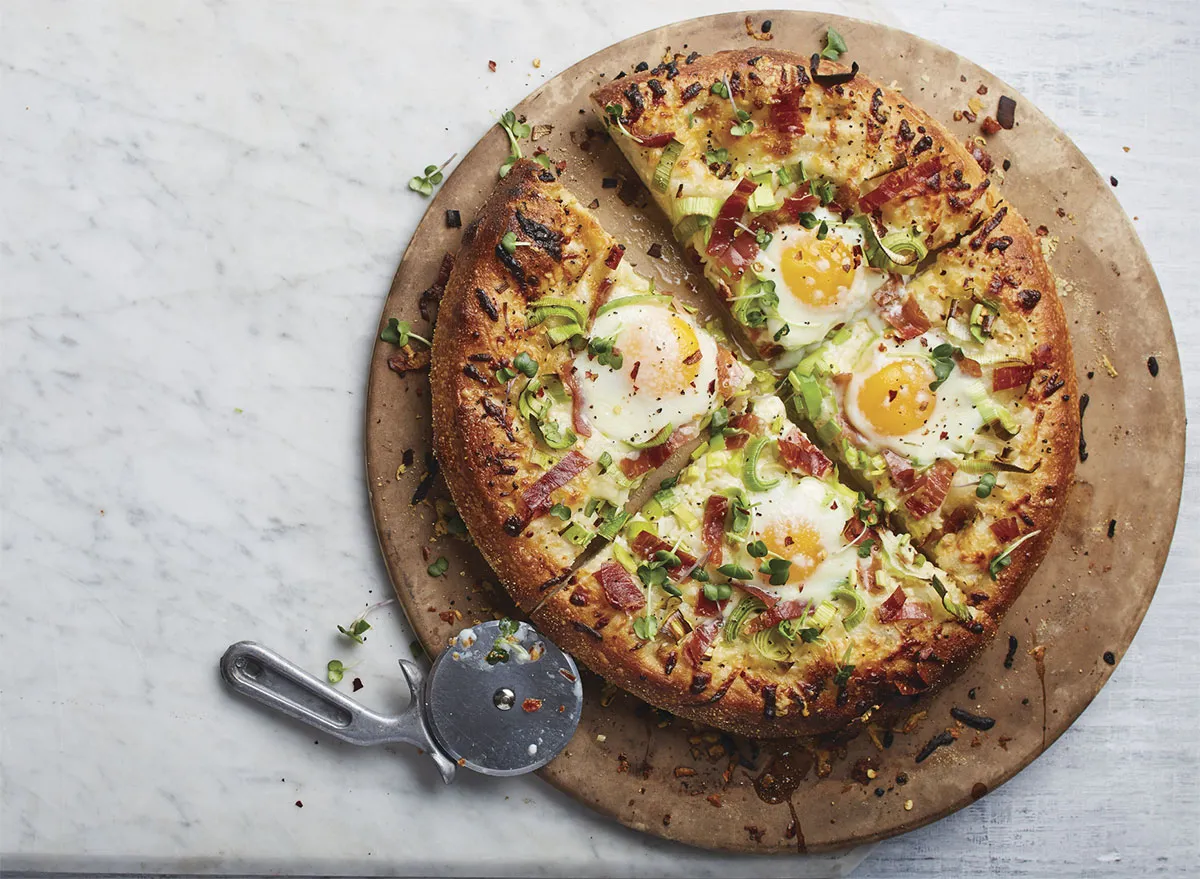
Pizza for brunch? Absolutely! Throw an egg on any dish that Mom loves—like pizza—and you basically have brunch. This recipe is made with sunny-side up eggs, leeks, garlic, prosciutto, and both Parmesan and mozzarella cheese.
MAKES 6 SERVINGS
INGREDIENTS
2 Tbsp extra-virgin olive oil, plus more for greasing pan
1 Tbsp cornmeal
1 clove garlic, minced
Flour
1-lb package refrigerated pizza dough
1/4 cup shredded Parmesan cheese
1 cup shredded mozzarella cheese
1 small leek, halved lengthwise and thinly sliced, white and light green parts only (The layers of leeks can contain grit and sand. To clean, hold the halves under cool running water and fan the layers. Shake off excess water, and pat dry with paper towels before slicing.)
2 slices prosciutto, coarsely chopped
4 large eggs
1/2 tsp kosher salt
1/2 tsp cracked black pepper
HOW TO MAKE IT
- Preheat oven to 500°F. Lightly grease a baking sheet or 12-inch round pizza pan. Sprinkle with cornmeal.
- Combine the 2 tablespoons olive oil and minced garlic in a small bowl. On a lightly floured surface, roll and press dough into a 12-inch circle, building up a rim around the edges. Carefully transfer to prepared pan. Brush dough with garlic-olive oil mixture.
- Top with the Parmesan and mozzarella cheeses, leeks, and prosciutto.
- Crack one egg into a small dish. Gently transfer to one-quarter of the pizza. Repeat with additional eggs. Sprinkle eggs with salt. Sprinkle entire pizza with cracked pepper.
- Bake, rotating pizza halfway through baking time, until bottom of crust is crisp and top is blistered and egg whites are set (yolks should still be runny), 8 minutes.
- Cut into quarters and serve immediately.
Open-Face Hot Ham and Cheese with Chipotle Mayo
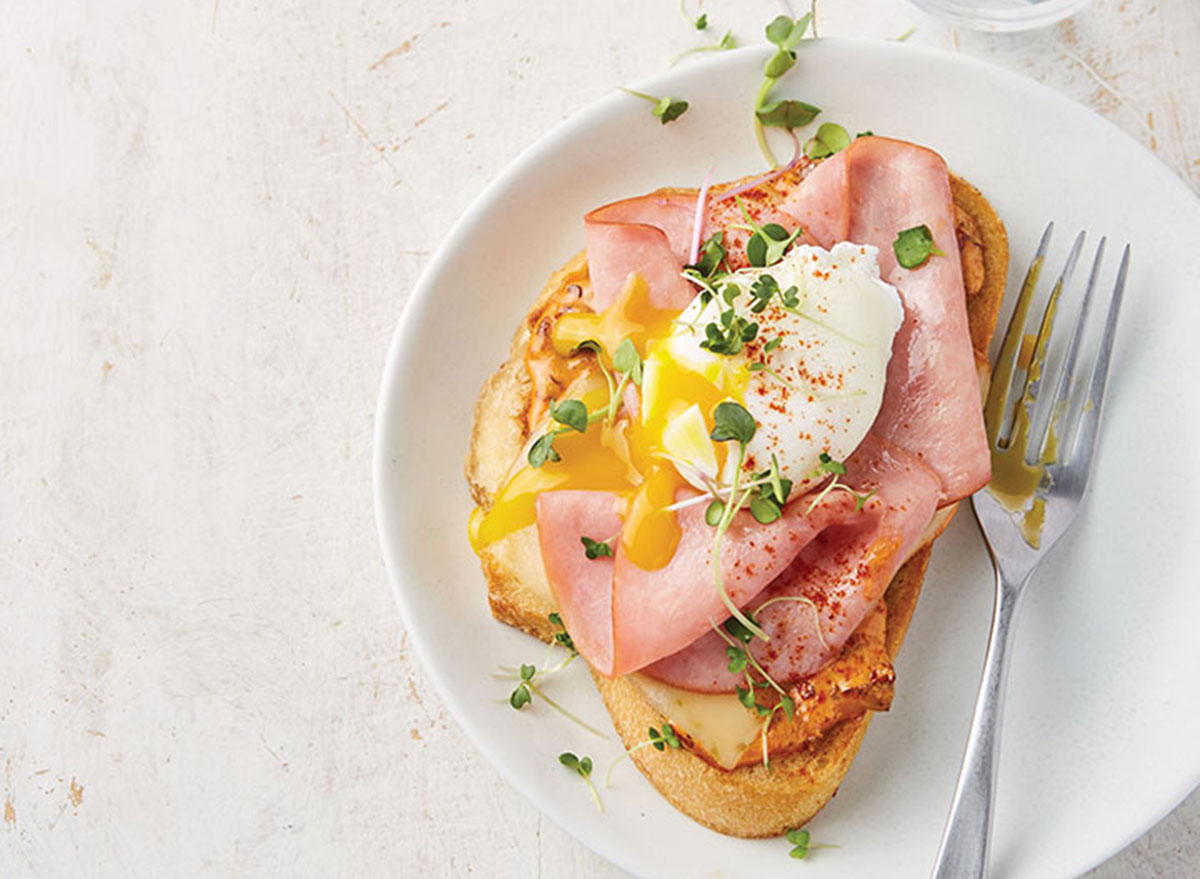
Make mom something a little fancier this Mother’s Day with this open-face hot ham and cheese sandwich! By simply taking off the top piece of bread, you can make a sandwich look especially fancy with all kinds of toppings. Just make sure to serve them with knives and forks—they are much easier to eat when you cut them up!
MAKES 4 SERVINGS
INGREDIENTS
For the mayo:
1/2 cup light mayonnaise
2 chipotle chiles in adobo sauce
1 Tbsp adobo sauce from chipotle peppers
For the sandwiches:
4 3/4-inch-thick slices sourdough bread
1 Tbsp butter, softened
8 oz thinly sliced low-sodium deli ham
4 ultra-thin slices pepper jack cheese
Vegetable oil
1 tsp vinegar
4 large cold eggs
Kosher salt
Ground chipotle powder
Microgreens or chopped fresh chives
HOW TO MAKE IT
- Preheat oven to 350°F. For the mayo, combine mayonnaise, chipotle chiles, and adobo sauce in a blender or food processor and blend until smooth.
- For sandwiches, lightly butter both sides of the bread with softened butter. Toast one side of bread in an extra-large oven-proof skillet over medium heat until golden brown. Flip bread slices. While second side is toasting, spread top slice of bread with 1 tablespoon of the mayonnaise. Top with ham and cheese. Transfer pan to oven.
- While sandwiches are heating, lightly oil the sides of a medium skillet or large saucepan. Fill pan half full with water. Add vinegar to water and bring to a boil.
- Break 1 egg into a small dish. Carefully slide the egg into the simmering water, holding the lip of the dish as close to the water as possible. Repeat with three remaining eggs, adding them one at a time and spacing them so each egg has an equal amount of space surrounding it. Simmer for 3 to 5 minutes, or until whites are completely set and yolks begin to thicken but are not hard.
- Remove sandwiches from oven. Use a slotted spoon to remove eggs from water. Top each sandwich with an egg. Season lightly with salt and chipotle powder. Sprinkle with micro-greens and serve immediately.
Note: Refrigerate leftover mayo and use on sandwiches or add it as a topping for steamed or roasted vegetables.
Strawberry Shortcake Drop Cookies

Who says you can’t have cookies with your Mother’s Day brunch? Not only are these Strawberry Shortcake Drop cookies delicious, but they’re also healthier than your average cookie option, swapping regular sugar for Purecane zero-calorie Baking Sweetener. Plus, they’re packed with an entire cup of fresh strawberries and fresh lemon juice, which really takes the flavor of these cookies to the next level.
YOU’LL NEED
For the Cookies:
1 egg
2 Tbsp lemon juice
1/2 cup melted butter (can sub vegan butter)
1/2 tsp vanilla extract
1/4 cup almond milk
1/4 cup Purecane zero-calorie Baking Sweetener
1 1/2 cups flour
1/2 Tbsp baking powder
1/4 tsp salt
1 cup fresh strawberries, chopped
For the Icing Drizzle:
1/4 cup Purecane Confectioners Sweetener
1-2 tsp almond milk
HOW TO MAKE IT
- Preheat the oven to 350 degrees Fahrenheit. Line the bottom of a baking pan with parchment paper or a silicone baking mat.
- In a large mixing bowl, combine the wet ingredients: egg, lemon juice, melted butter, vanilla, and almond milk. Whisk until well combined.
- Once combined, add in Purecane zero-calorie Baking Sweetener, flour, baking powder, and salt and mix with a rubber spatula until a soft dough starts to form. Fold in the chopped strawberries and mix until well incorporated.
- Using a cookie scoop or spoon, scoop two spoonfuls and place them directly on the baking sheet.
- Bake for 22 minutes. While the cookies bake, make your icing. Combine the almond milk and Purecane Confectioners Sweetener until you’ve reached the desired consistency (the more almond milk you add, the more liquidy the icing). Drizzle on top of cookies and enjoy!
The post 18 Best Mother’s Day Recipes to Make Mom Feel Special appeared first on Eat This Not That.
]]>The post 7 Quick Meals That Burn Fat Without Starving You appeared first on Eat This Not That.
]]>As a certified nutritionist and fitness coach who lost over 80 lbs during perimenopause, I’ve seen firsthand how many people, specifically women over 40, fall into the trap of eliminating entire food groups, overusing intermittent fasting, and not eating enough protein. Instead, we need to fuel our bodies to thrive, not restrict ourselves into exhaustion.
“Quick meals” are often associated with processed, carb-heavy, low-protein options that spike blood sugar and lead to energy crashes. But when structured right: with protein, fiber, and healthy fats, they can keep you full, balance your blood sugar, and reduce cravings.
Below, you’ll find simple, delicious, and balanced meals that are easy to prepare, support hormone health, and help you lose fat while feeling energized. These meals are designed for real-life routines: no fancy prep, no starving, and no “diet food” taste.
Easy Yogurt Parfait (Breakfast)
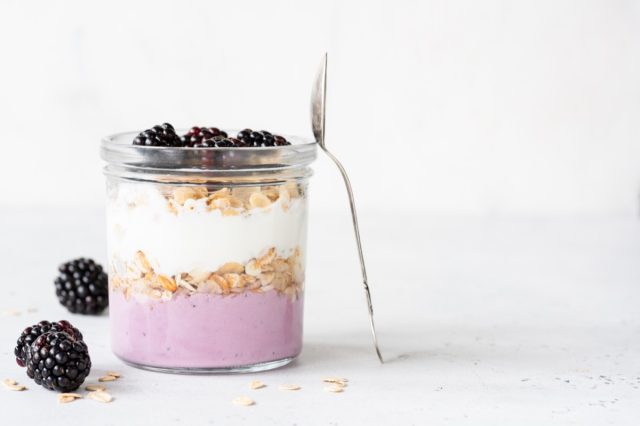
With balanced macros (protein, carbs, and healthy fats), gut-friendly probiotics, and fiber-rich berries, this recipe supports digestion and helps reduce cravings later in the day by starting you off with solid morning protein.
Ingredients:
140 grams of 0% Greek yogurt
10 grams of protein powder
10 grams of PB2 powder
75 grams of berries (blueberries, strawberries, raspberries, blackberries)
10 grams of pecans or other fat source (can sub. nut butter, walnuts, etc.)
10 grams of granola
Directions:
Using a food scale, measure out each ingredient in a large bowl, mix in the protein powder and add the berries and granola. If you want it to be a bit sweeter, you can add zero sugar Walden’s Syrup.
This easy breakfast provides a balanced macronutrient count with a good amount of protein, carbs and fat to keep your blood sugar balanced, keep you satisfied, and also taste delicious! You can also substitute dairy free yogurt and vegan powder to meet your dietary preferences.
Tip: This is an easy meal to put together in advance with minimal prep time. You can use Mason jars and store them in the fridge so they are ready to go.
Omelette with Avocado Toast (Pre-Workout or Breakfast)
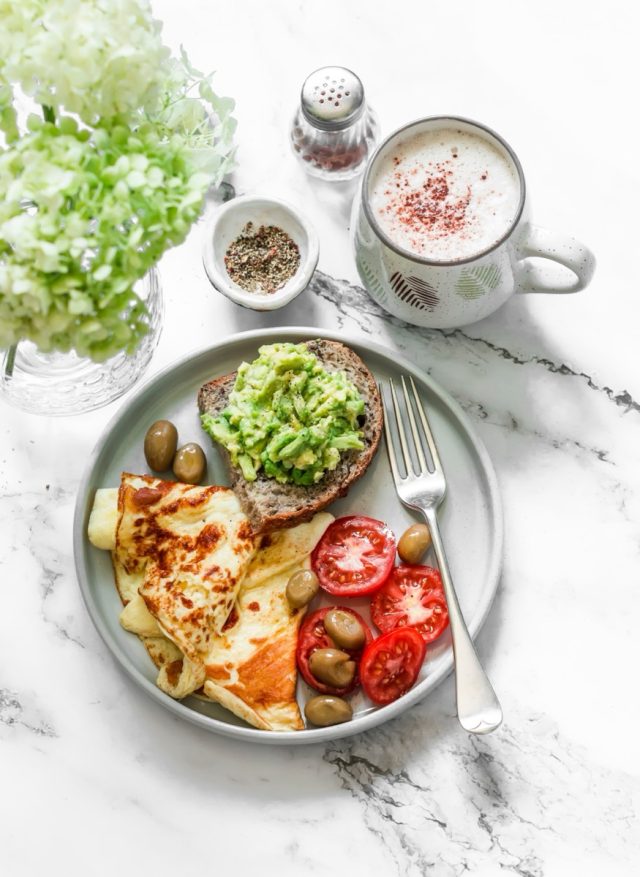
Studies show both protein and complex carbs are the ideal fuel before resistance or cardio training. Use the recipe below for sustained energy, and it has the added benefit of healthy fats to slow digestion and promote satiety.
Ingredients:
180 grams of egg whites
1 egg yolk
1 piece of toast or half an english muffin
75 grams of spinach
75 grams of mushrooms
35 grams of avocado
10 grams of scallions
Everything but the Bagel seasoning
Directions:
Coat your pan with 2 sprays of olive oil spray, place your pan on your food scale, measure out each ingredient for your omelette (everything except your toast, avocado and scallions) and place on the stove-top while toasting your bread or English Muffin.
Once your omelette and toast are ready, spread the avocado onto your toast, plate it next to your omelette and sprinkle with scallions and your seasoning.
This easy pre-workout meal provides the perfect balance of protein, starch for pre-workout energy, carbs, and fat.
Chipotle-Style Rice & Ground Beef Bowl w/ Chimichurri Sauce (Post-Workout, Dinner, or Lunch)

This recipe combines fast-digesting carbs and lean protein to help muscle recovery. Post-workout meals like this, that have carbs and protein, are proven to improve glycogen replenishment and muscle repair.
Ingredients:
50 grams of spring salad mix
60 grams of white rice
100 grams of 96% fat free ground beef
50 grams of zucchini
60 grams of broccoli
40 grams of cooked julienned carrots
40 grams of green peas
10 grams of chimichurri sauce (store-bought or home made)
Directions:
Cook your ground beef, zucchini, broccoli, carrots, and green peas in advance in a large skillet while you cook your rice. You can season this with salt, pepper, taco seasoning, or whatever style of seasoning you prefer. Once your beef, vegetables, and rice are ready, you can assemble the meal by placing your salad mix in a large bowl along with all the ingredients.
This is a great meal to have on the go and provides a good balance of protein, starch, carbs and fat. Since all of the ingredients can be prepared in advance and stored in a large glass tupperware container, it lends itself to an easy meal on the go or at home. If you want to replace the ground beef with a vegan option, you can use firm tofu in place of animal protein.
Berry Bliss Chia Pots (Snack)
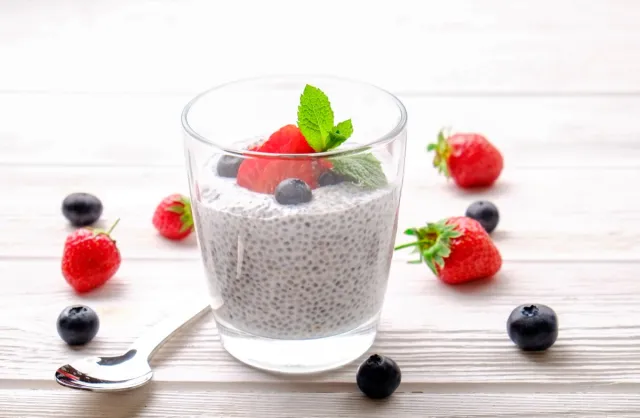
Fuel your day with these high-protein, fiber-rich pots, all under 250 calories. Perfect for breakfast, a post-workout snack or a healthy dessert, this recipe combines the creaminess of Greek yogurt with the sweetness of berries and the satisfying crunch of chia seeds. Chia seeds are high in soluble fiber and omega-3s, and increased fiber intake is linked with reduced belly fat and improved insulin sensitivity, with the added bonus that the protein keeps you satisfied.
Ingredients:
100 grams of 0% Fat Free Greek Yogurt
75ml of almond milk
45 grams of frozen berries
20 grams of chia seeds
1 medjool date
Blend the frozen berries, medjool date, and milk together in a blender until smooth. Pour the berry mixture into a bowl and stir in the chia seeds until well combined. Let the mixture sit for 20–30 minutes, stirring occasionally to prevent clumping, until it thickens into a pudding-like consistency.
Place the Greek yogurt into your container, smoothing it out as the base layer. Spoon the berry chia pudding over the yogurt layer evenly. Store the container in the fridge for 3-4 days.
Raspberry Chia Oat Bars (Snack)
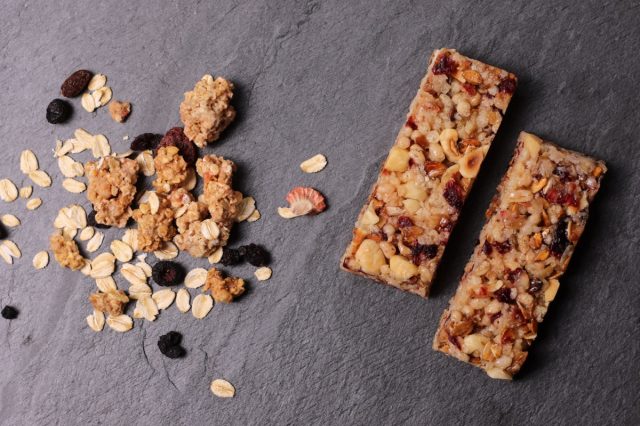
Packed with fiber and natural sweetness, these Raspberry Chia Oat Bars are the perfect balance of chewy, fruity, and nutty flavors and each serving (1 bar) is under 200 calories. With the added benefit of homemade chia jam, they’re a wholesome snack option that keeps you fueled throughout the day. Plus, rolled oats support digestive health and are a great source of resistant starch and fiber, which improve satiety. These bars are nutrient-dense, portable, and easy to make!
Ingredients:
200 grams of rolled oats
1 large banana
1 tsp of vanilla extract
2 tbsp sweetener of your choice
40 grams of peanut butter
A dash of milk
Pinch of salt
300 grams of frozen raspberries
20 grams of chia seeds
Directions:
Add the frozen raspberries to a saucepan and simmer over medium heat until they defrost and release their juices. Stir in the chia seeds and vanilla extract, mixing well. If desired, add honey or sugar to taste (Note: this will add more carbs to each bar).
Allow the jam to cool and thicken as the chia seeds absorb the liquid. Set aside. In a large mixing bowl, mash the ripe banana until smooth.
Mix in the vanilla extract, peanut butter, sweetener, baking powder, salt, and milk. Gradually fold in the rolled oats to form a sticky batter. Preheat the oven to 170°C/330°F (fan) or air fryer to 160°C/320°F. Line a baking tin with parchment paper or use a non-stick baking dish (a 7.5″ skillet works well).
Press just over half of the oat mixture into the base of the dish, ensuring it’s evenly spread. Spoon the raspberry chia jam over the base layer, spreading it evenly. Crumble the remaining oat mixture over the jam layer, pressing gently to form clusters.
Place the assembled bars in the oven and bake for 20 minutes or air fry at 160°C/320°F for the same duration. Bake until the top is golden.
Allow the bars to cool completely in the tin. This ensures they firm up for slicing. Once cooled, cut into 6 bars. Serve with an optional dollop of 0% greek yogurt.
Baked Sriracha Salmon with Skinny Pasta and Peas (Lunch or Dinner)
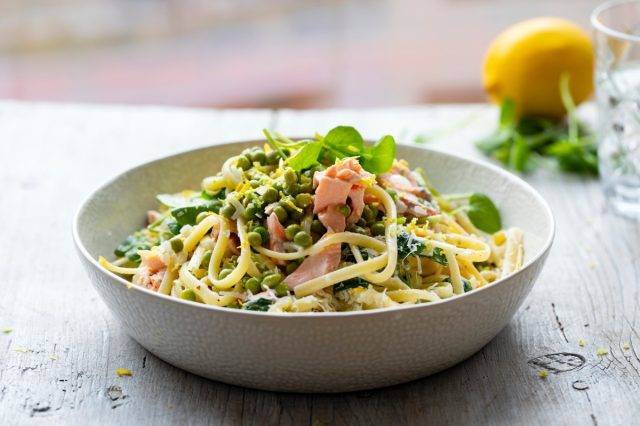
This meal combines Konjac noodles with a bit of regular spaghetti to achieve the “pasta” taste without the heavy carb calories, and it tastes delicious. Salmon is high in omega-3 fatty acids, which support heart and hormonal health, and the blend of high-fiber konjac pasta and traditional noodles offers volume and satisfaction.
Ingredients:
100 grams of baked salmon
1 package of Skinny Pasta noodles
50 grams of spaghetti noodles
100 grams of green peas
10 grams of Sriracha Mayo
Directions:
Lightly spray a baking sheet with avocado oil spray and place your salmon in the oven at 350F for 20-25 minutes. While it is cooking, drain your Skinny Pasta noodles and place them in a pan and add the green peas.
At the same time, cook your regular spaghetti pasta in a medium pot. Once everything is ready, plate by placing the Skinny Pasta, regular spaghetti, and your peas on a plate and top with your salmon. Drizzle the store-bought Sriracha sauce on top and enjoy.
Mediterranean Power Salad (Lunch or Dinner)
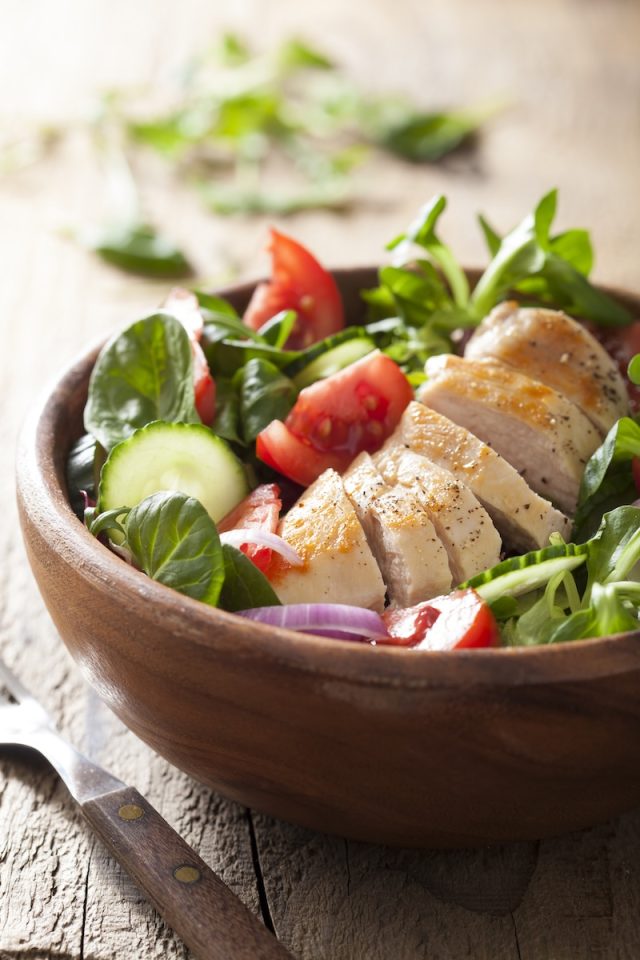
This meal combines lean protein (38g), plant-based fiber, and anti-inflammatory fats. Studies show the Mediterranean-style diet supports weight loss, heart health, and improved insulin sensitivity, especially in midlife women, and all under 350 calories. It will become a favorite go-to meal for busy days as you can easily put this together in advance and there is minimal cooking time. Plus, the quinoa is easy to prepare in advance and it lasts for a few days in the fridge. All you need to do is assemble the meal and you are ready to go!
Ingredients:
100 grams of chicken breast
100 grams of baby spinach
50 grams of pomegranate seeds
90 grams Quinoa
50 grams of dates
10 grams of walnuts
20 grams of mint
15 grams of balsamic vinegar
10 grams of olive oil
½ lemon, juiced
10 grams of Dijon mustard
Directions:
Rinse quinoa under cold water and cook according to package instructions (simmer in water/stock for about 12-15 minutes). Fluff with a fork and allow to cool. If using pre-cooked chicken, shred it into bite-sized pieces. If cooking fresh, air-fry, grill, or poach and shred with two forks.
Whisk together olive oil, balsamic vinegar, lemon juice, Dijon mustard, salt & pepper until emulsified. In a large bowl, combine baby spinach, quinoa, shredded chicken, pomegranate seeds, walnuts, mint, and chopped dates. Pour the lemony balsamic dressing over the salad and toss gently to combine. Serve immediately or store in an airtight container for up to 3 days.
Sustainable fat loss comes from eating enough nutrients in a small caloric deficit (roughly 10% below your maintenance calories), not starvation. Think high-volume, low-calorie-dense foods packed with fiber, protein, and healthy fats.
Combine this with resistance training, and you’ll build muscle, increase metabolism, and create the lean, toned look many women desire. You don’t need to starve or do hours of cardio — just be consistent, eat smart, and prioritize recovery.
Want More Support? I’m a certified nutritionist and fitness coach who helps women over 40 lose weight without guesswork. I’ve personally lost over 80 lbs during perimenopause, and now I help others do the same inside The House of Rose (THOR). If you want meal ideas, coaching support, or just have a question, email me at terry@thehouseofrose.com or check out my coaching programs here. Let’s help you thrive!
The post 7 Quick Meals That Burn Fat Without Starving You appeared first on Eat This Not That.
]]>